Before and After: How Organizing My Friend’s Kitchen Changed Her Life and Marriage
Say Hello To Tina and Ricky
My friend Tina never really had the opportunity to learn how to organize or manage a kitchen. With few opportunities to learn cooking skills, she relied on eating out and purchasing processed foods. Her husband, Ricky, however had grown up with a more organized disposition. Consequently with most married couples I consult with, the more disorganized habits usually win out.
A couple of months ago, I started sharing weekly dinners with Tina and Ricky. Tina expressed a desire to learn how to cook meals at home so she could provide healthier nutrition to her family. I was happy to help and I provided weekly cooking guidance.
We are blind to our own mess
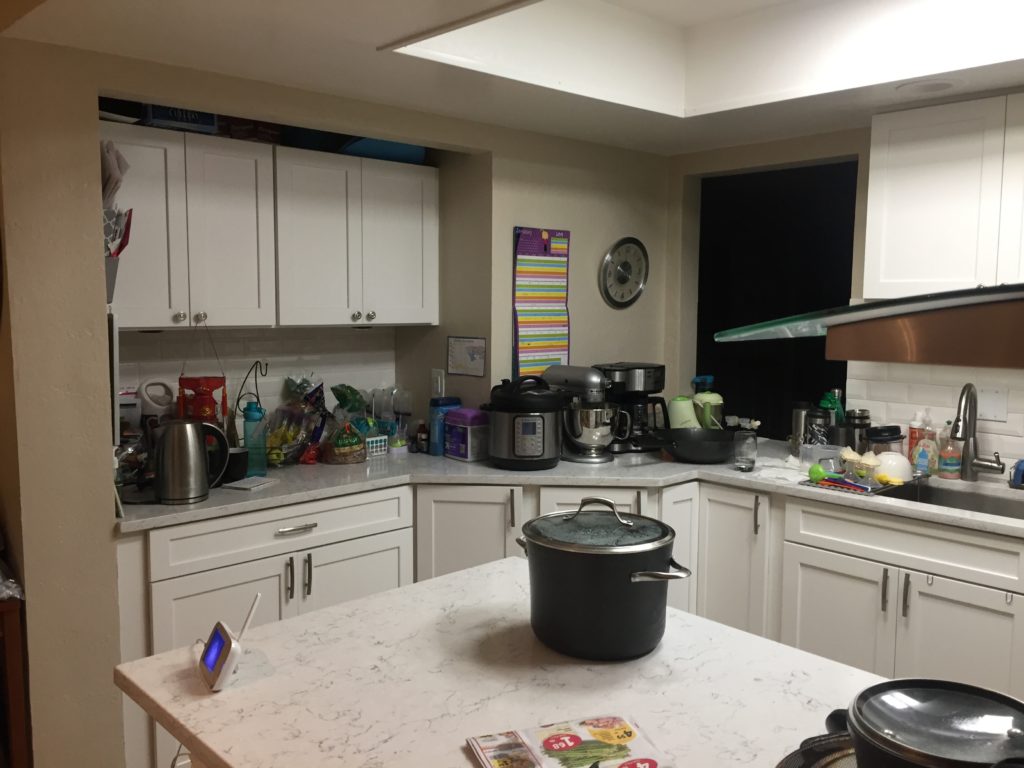
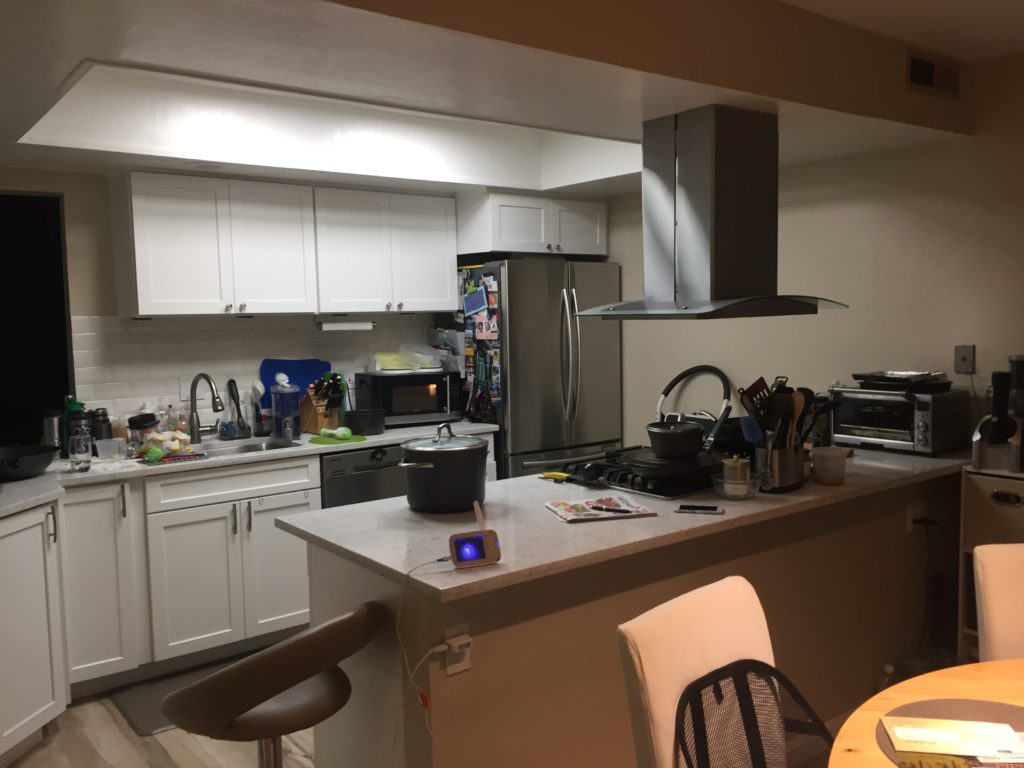
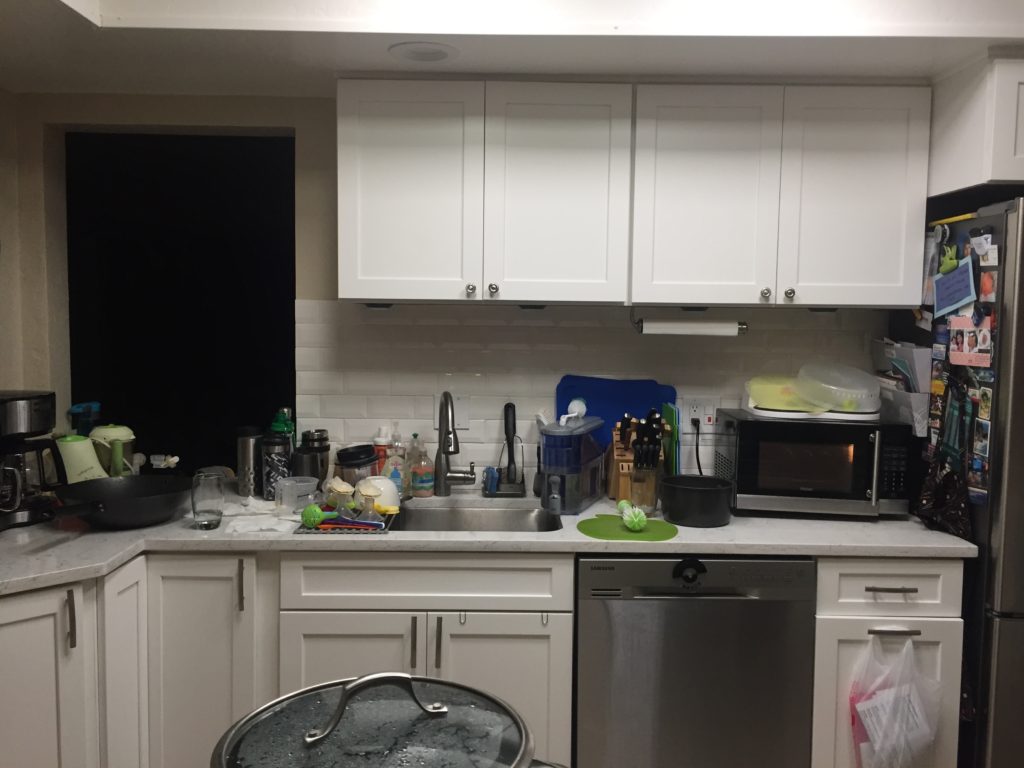
Quite frankly, cooking in their kitchen was stressful. Placement of certain items did not feel intuitive and there was barely any counter space to prep food. Every surface housed endless single use appliances like the crock pot, instant pot, a baby food maker, water boiler, coffee maker, rice maker, food processor, juicer and many more. I counted over 25 water bottles/thermoses all over the kitchen, at least 13 cutting boards (made mostly of plastic) and an enormous amount of food packaging. Pots and pans often sat on the stove unwashed because the sink held the previous days dirty dishes. Even after washing them, they didn’t have enough room to store all of them.
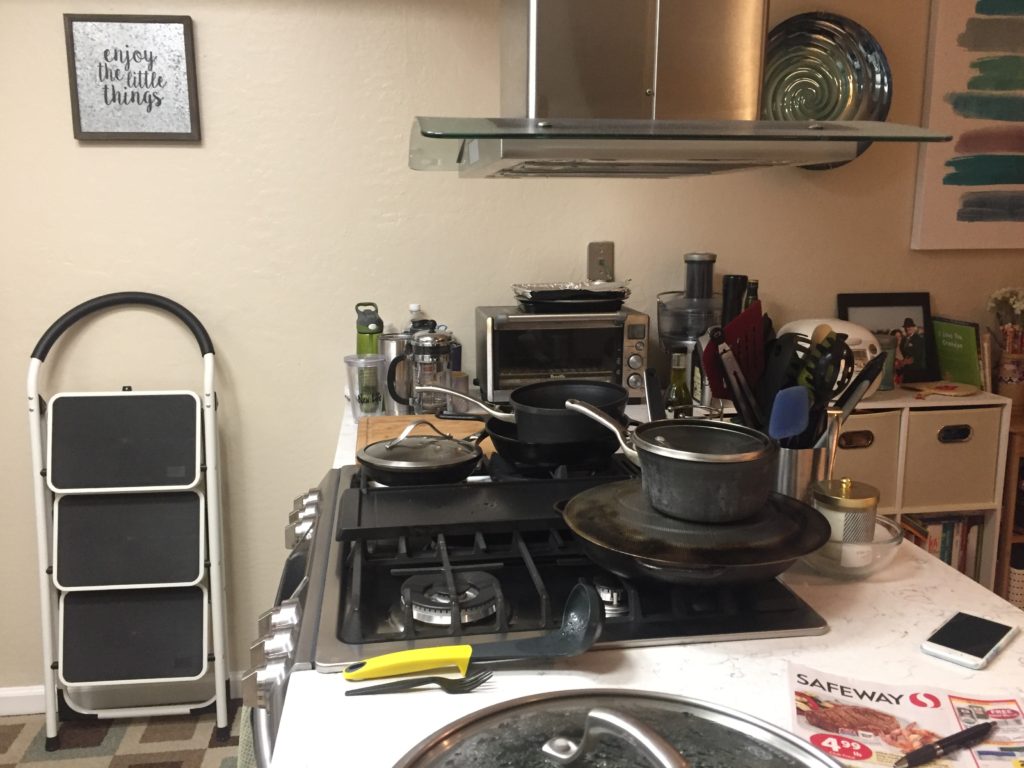
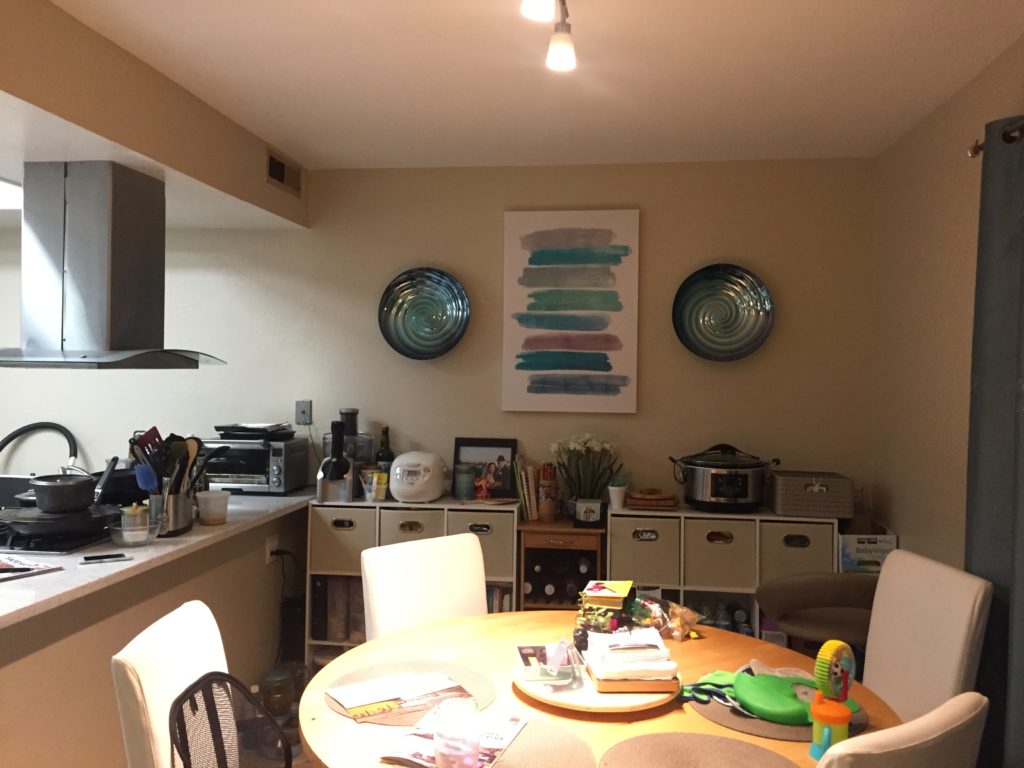
However, Tina had gotten so used to living in the clutter she didn’t even realize how bad it had become. She developed a habit of shifting objects from one surface to another when she wanted to cook. While the chaos didn’t necessarily impede her ability to make a meal, it was quietly taking a toll on her mental health and her marriage.
To make it clear how truly chaotic her kitchen was, I took photos on my phone to show her through a different “lens”. She audibly gasped upon seeing the photos on my phone and exclaimed, “oh my gosh, that looks terrible!” Tina had become so used to the mess that she became proverbially blind to it. Only after seeing it through the eyes of my camera did it become apparent.
The first step is admitting you have a problem
One night I sat down to talk to Tina about how things were going; she opened up to me about how she felt like she wasn’t thriving. It felt like she had no time to do anything particularly well. No time to clean her house, no energy to be the best mom or wife she could be especially since she was working full time and exhausted when she got home. She said the mess and disorganization was a major source of conflict in her marriage. During our conversation, she asked me how I found the time to keep my home in order.
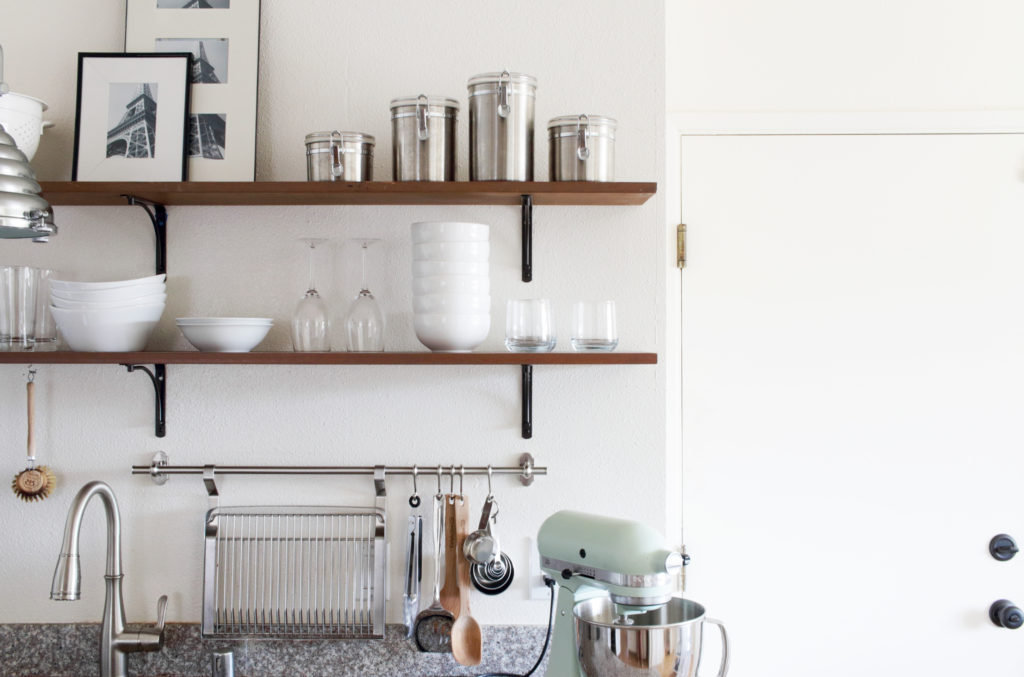
To her surprise, I told her that I spent very little time cleaning everyday even though my house stays organized year round. My secret to staying on top of things had nothing to do with having a ton of extra time on my hands. I had developed a system in my home where everything I owned had its place. I never had to wonder where something belonged because I established that early on. Organizing never really became a chore because it became ingrained in my daily habits.
My Guide for Kitchen Organization
I generated an organization plan for her that included the following guidelines:
- Counter space is prime real estate. Rethink the concept of “every space must be filled.” Clutter builds up when you believe there is space for it. Keep things on the counter that you use every day and try to set a goal of 20 items max on the countertops at any given time (unless the kitchen is in use). This includes semi permanent appliances like toasters and microwaves or daily use items like knives and drying racks. Carefully select which items belong on the counter and that you actually want to see everyday. Once you start considering what actually looks good on display and what is useful, you will quickly realize that certain things just don’t deserve a permanent address on your counters.
- Store single use appliances. Any appliances you are not using everyday should be stored in a closet or cabinet. Things like juicers, crock pots, food processors should be stored until they are needed.
- Reduce your plastic use. Plastic bins, plastic dishes, plastic cups, plastic cutting boards, plastic colanders, plastic Tupperware etc. These things not only negatively affect your health in the long term, they also are visually unattractive. Colorful plastic items always look good brand new in the store, but they do not age gracefully. Plastic items break down continuously little by little. They inevitably deteriorate and end up looking worn out after a year of use. Things like wood, glass, ceramic and metals age much more beautifully.
- Reduce redundancies like excessive water bottles, Tupperware and cutting boards.
- Be picky about what you buy in the store. Ask yourself if you have room for it, if it’s beautiful and if it is something you will actually use on a regular basis.
The Heart of a Hoarder
Accumulators (AKA pack rats) rarely do so because they love mess. Usually there is a strong emotional component that triggers a need to hold onto material objects regardless of their intrinsic value. For Tina, sentimental attachment prevented her from discarding items that long outlived their usefulness. Whether it was a quirky gift from a relative or the fact that she owned something for a very long time, letting go did not come easily to her.
This part of the battle I could not fight for her. I could only gently steer her in the right direction. Taking a page out of Marie Kondo’s book, Tina learned to say goodbye and thank the objects she had a difficult time parting with. Tina found this exercise in gratitude immensely helpful and it made letting go of stuff a lot easier.
Get ‘er Done
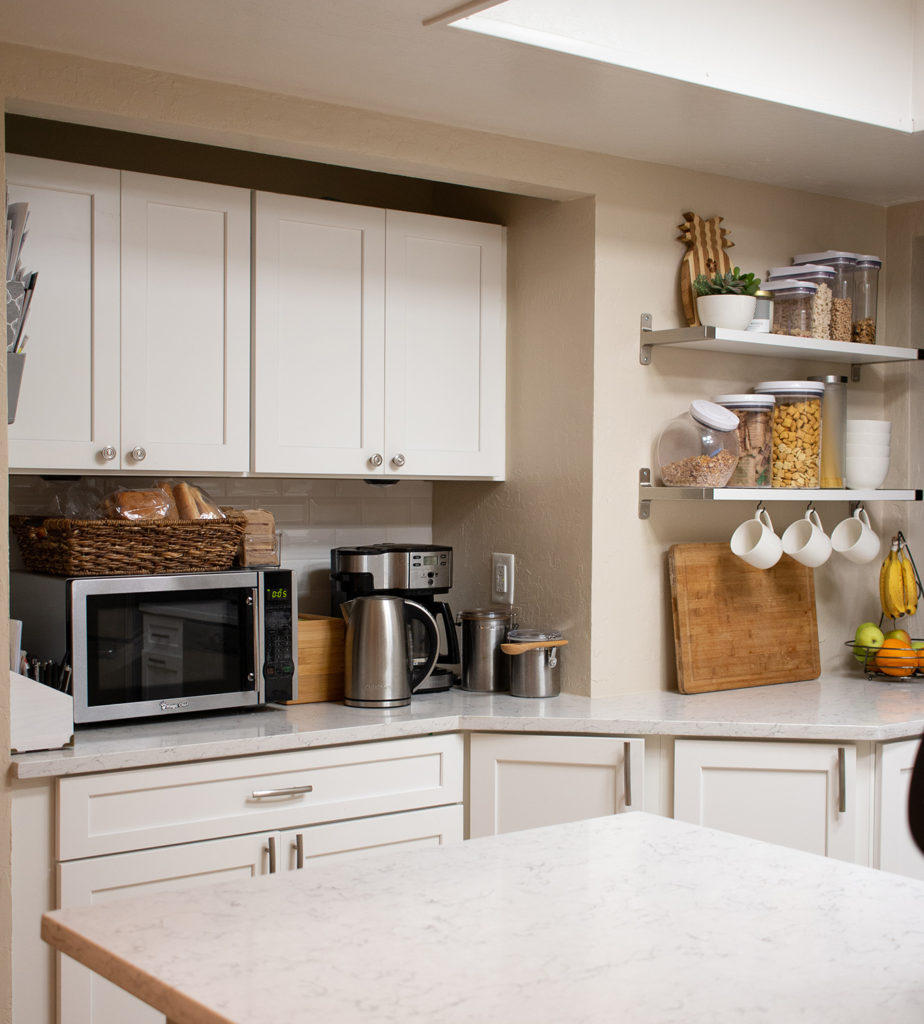
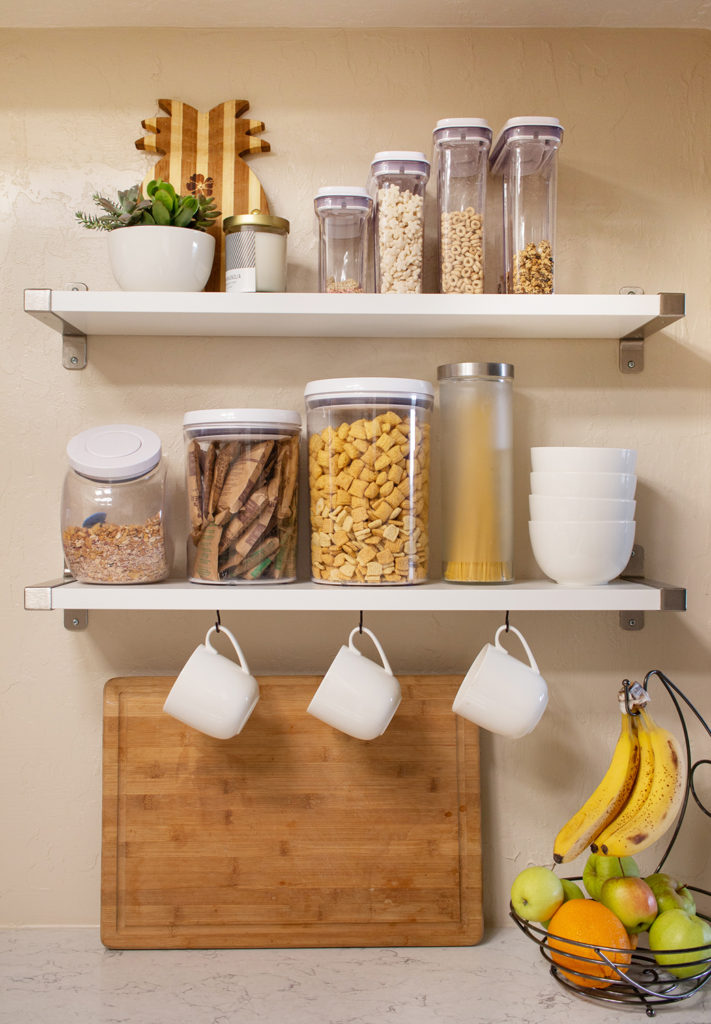
We started going through all her packaged foods and figuring out what she needed to throw out, what could go into canisters and what she could keep in long term storage. To my surprise, Tina had purchased a bunch of clear Oxo containers a long time ago that she never used. While I always prefer glass or ceramic, Tina was concerned about the heaviness and potential for breakage. We prioritized her daily use foods like cereals, oatmeal, and granola to put into the canisters that way she could keep a visual inventory of how much food she had.
We also pulled items off the counter by installing wall shelves from IKEA. Adding vertical storage helps immensely in freeing up horizontal work surfaces.
Moving the appliances proved very useful in freeing up key spaces on the countertops. We moved the microwave away from the sink and placed it by the breakfast bar.

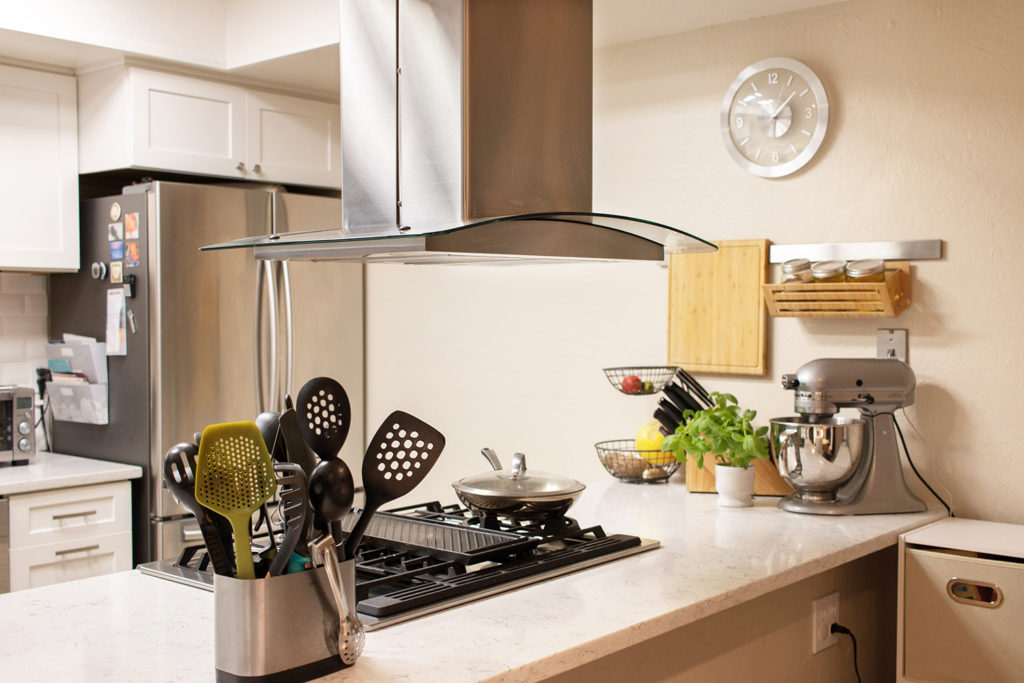
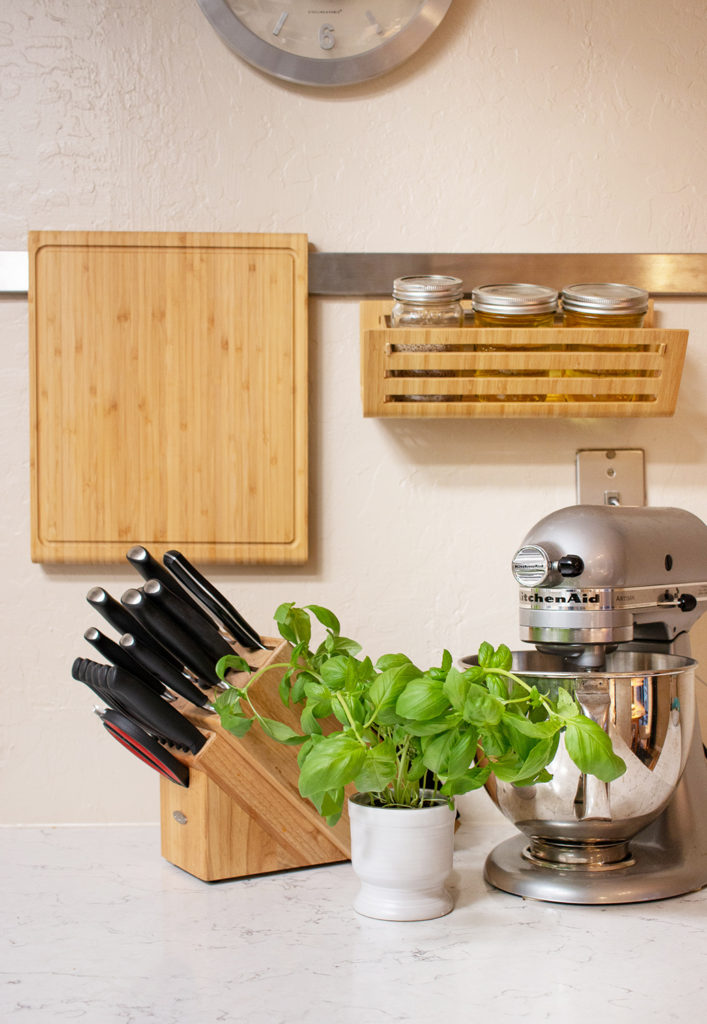
We created stations in each part of her kitchen dedicated to certain tasks. One section was devoted to cutting, so we placed her knife block and cutting boards in that area. Tina got rid of two thirds of her cutting board collection (almost all the plastic ones except a select few). Only the wood cutting boards remain out on display.
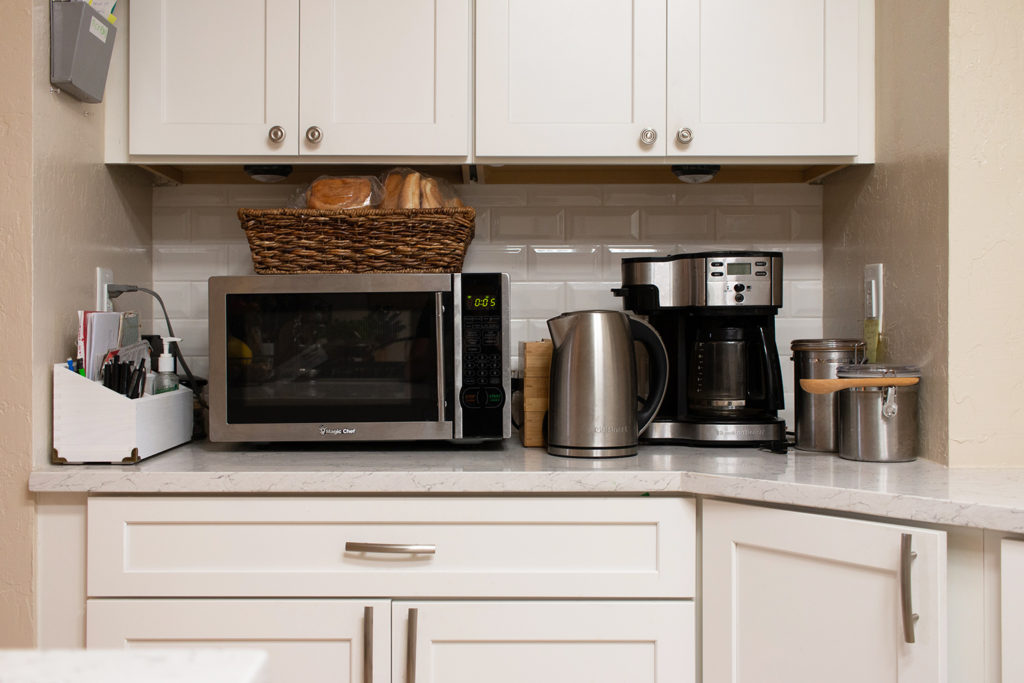
We moved the coffee maker, microwave, breads, teas, and water boiler to a section designated for morning routines. I also picked up a small stationery organizer so that they could keep miscellaneous items like pens, mail, and hand sanitizer all on in one container instead of scattered on the counter.
Tina threw away or donated a bunch of her water bottles, plastic dishes and bowls. She cleared out half of her Tupperware and was able to free up an entire drawer where she could now put pots and pans.
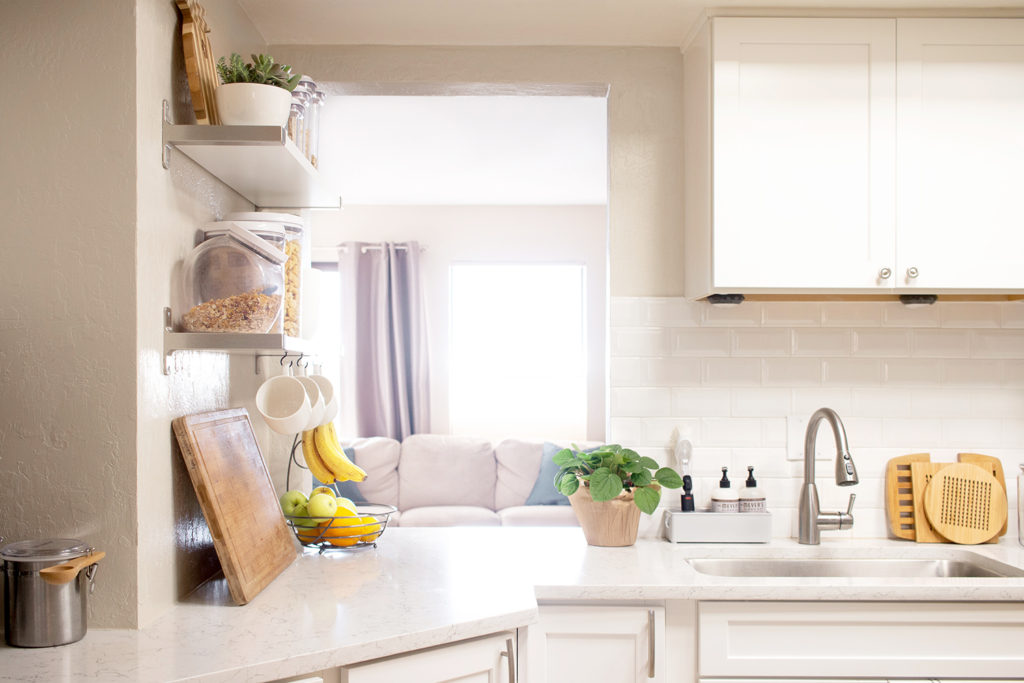
Tina also had a storage area by the dining table that became a catchall surface for random appliances and knick knacks. She hadn’t used some of the appliances in years. So we took them and put them into a closet. I also helped her clear out some unused items in the shelves and gave her another rule: Open storage should always be daily use items. Before, she used the shelves to store all manner of random items. By assigning specific tasks for each cubby hole, we quickly cleared out useless items and long term storage items. We cleared off the entire surface leaving only a couple of specific decorative items. The overall result felt a lot less chaotic.

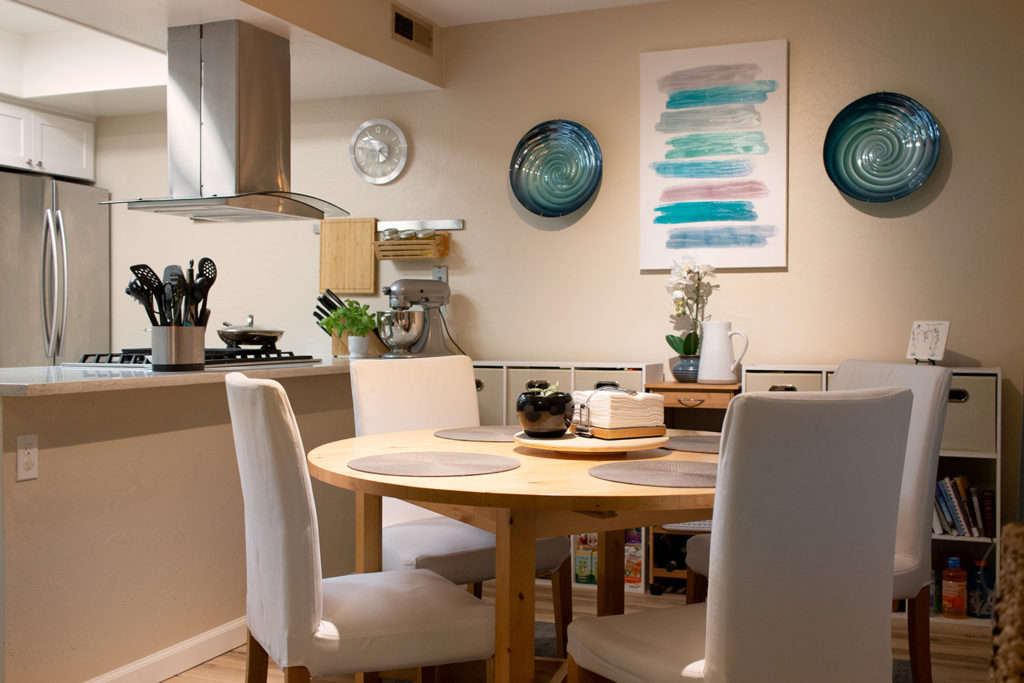
The Aftermath
But the true test of whether our organizing efforts worked came after I left their home and didn’t return until a few weeks later. Much to my surprise, her kitchen looked almost exactly the same as I had left it. The systems we had established for her were working beautifully. Reducing the number of cutting boards had made a huge difference. Placing the cereals in clear canisters made mornings so much more efficient.
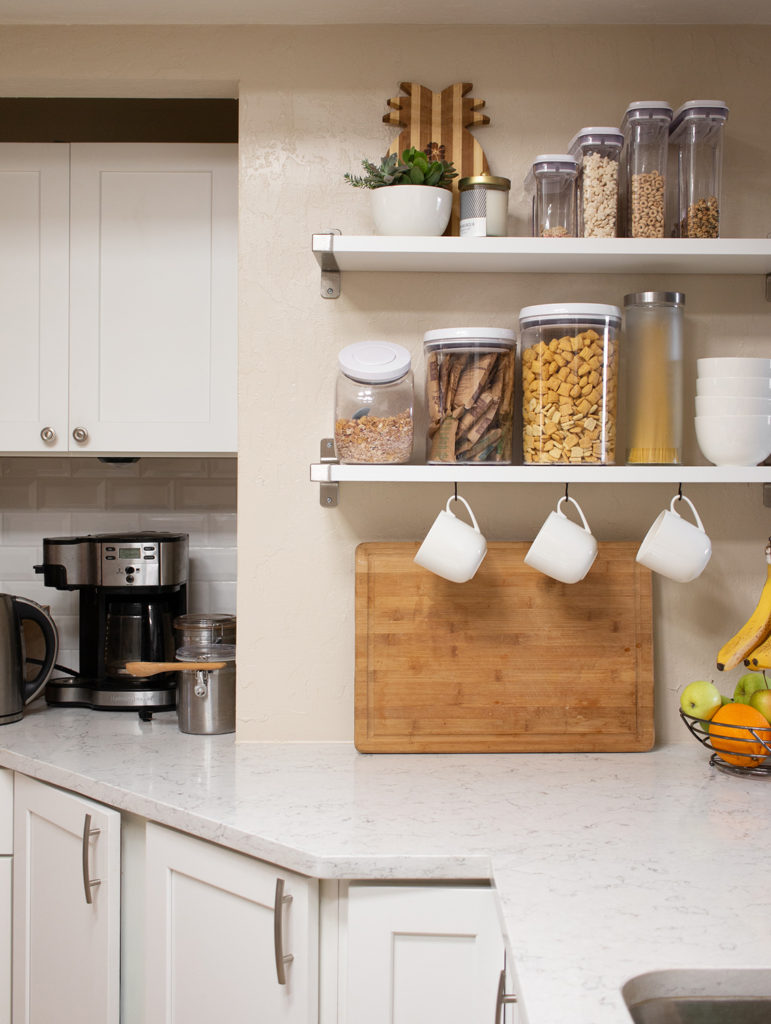
When I asked how things were going, she said reorganizing the kitchen had changed her life. She also said it had taken a constant stressor off of her marriage. They no longer waste time fighting about the mess in the kitchen or contending with clutter. Ricky told me that waking up in the morning to a clean kitchen is a source of joy now. He loves his new coffee/tea bar. Tina now spends less time in the kitchen shifting around clutter because of the improved efficiency. She loves cooking in her kitchen and has a newfound passion for making healthy meals for her family.
Cost Breakdown and Final Thoughts
Tina did a lot of the hard work. All I did was give her a little bit of guidance and she ran with it. Now when she goes shopping, she is significantly pickier with what she allows herself to bring home. She asks herself if she has the space for it, and if the answer is “no”, she leaves it on the store shelf. Overall, they spent a total of $250 on storage items and shelving. Other than that, everything came down to good old fashioned cleaning.
It’s been months since Tina and Ricky embarked on the harrowing task to organize their kitchen and I’m happy to report things keep getting better. They now have higher standards and continually improve their existing systems to be more efficient and streamlined.
The spaces we occupy can have a profound effect on our day to day lives. Clearing the clutter and developing efficient systems in your home life can free you up to spend time and focus on things that really matter. Happy Organizing!
2 Replies to “Before and After: How Organizing My Friend’s Kitchen Changed Her Life and Marriage”
Hey Tim, Great job on the kitchen organization! It really looks so much better visually and as well as functionally, I’m sure. Question: What did you use to hang those cups? I’m in the process of trying to update my own kitchen and I’m having trouble finding a place for all my mugs…
They’re just small hooks I picked up at a local hardware store. You can screw them directly into the bottom of the shelf