DIY Headboard with Gold Chevron
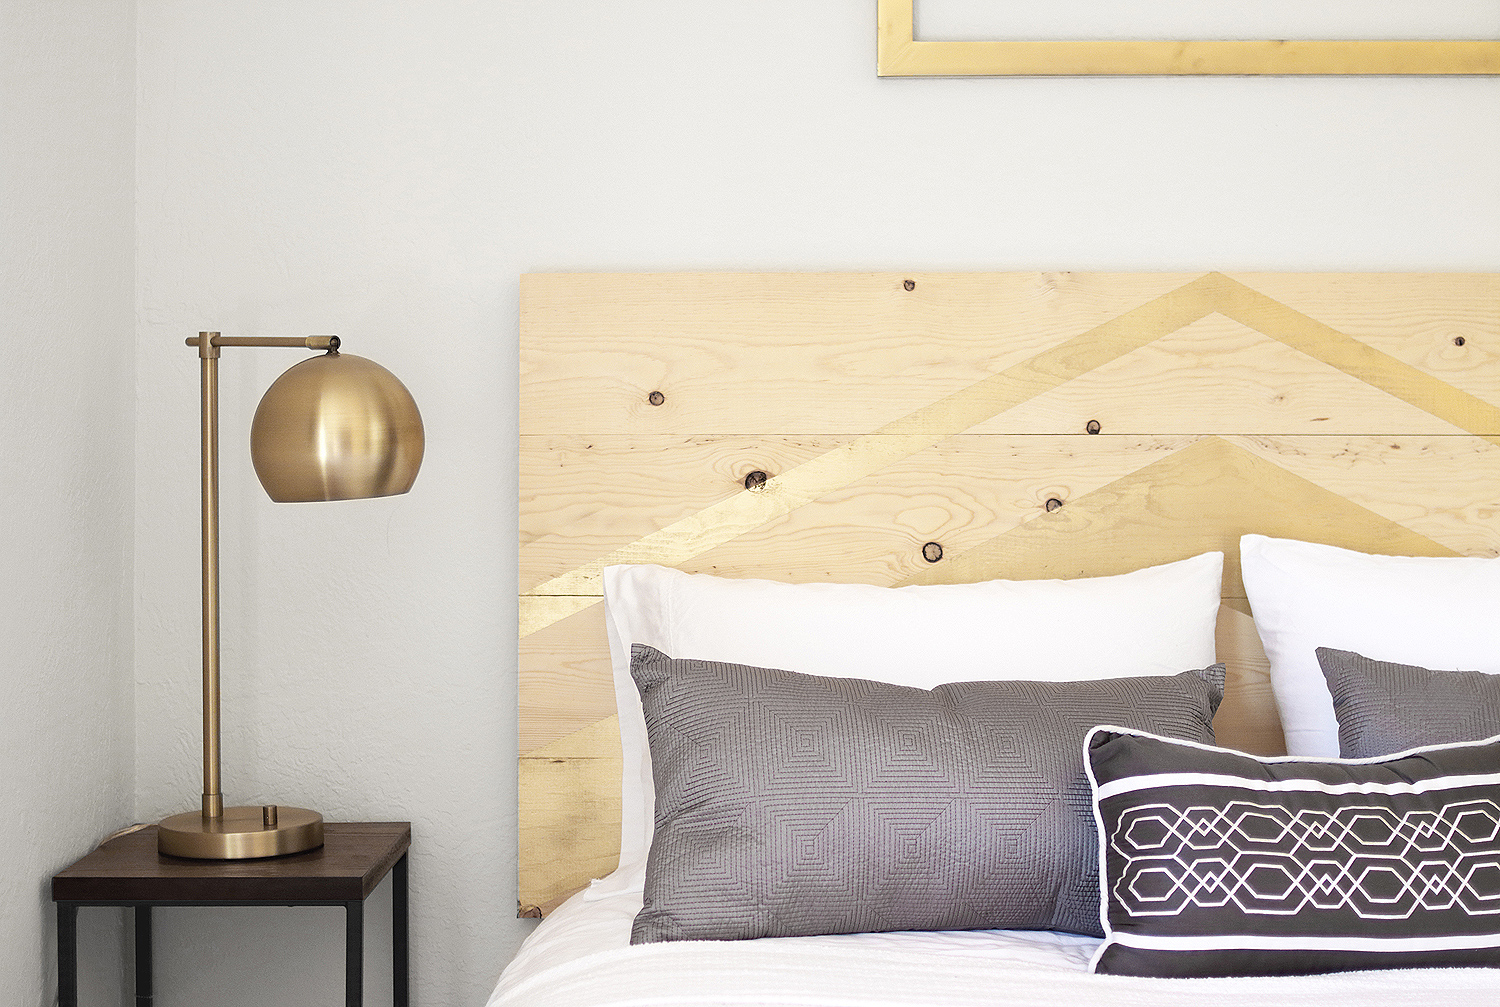
As a music producer with a home studio, I often have recording artists stay in my guest room. Obviously I want them to feel comfortable and well rested to make sure they deliver great performances. Still, I didn’t want to blow a lot of money on furnishings or cosmetic upgrades so I tried to pull the room together with as many budget friendly solutions as possible. One of my favorite solutions was creating a simple headboard out of some scrap pine that I had from another project and some leftover gold spray paint. I already had a great queen sized bed that was given to me by a friend, but it was just a boxspring and mattress on a typical metal frame. All I needed was a headboard to finish it off. This is how I did it:
Materials and Cuts:
- 4 – 1 x 8 pine boards cut to 62 in. long (The approx width of a queen bed)
- 3 – 1 x 1 strips of scrap wood cut to ~26 in. each
- 1″ wood screws
- 3″ wood screws
- Plywood scrap that’s at least 12 in. x 48 in.
- Wood Glue
- Painters Tape and scrap paper
- Gold Spray Paint (I used Rustoleum Specialty Metallic)
Tools:
- Screw driver/Drill
- Circular Saw (If you don’t own a saw, a lot of hardware stores will cut your lumber for you)
- Straight edge
- Clamps
- Sand paper
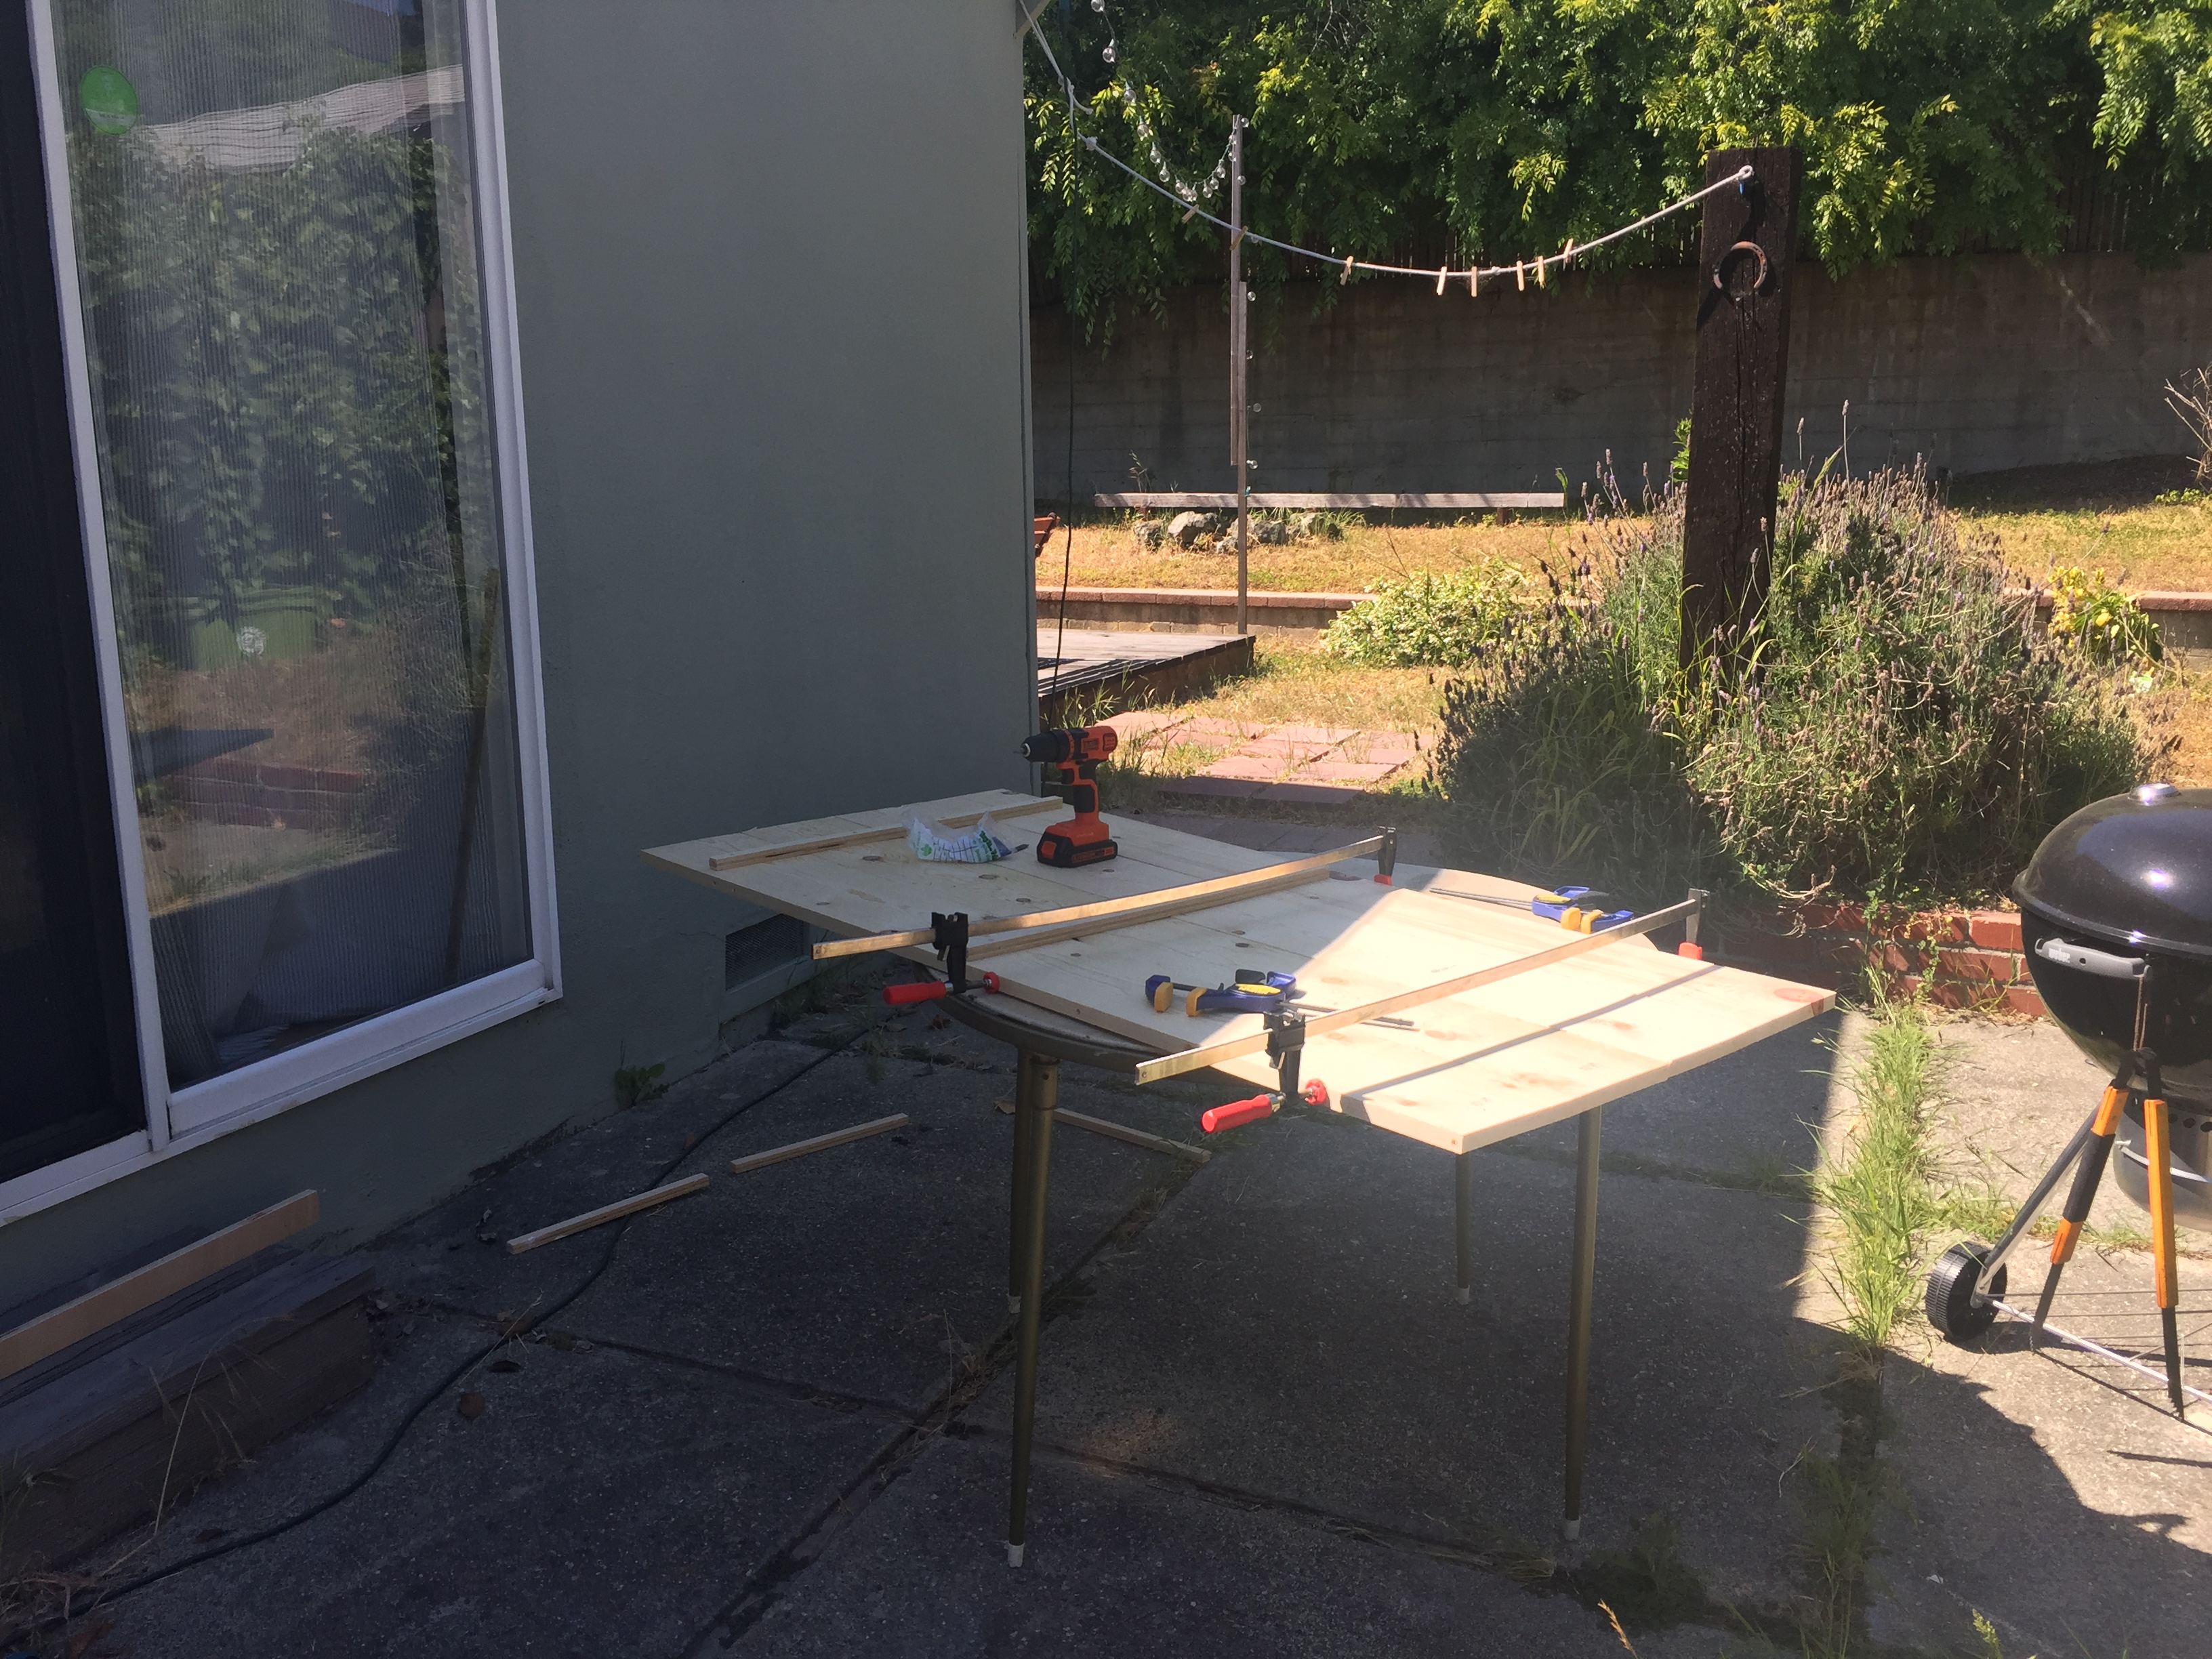
1. I laid out all my boards on a flat surface edge to edge, added glue to the edges and clamped them tightly together and then laid my 1″ wood strips on top, two on either end and one in the middle. I didn’t really measure the distances between the 3 strips since there were going to be on the back of the headboard, so I just eyeballed them.
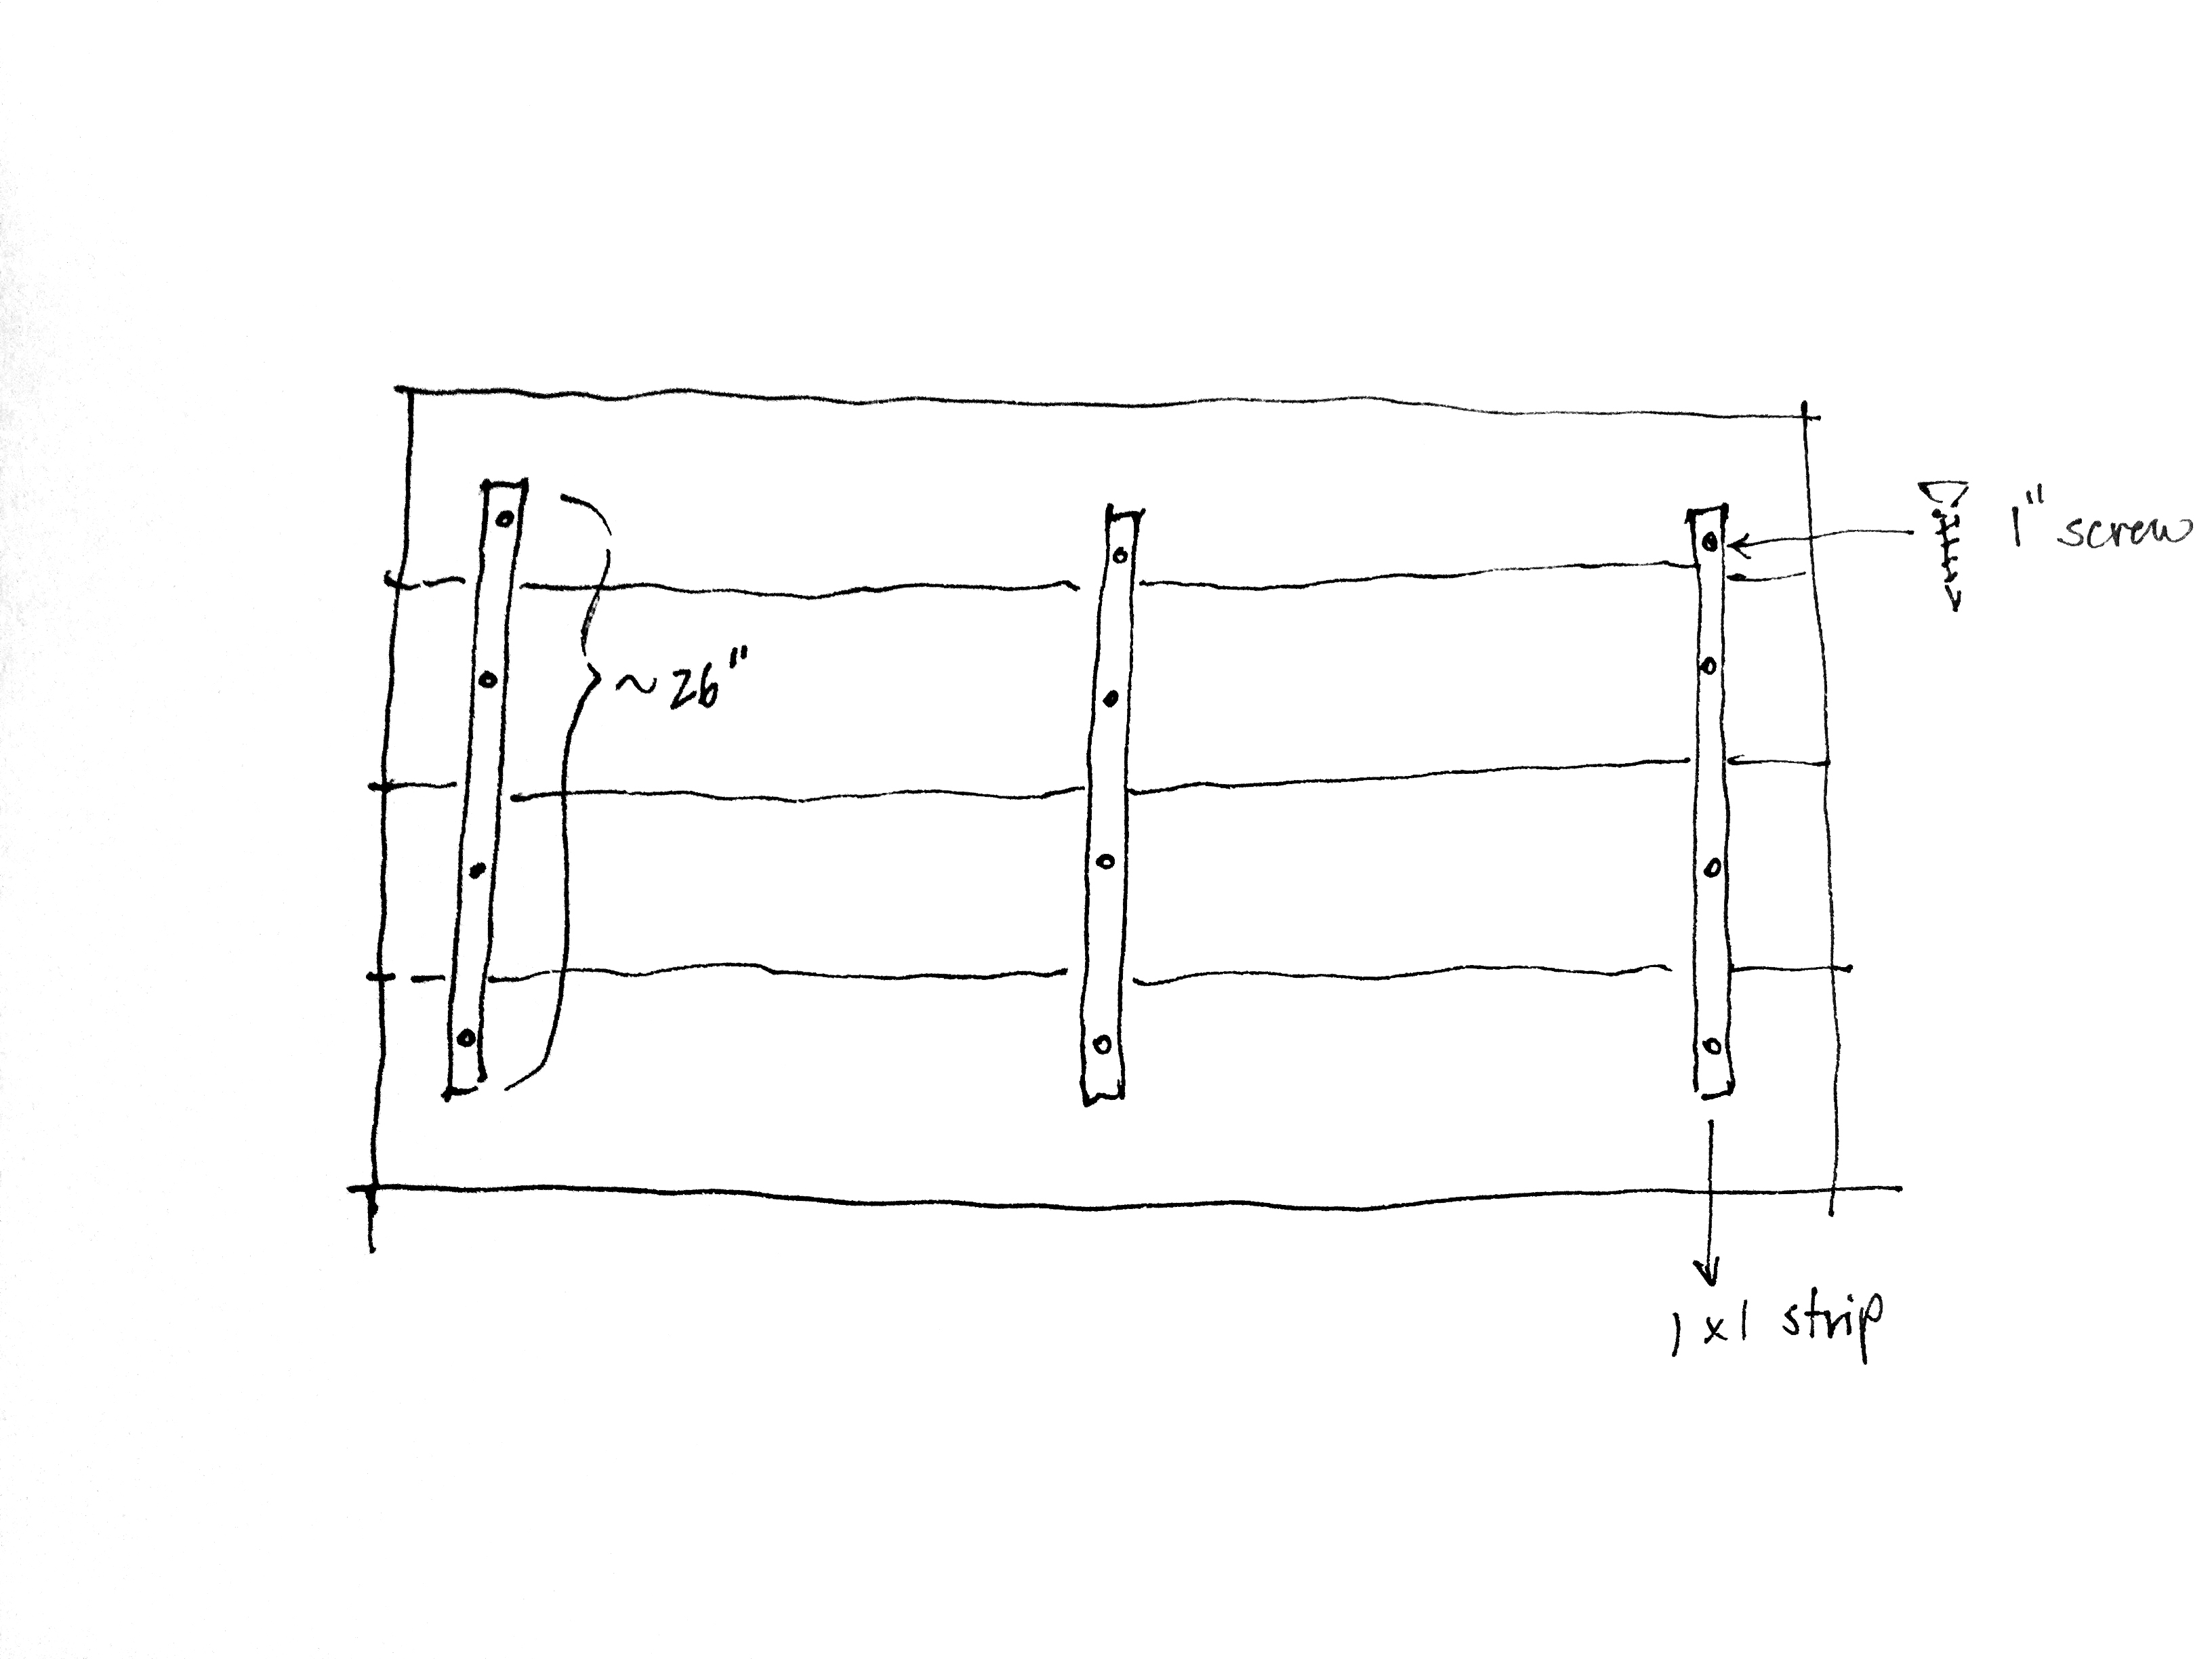
2. Once I found a good placement, I spread glue on the strips and screwed them onto the pine boards. I made sure to have one screw for each pine board.
3. After the glue dried, I turned the headboard over and gave it a good sanding at 220 grit. Then I began taping off the sections that I didn’t want to get spray painted in preparation for the gold chevron pattern. I used brown paper to cover up the larger sections.
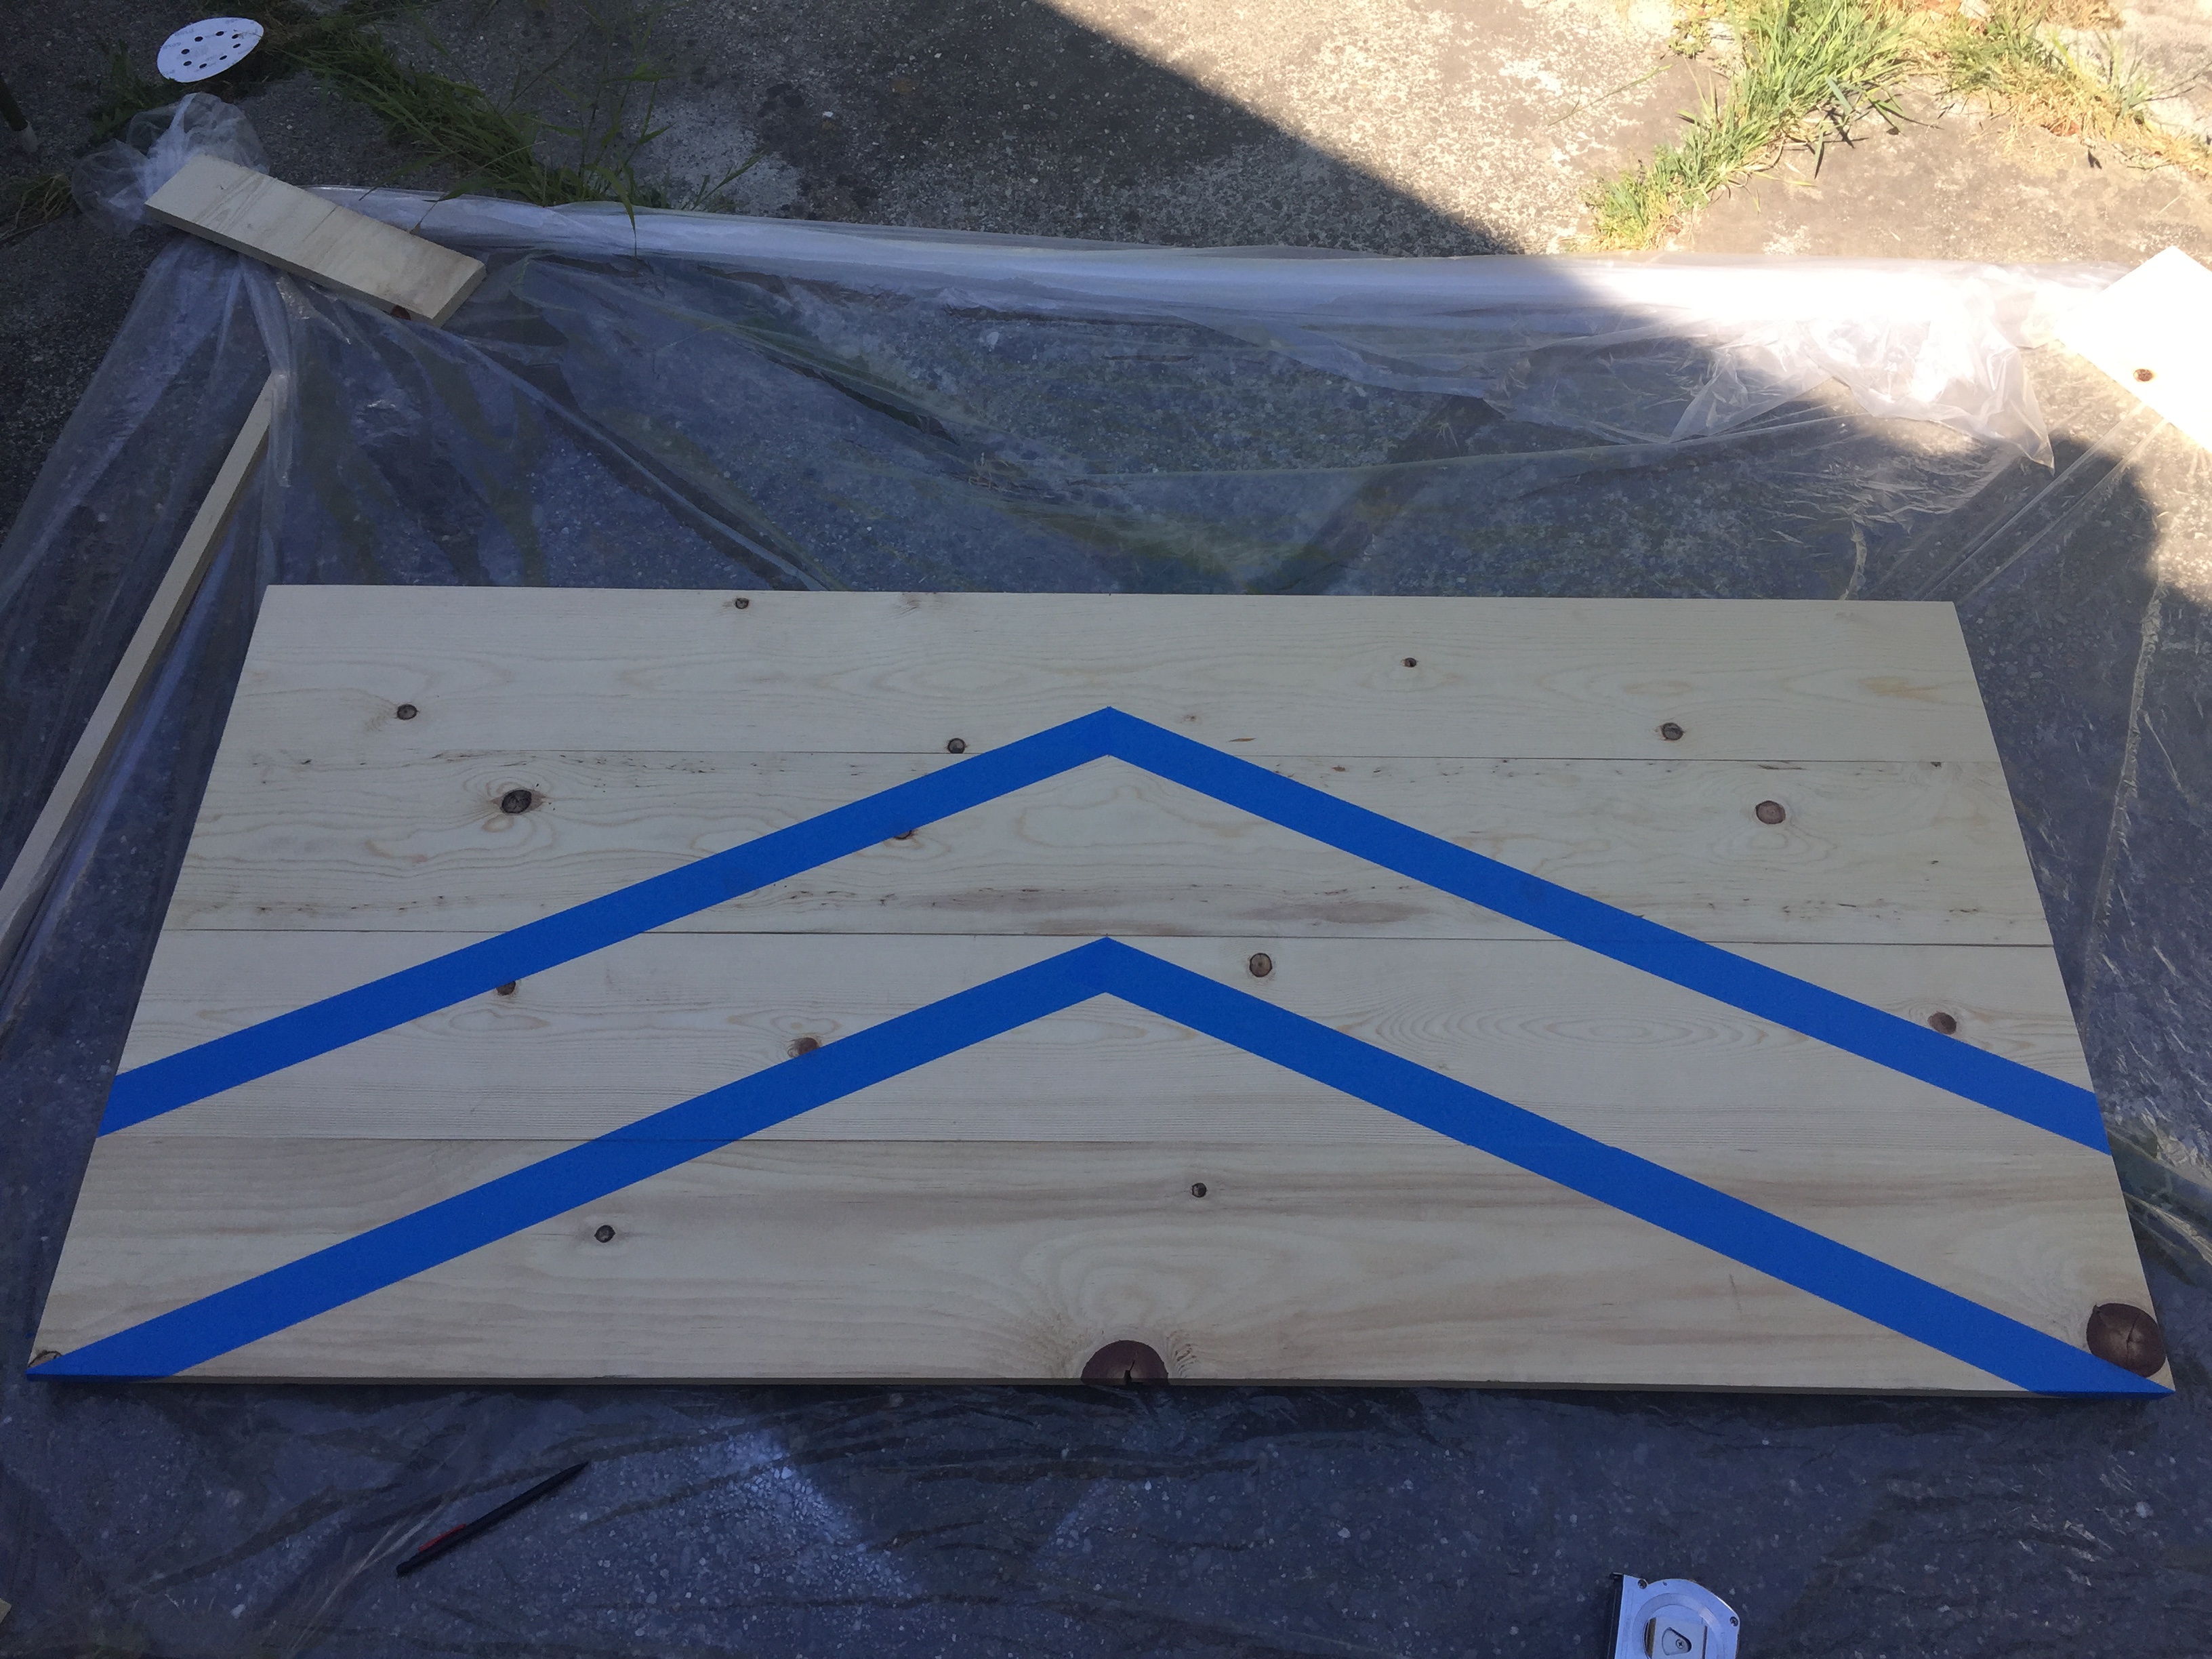
4. I probably should have primed the wood first with a spray primer since pine is a softwood and is super absorbent. As a result, I had to spray a few coats of the gold spray paint before it started looking shiny. Be sure to peel off the tape before the spray paint dries otherwise you will peel it up with the tape.
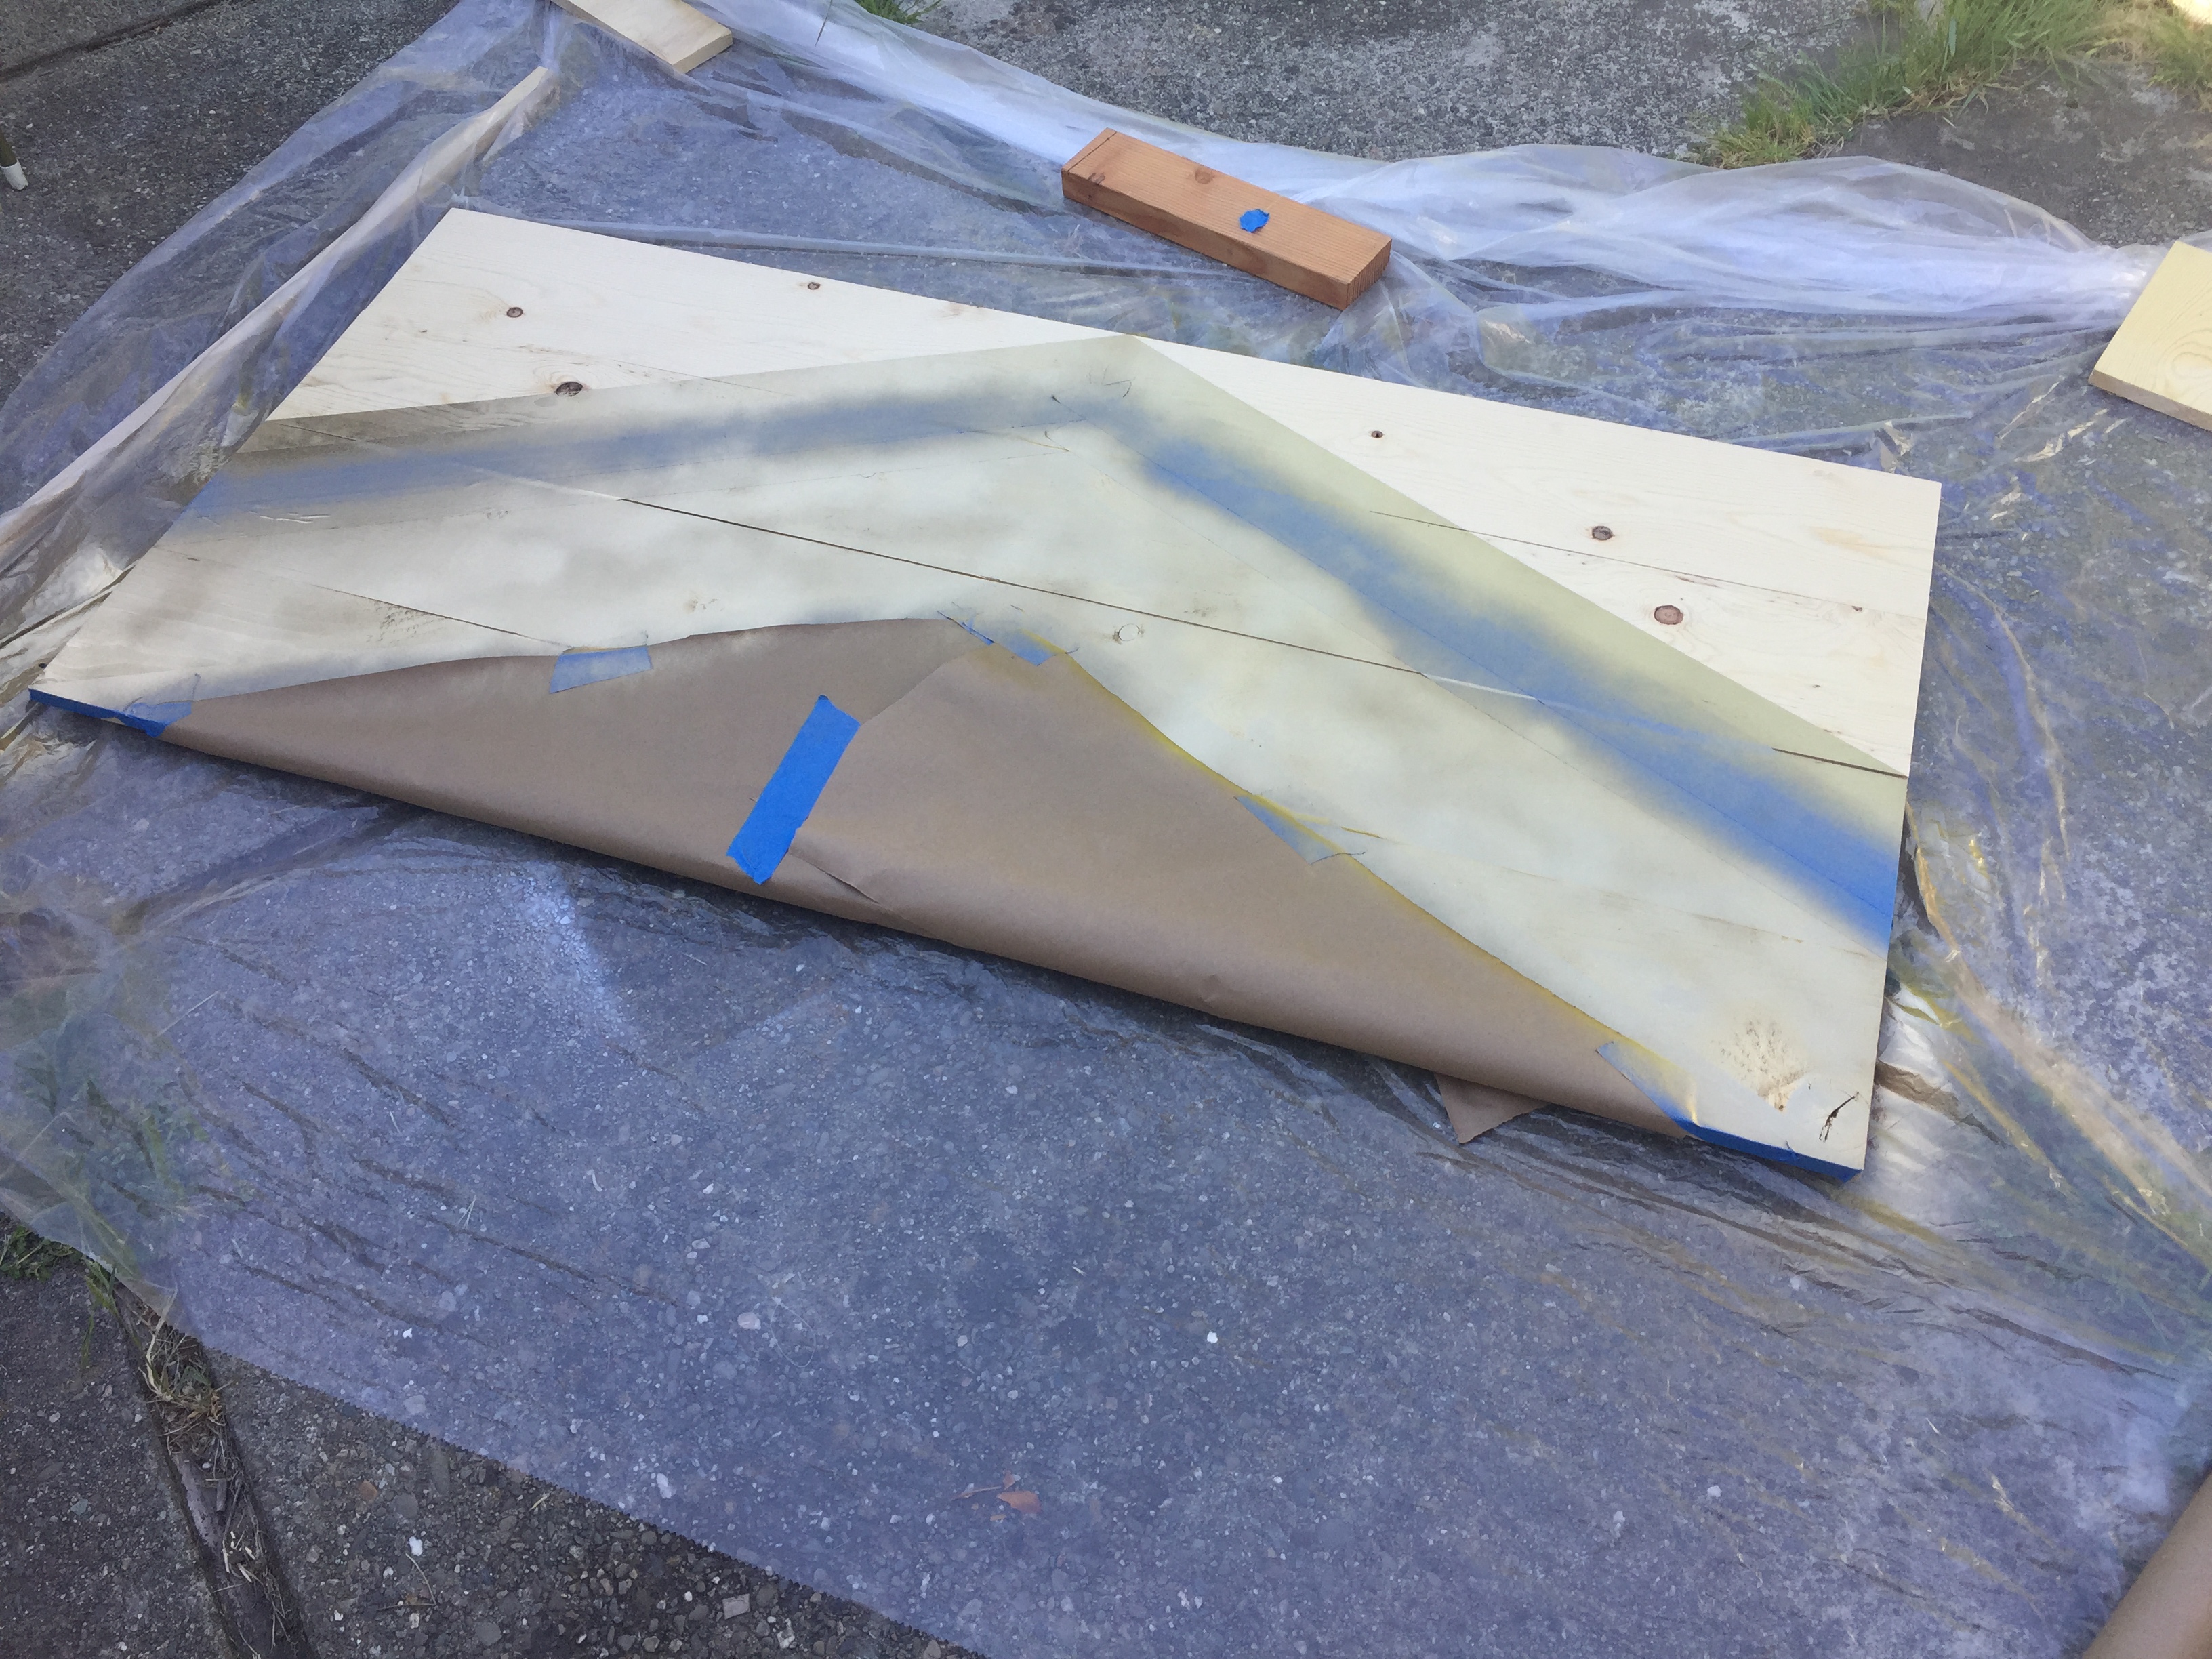
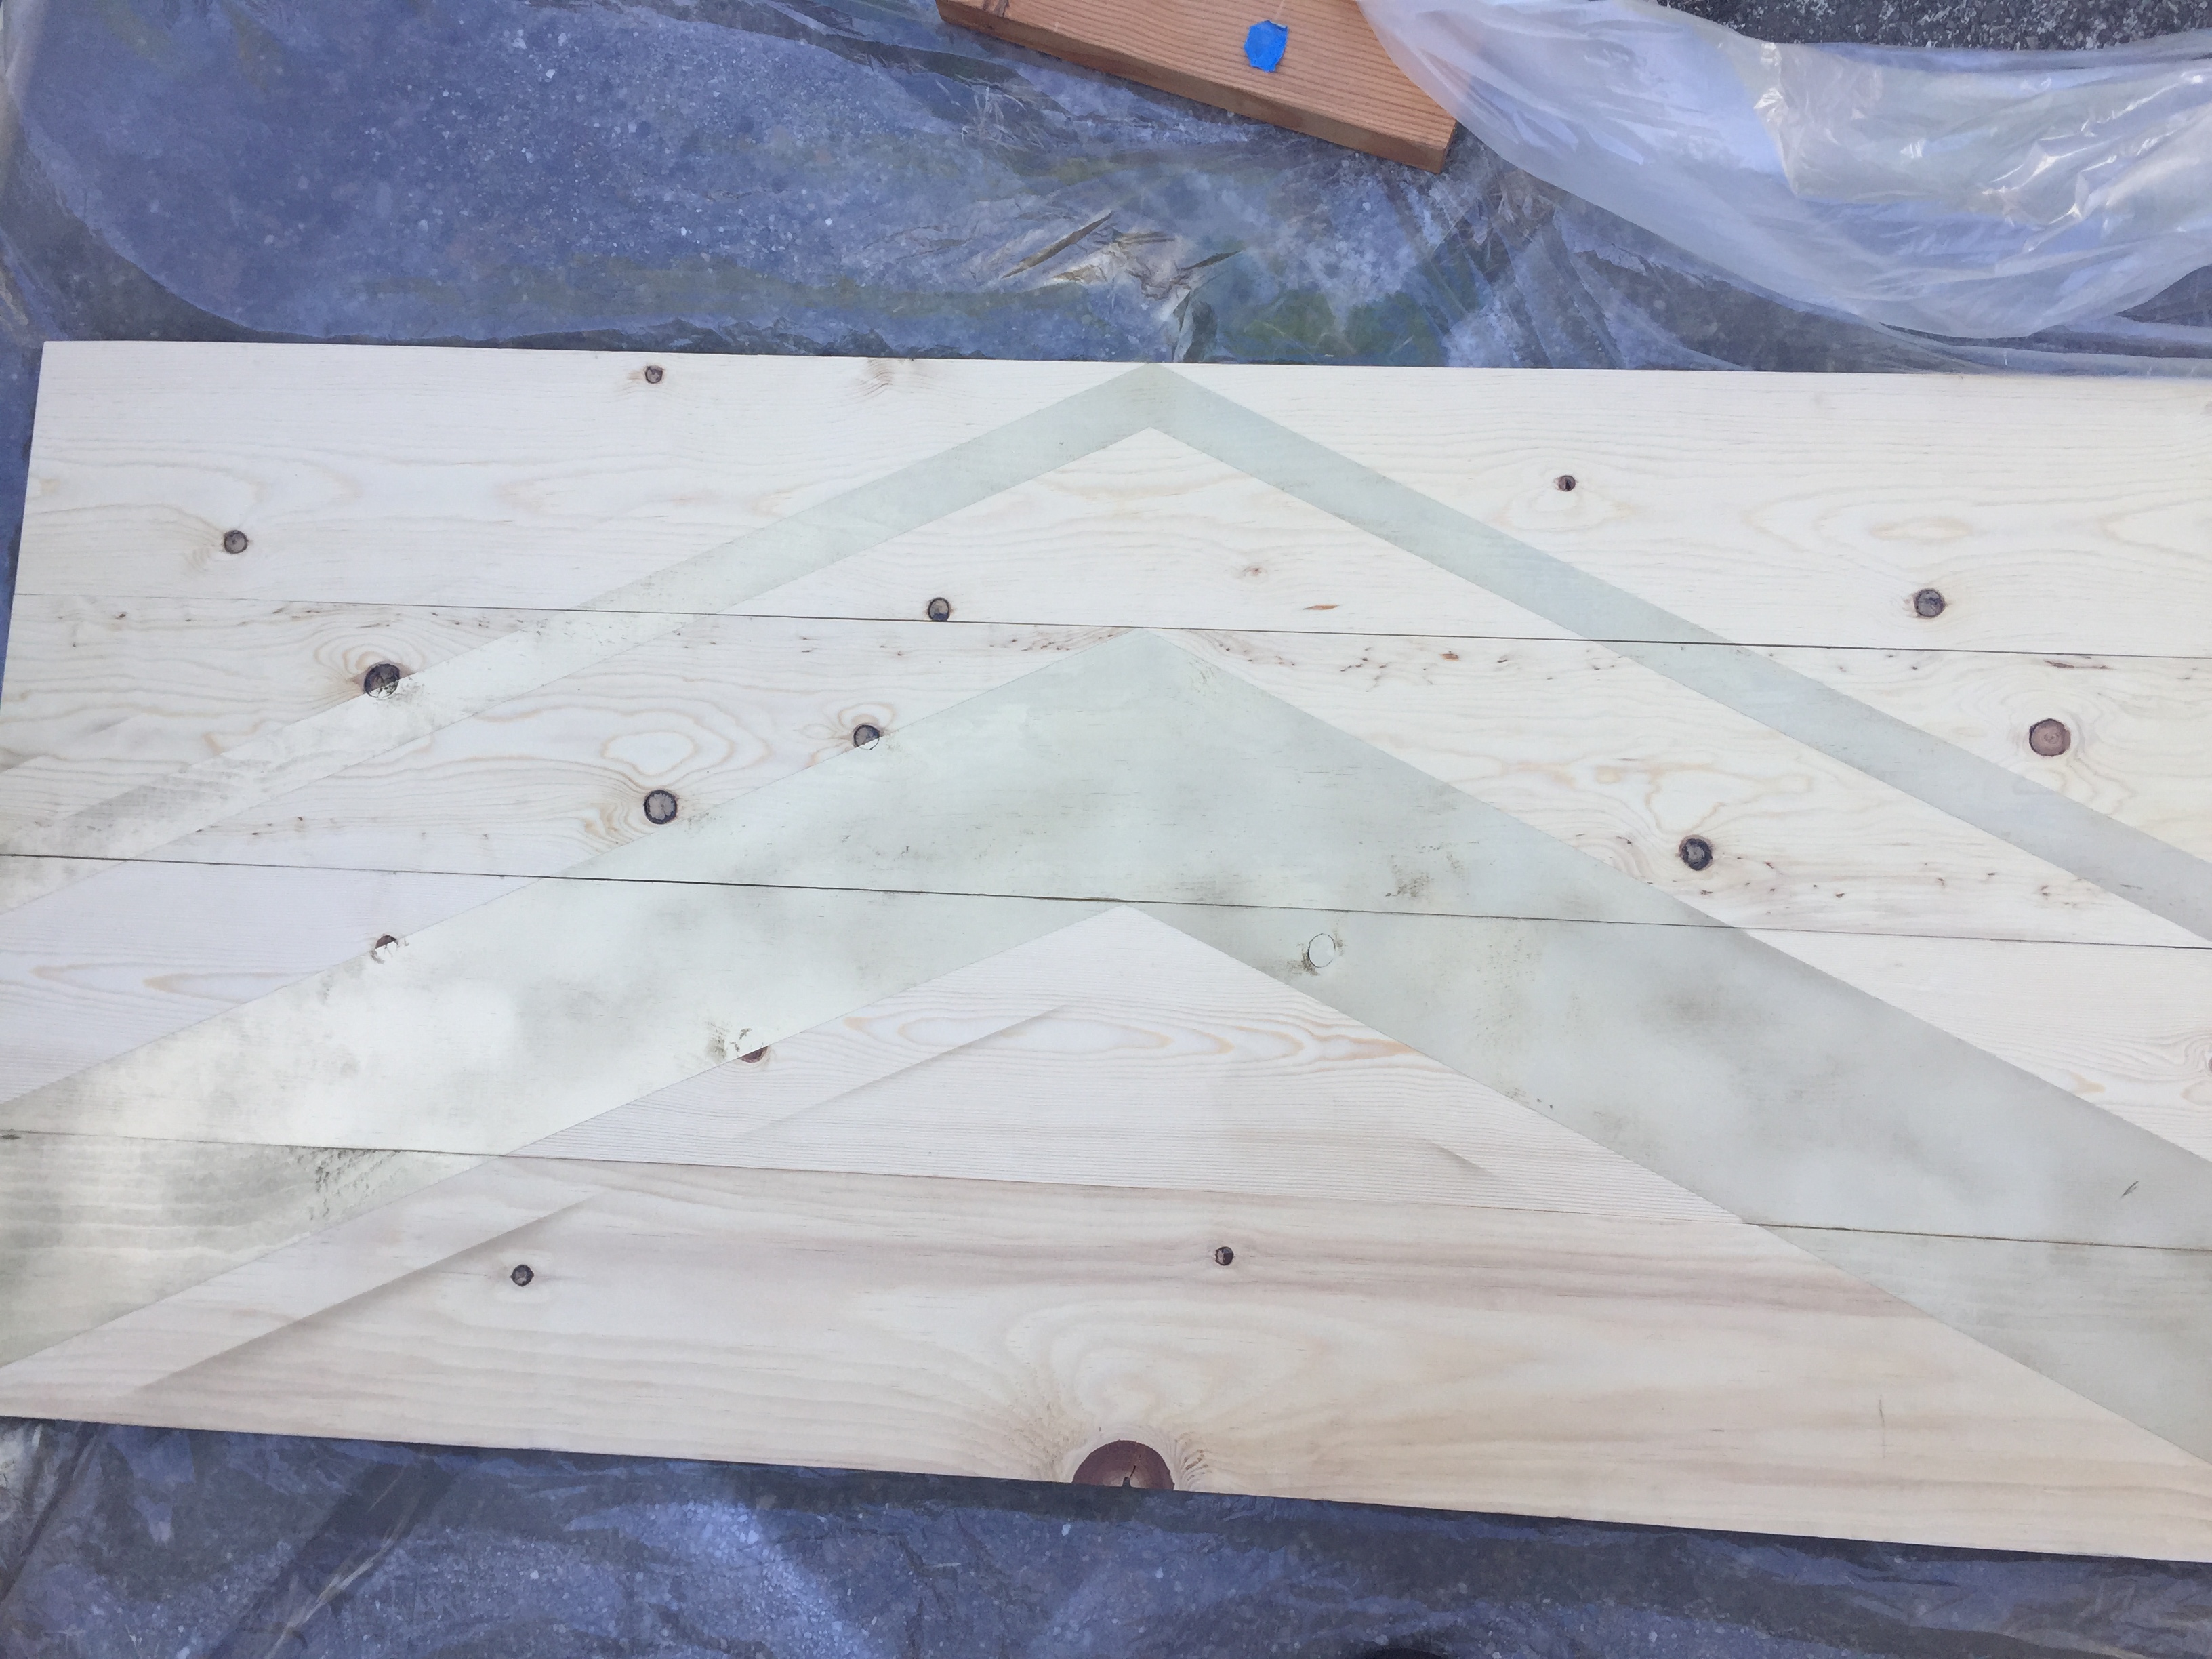
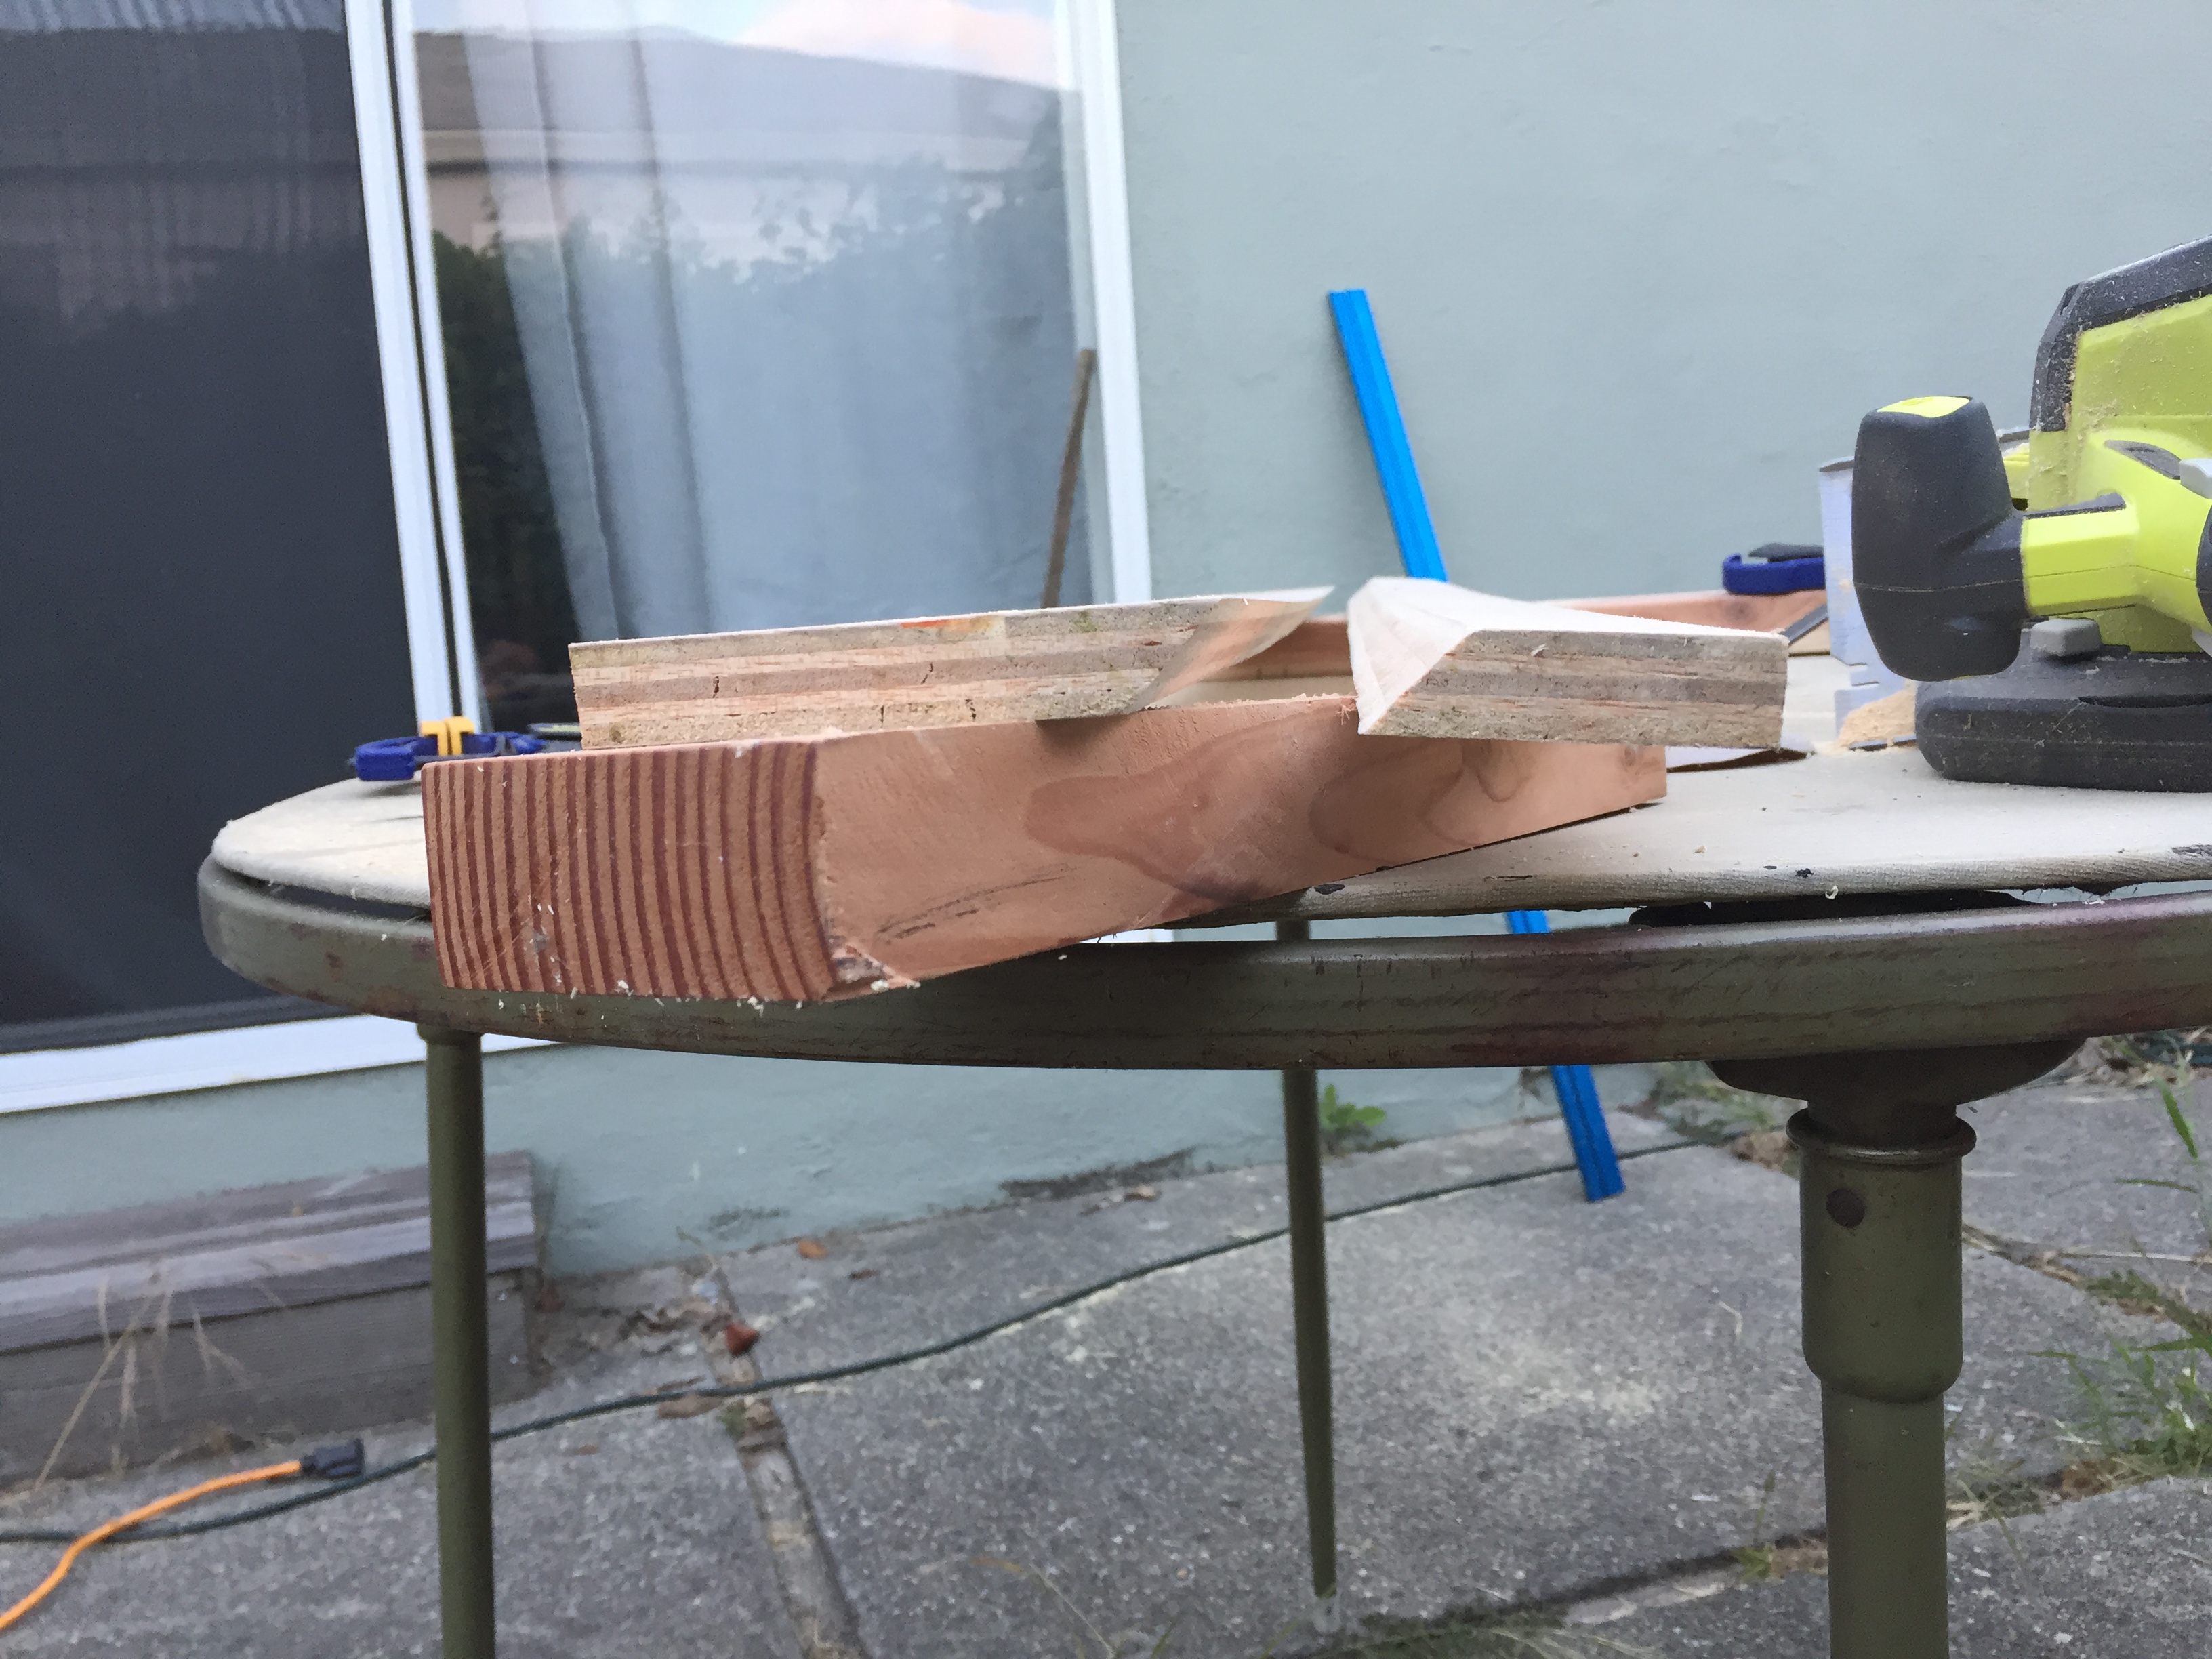
5. After the paint dried, I sanded off some of the bleed and it was time to mount the headboard onto the wall. I went through a couple of solutions in my head until I settled on this modified french cleat. You can use any method of hanging a headboard, but I chose the french cleatbecause it is crazy secure and I didn’t want to risk my board falling off the wall and seriously injuring someone. To do this, I took my scrap piece of plywood and set my circular saw at a 45 degree angle. Using my straight edge as a guide, I cut through the piece lengthwise so that I ended up with two long pieces that had opposing 45 degree angles.
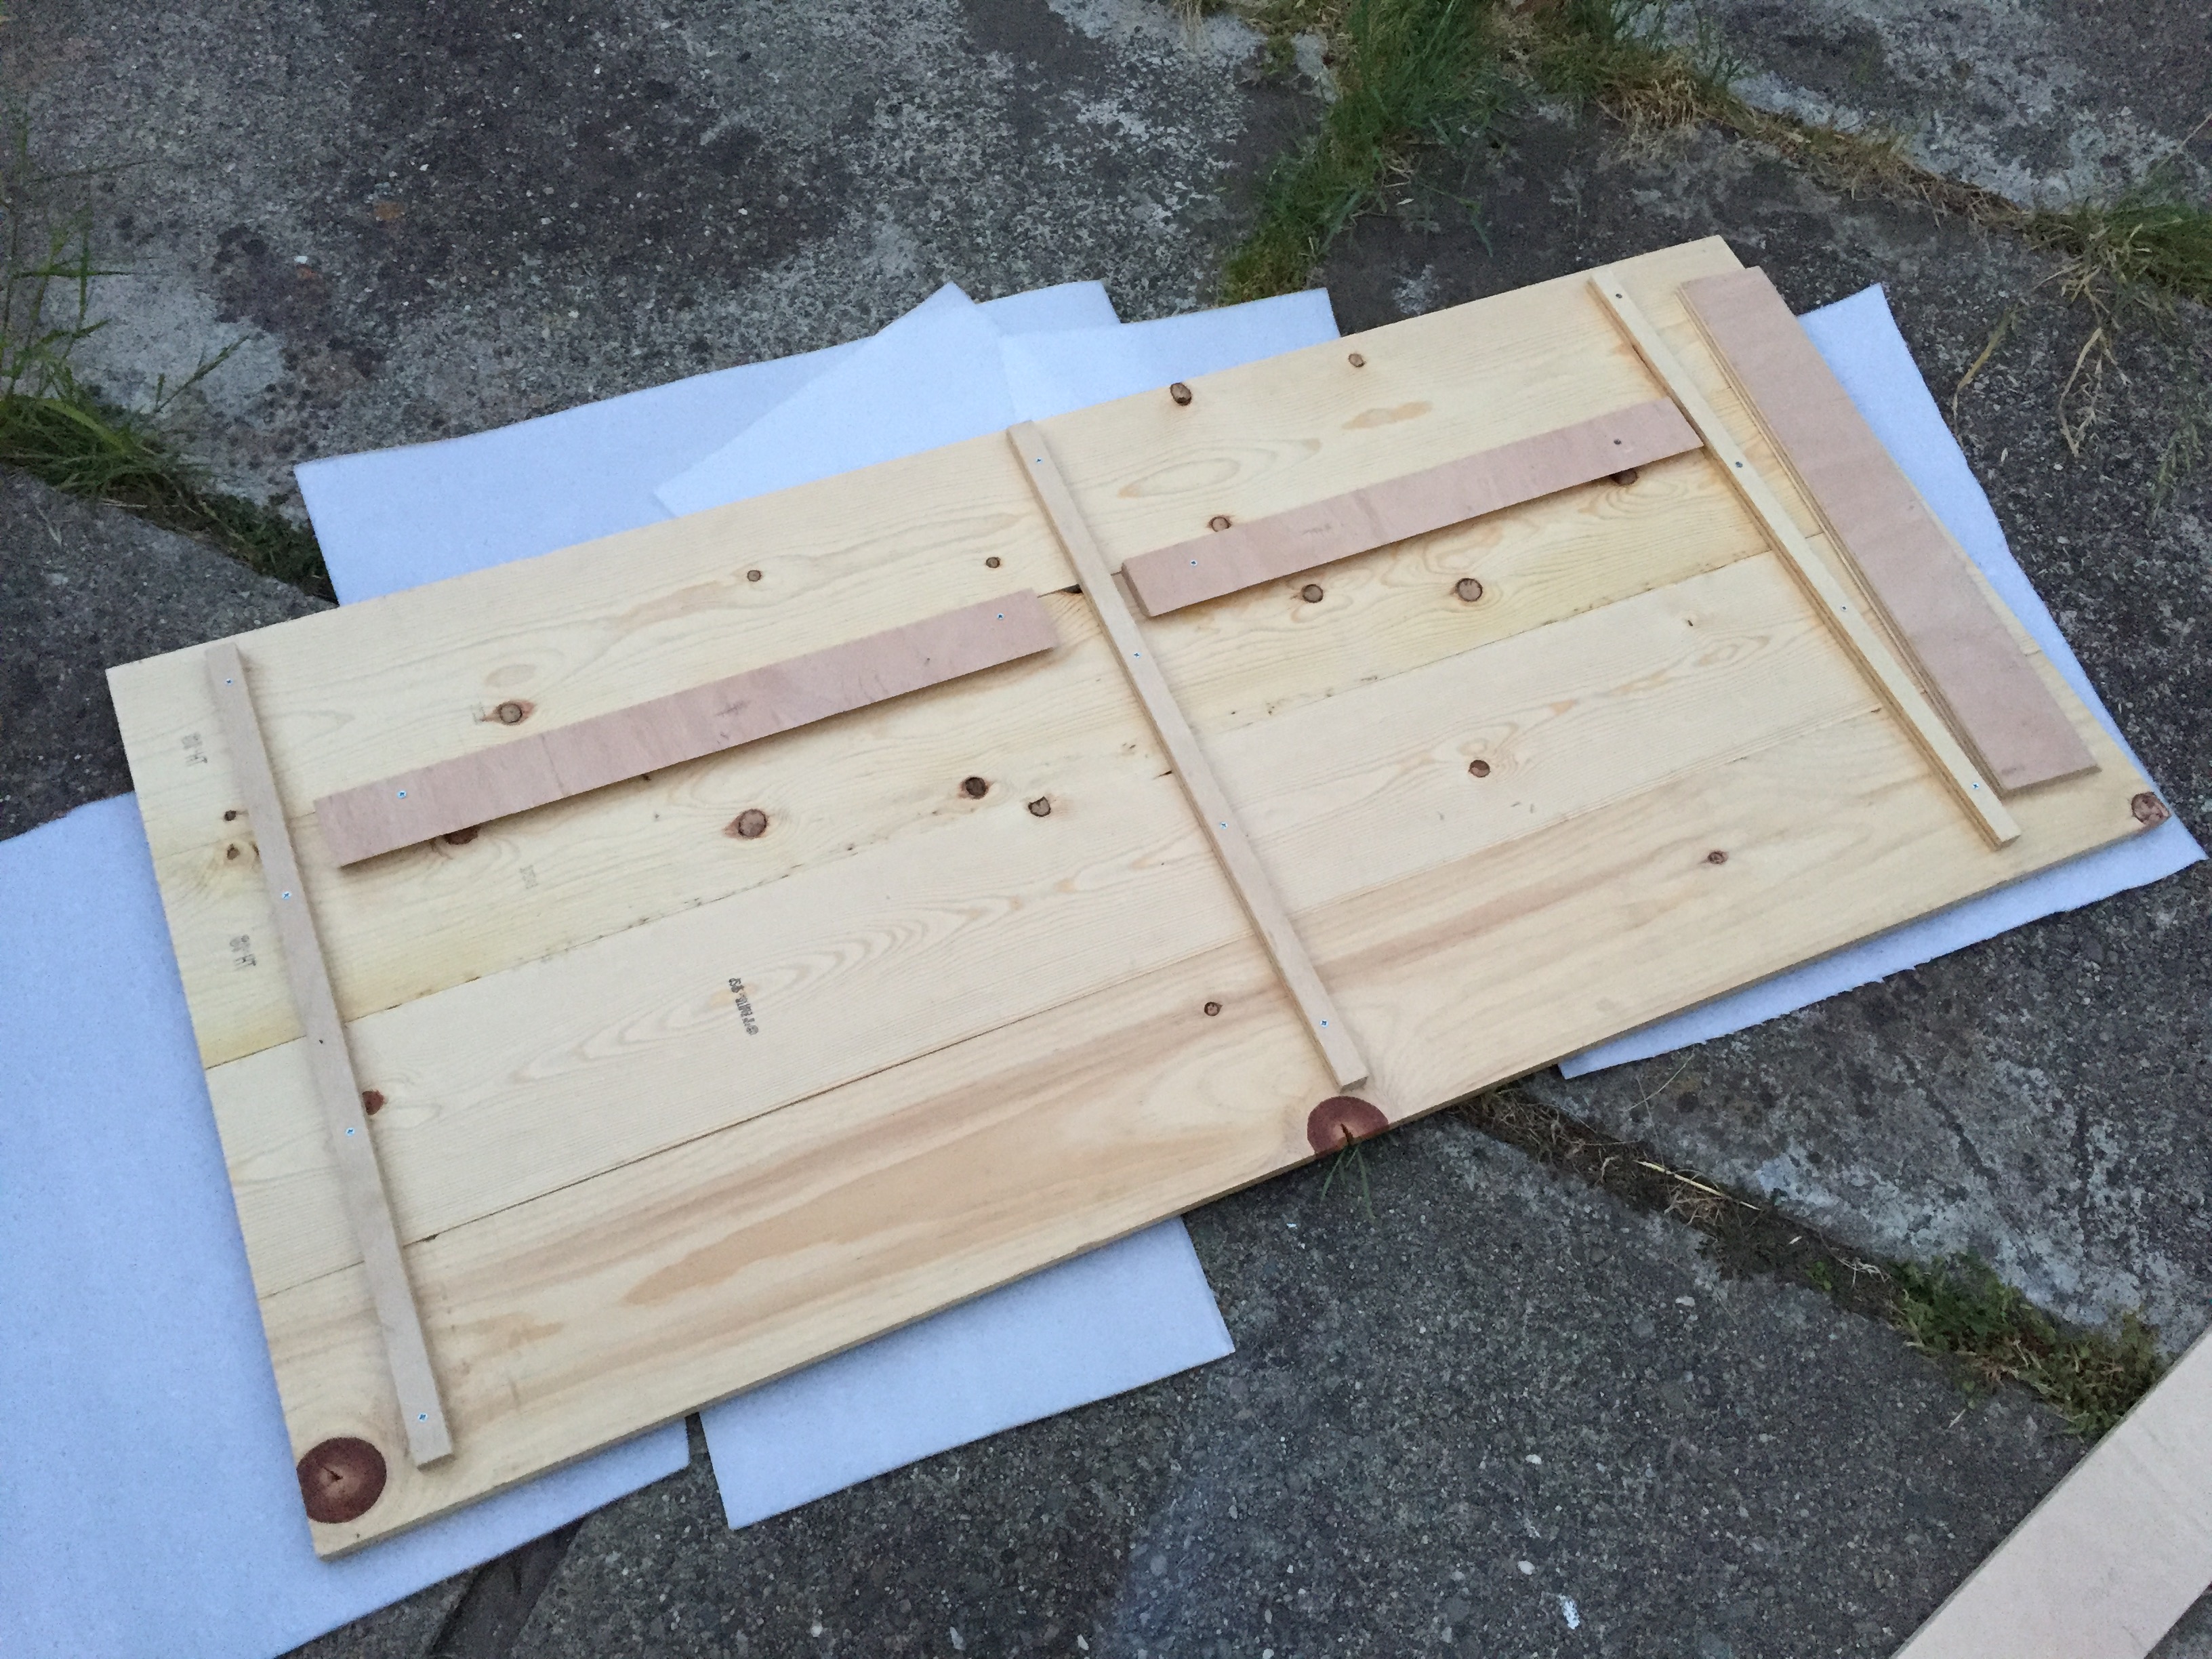
6. I then took one of the pieces and cut it in half (I had to cut it in half since there was a middle support piece on my headboard) and mounted it onto the headboard using glue and 1″ screws. I used one of the wood seams as my guide line so I wouldn’t waste time measuring. Be sure that the short side of the cleat is facing the headboard and the longer side is on the outside. The tip of the 45 degree angle should be pointing down. (Ignore that random piece on the right in the photo below)
7. With the opposing piece I cut two short pieces around 6″ wide that will eventually mount to the wall. Traditionally french cleats go all the way across the wall, but I wanted a little bit of flexibility with the placement of my headboard and not be confined by the studs in the wall. So by using two short pieces it allowed me to slide the headboard along the wall until it was in the perfect spot.
8. Locate the studs in your wall so that when the two short cleats are mounted to the wall they will fit well within the bounds of the cleats on your headboard. Also, calculate the height of the cleats based on the height of your bed and where you want the headboard to be in relation to it. This is the part where your measurements really count and it will depend on the height of your bed, where you mounted the cleat on the headboard and how far your studs are spaced.
Take the time to calculate this correctly, otherwise you’ll end up with a lot of holes in your wall or a lopsided headboard. My wall cleats are spaced approximately 32″ apart on center. Since I’m using short cleats, I had to use two screws per cleat to mount them into the studs on the wall so they wouldn’t rotate. Again, be sure when you’re mounting your cleats that short side of the cleat is facing the wall and the longer side is facing out with the 45 degree angle pointing up this time.
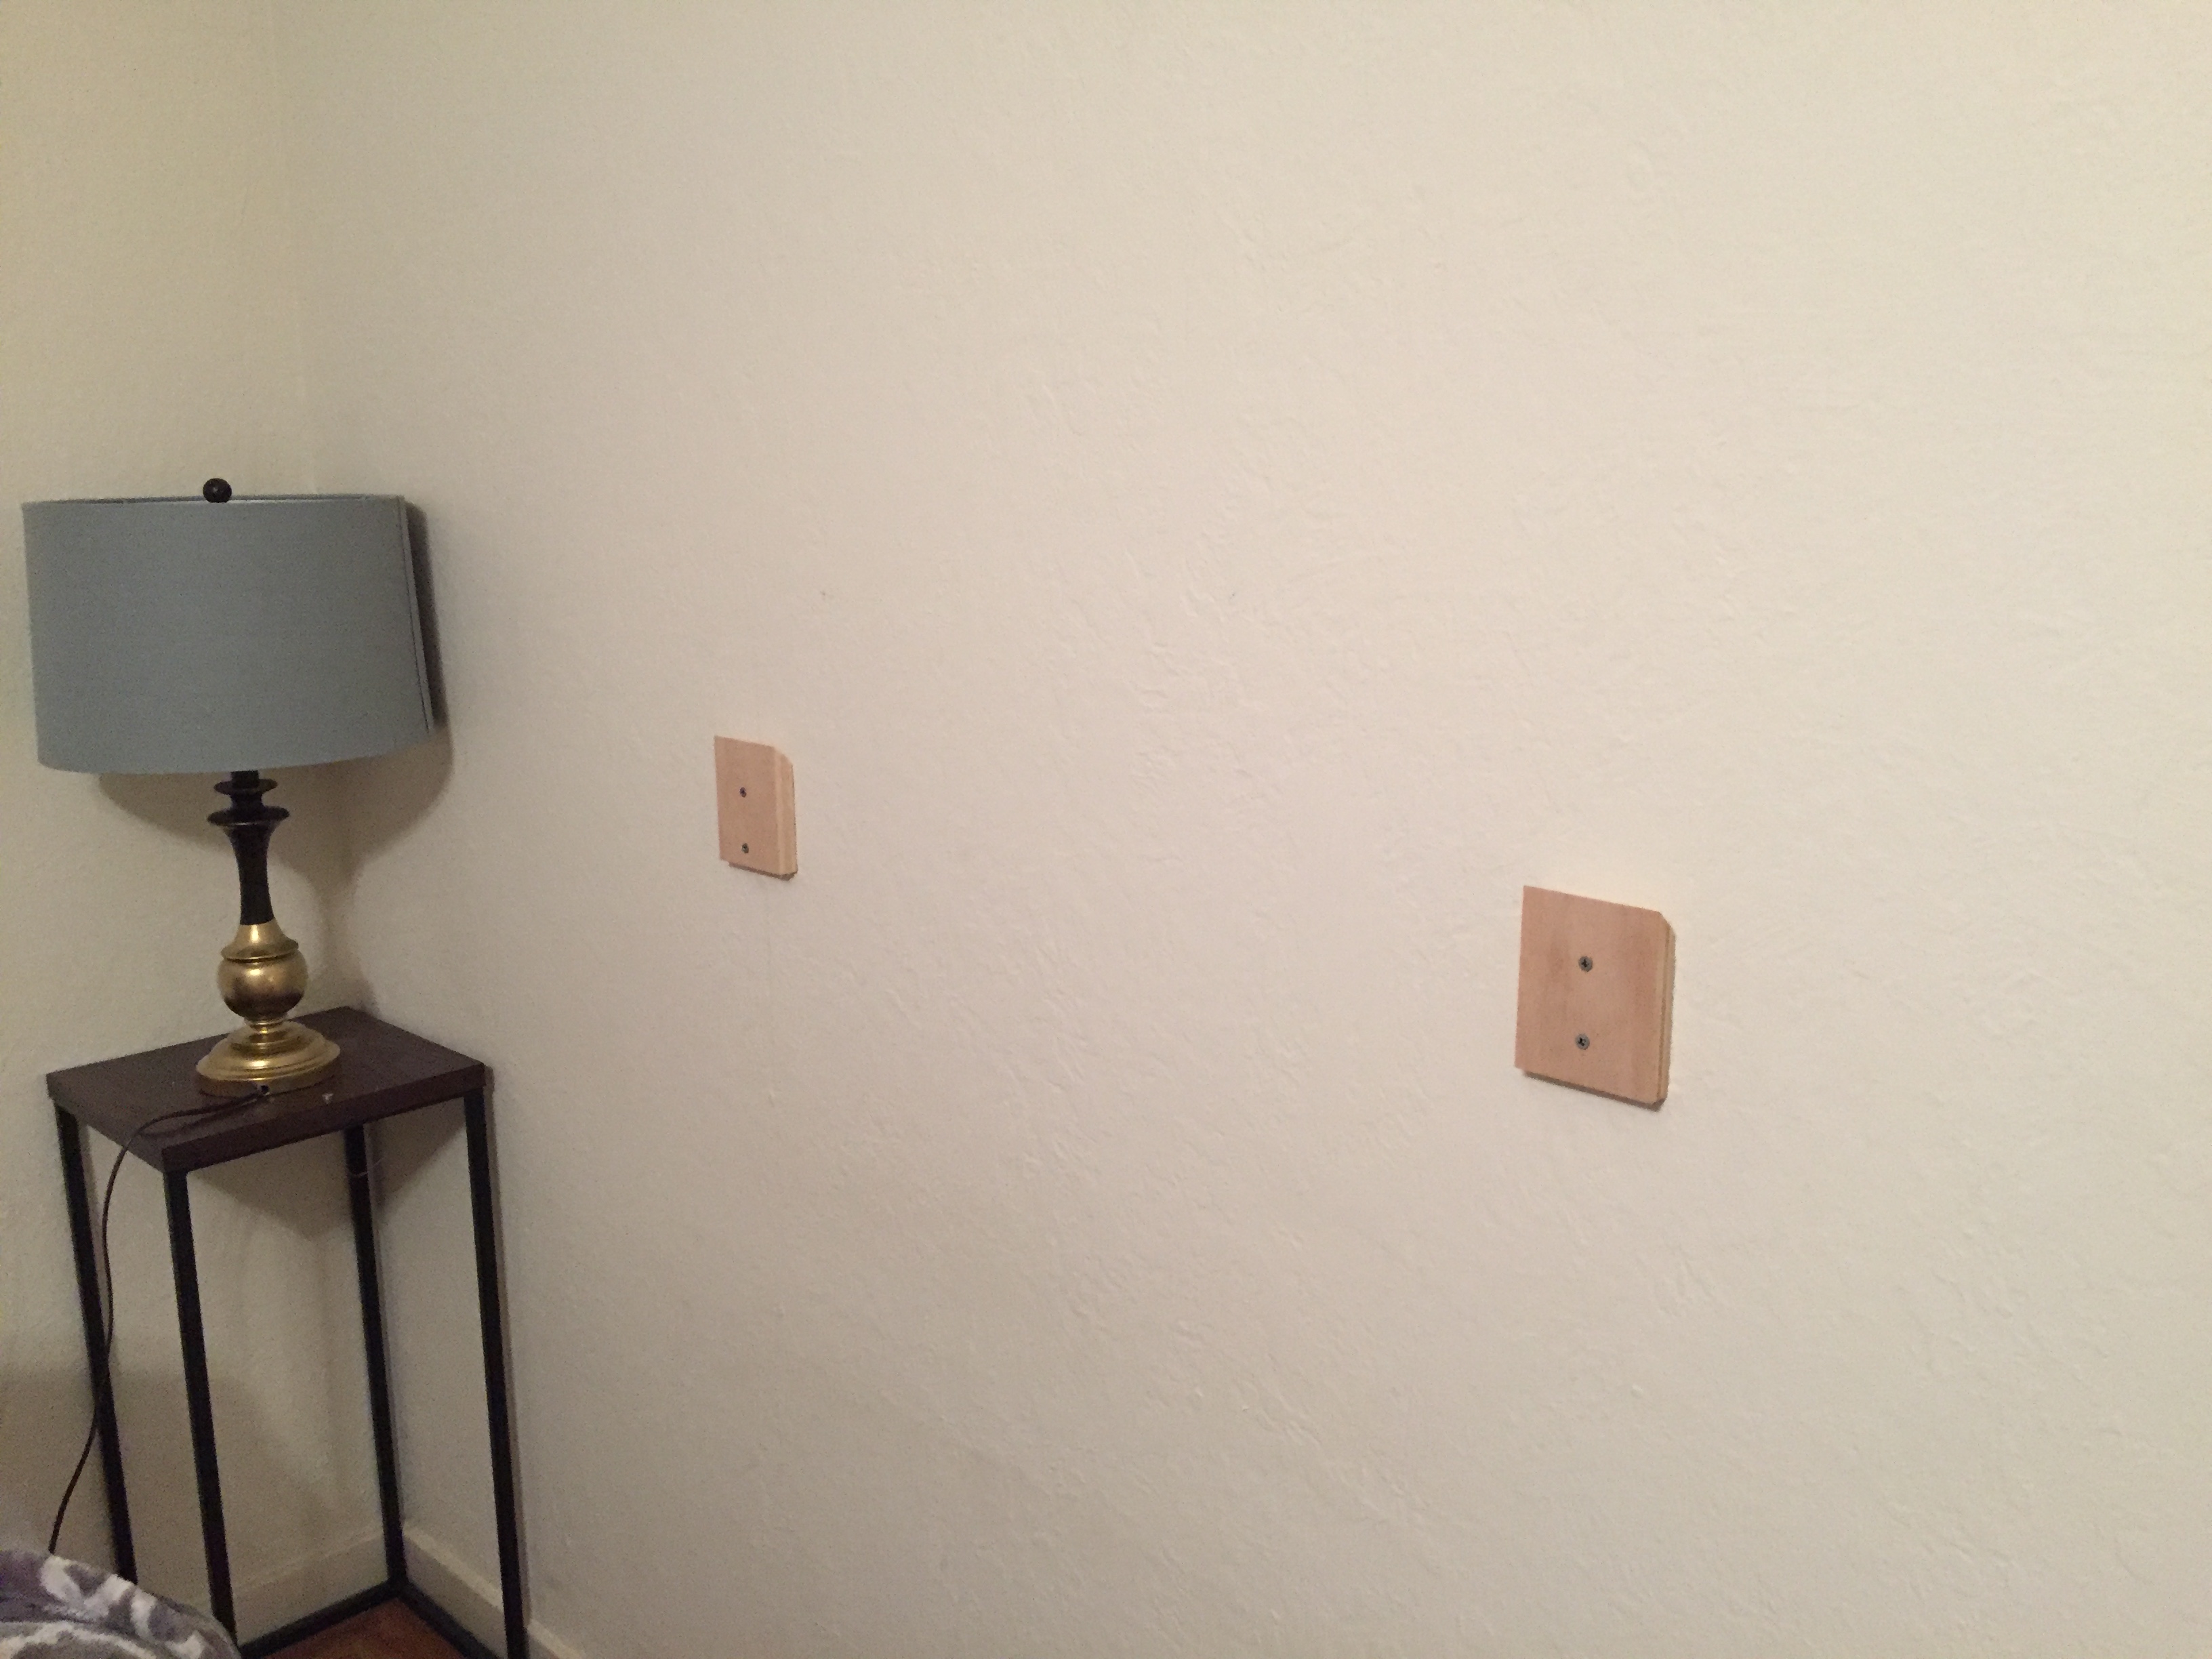
9. Once the cleats were mounted on the wall, all I had to do was lift the headboard onto the cleats and it was completely secure.
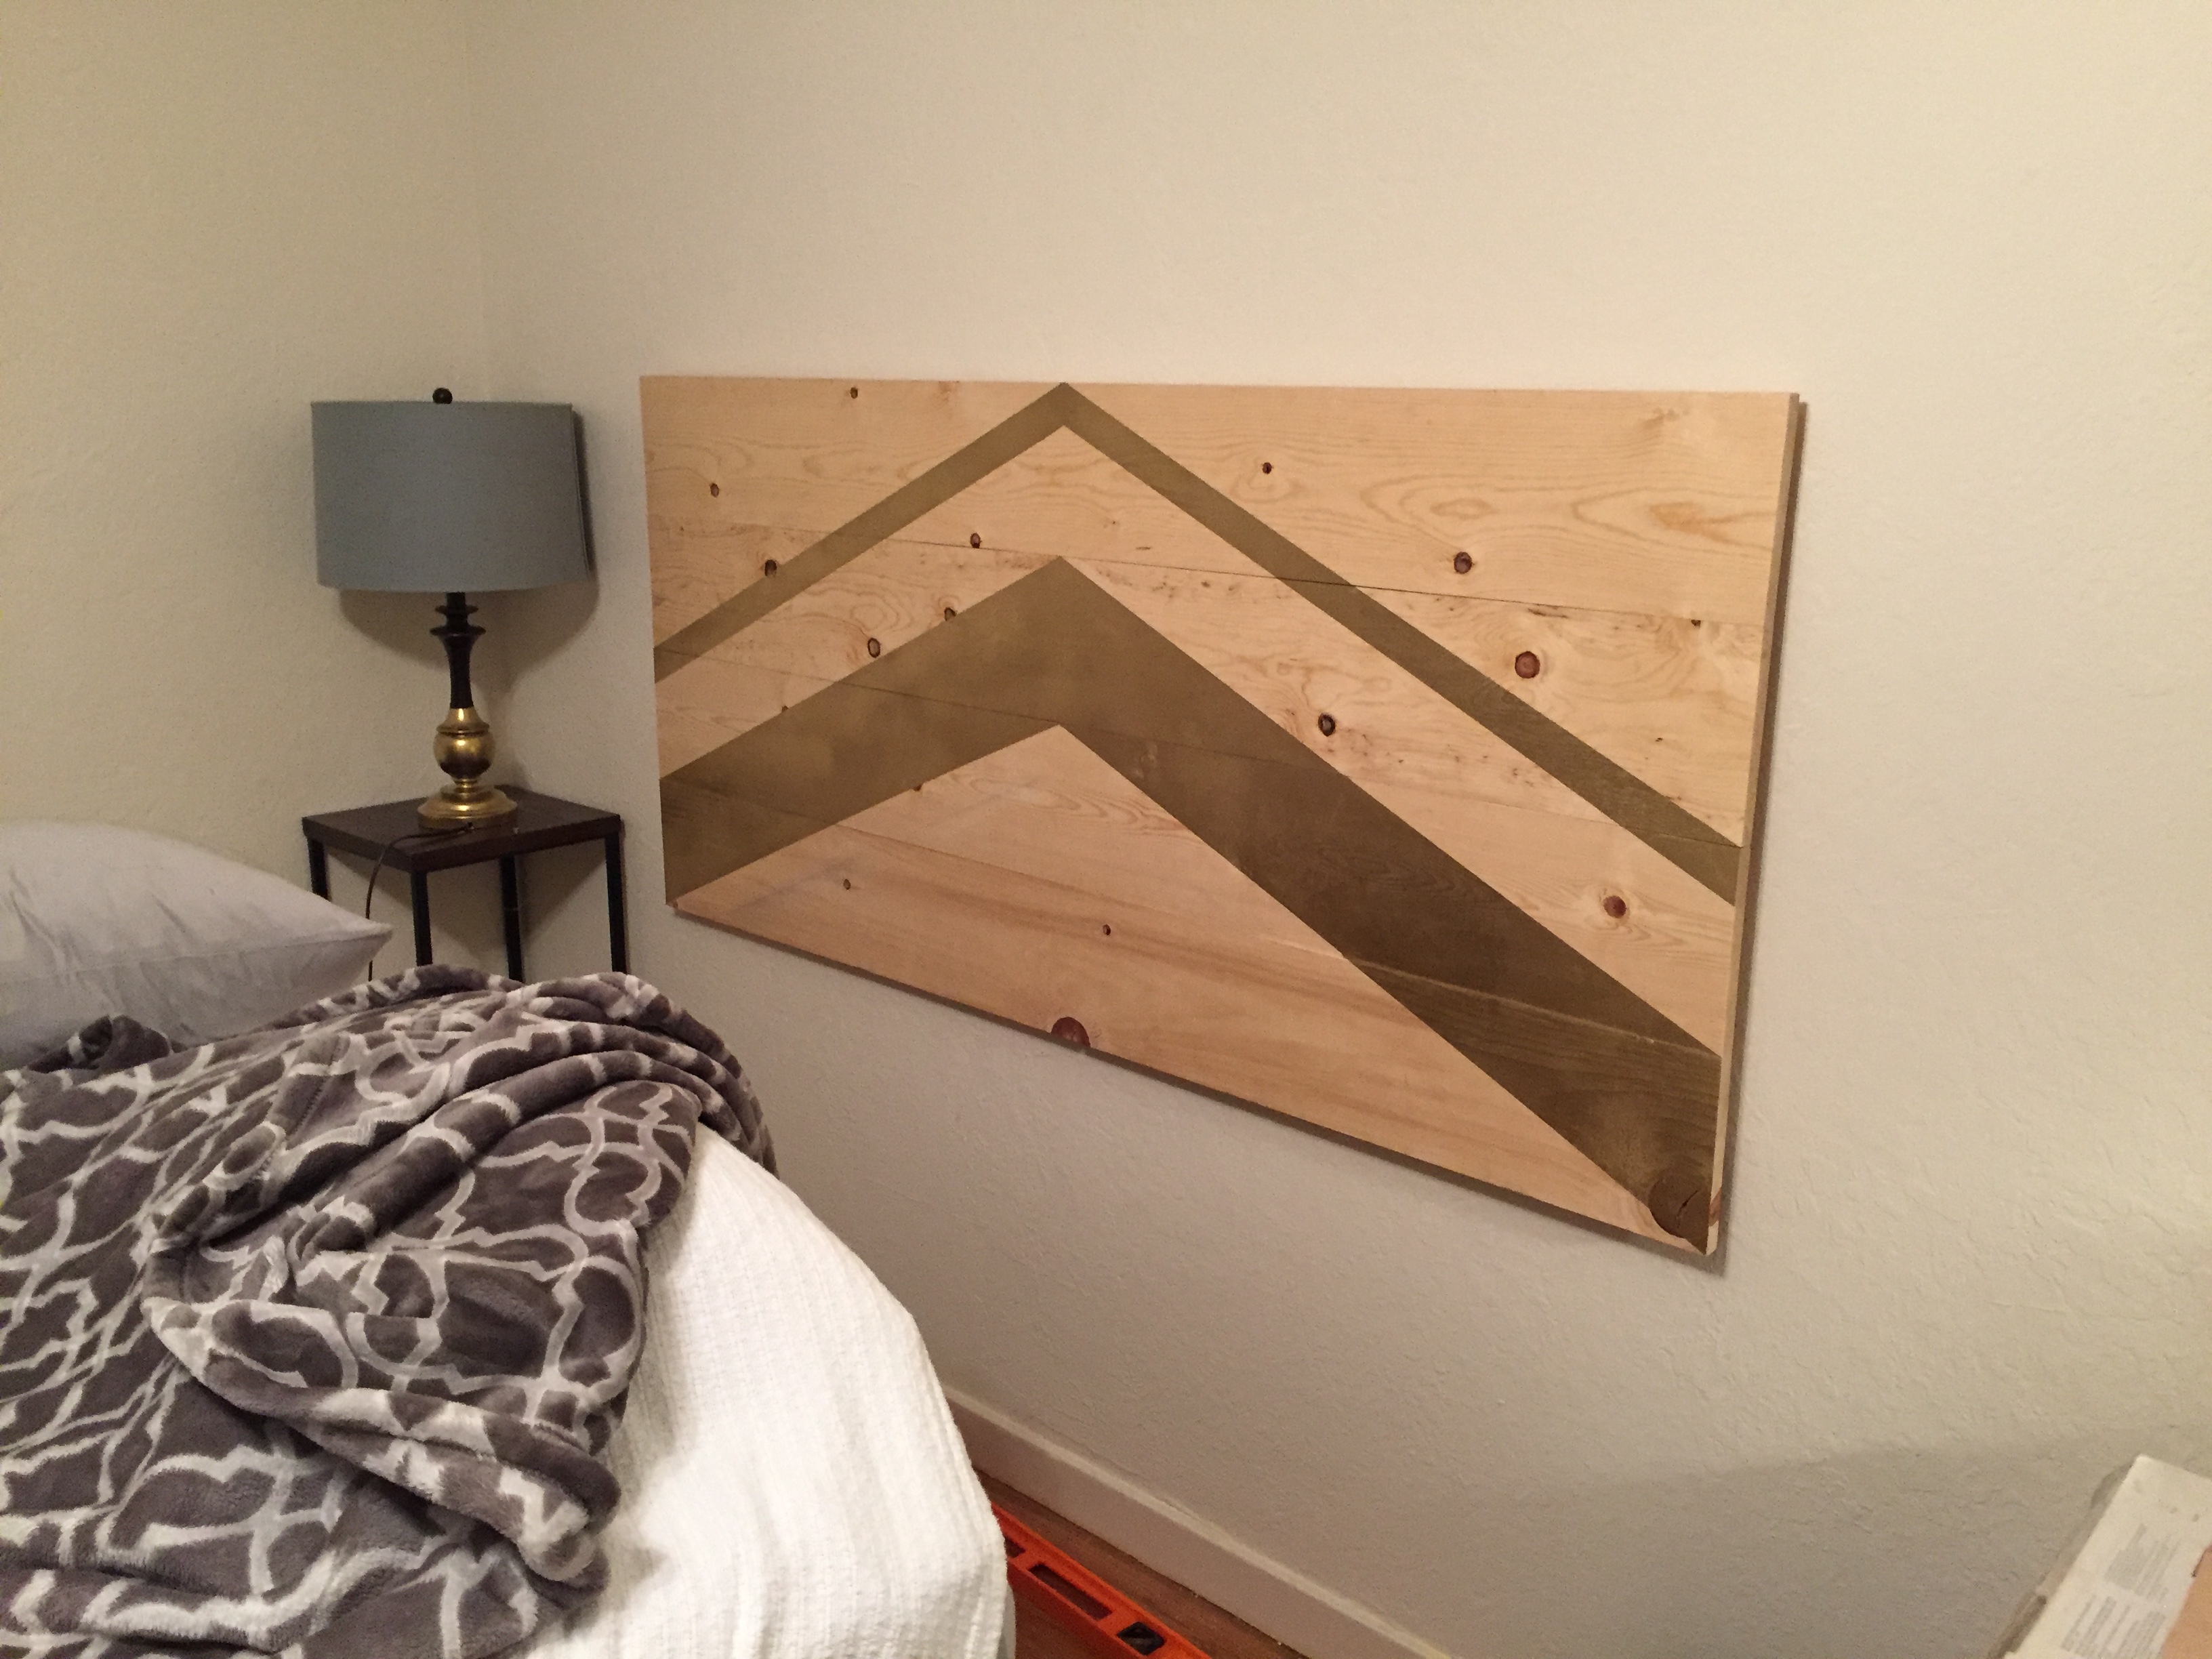
And there you go. A simple DIY headboard with minimal measuring and cutting. Happy building!
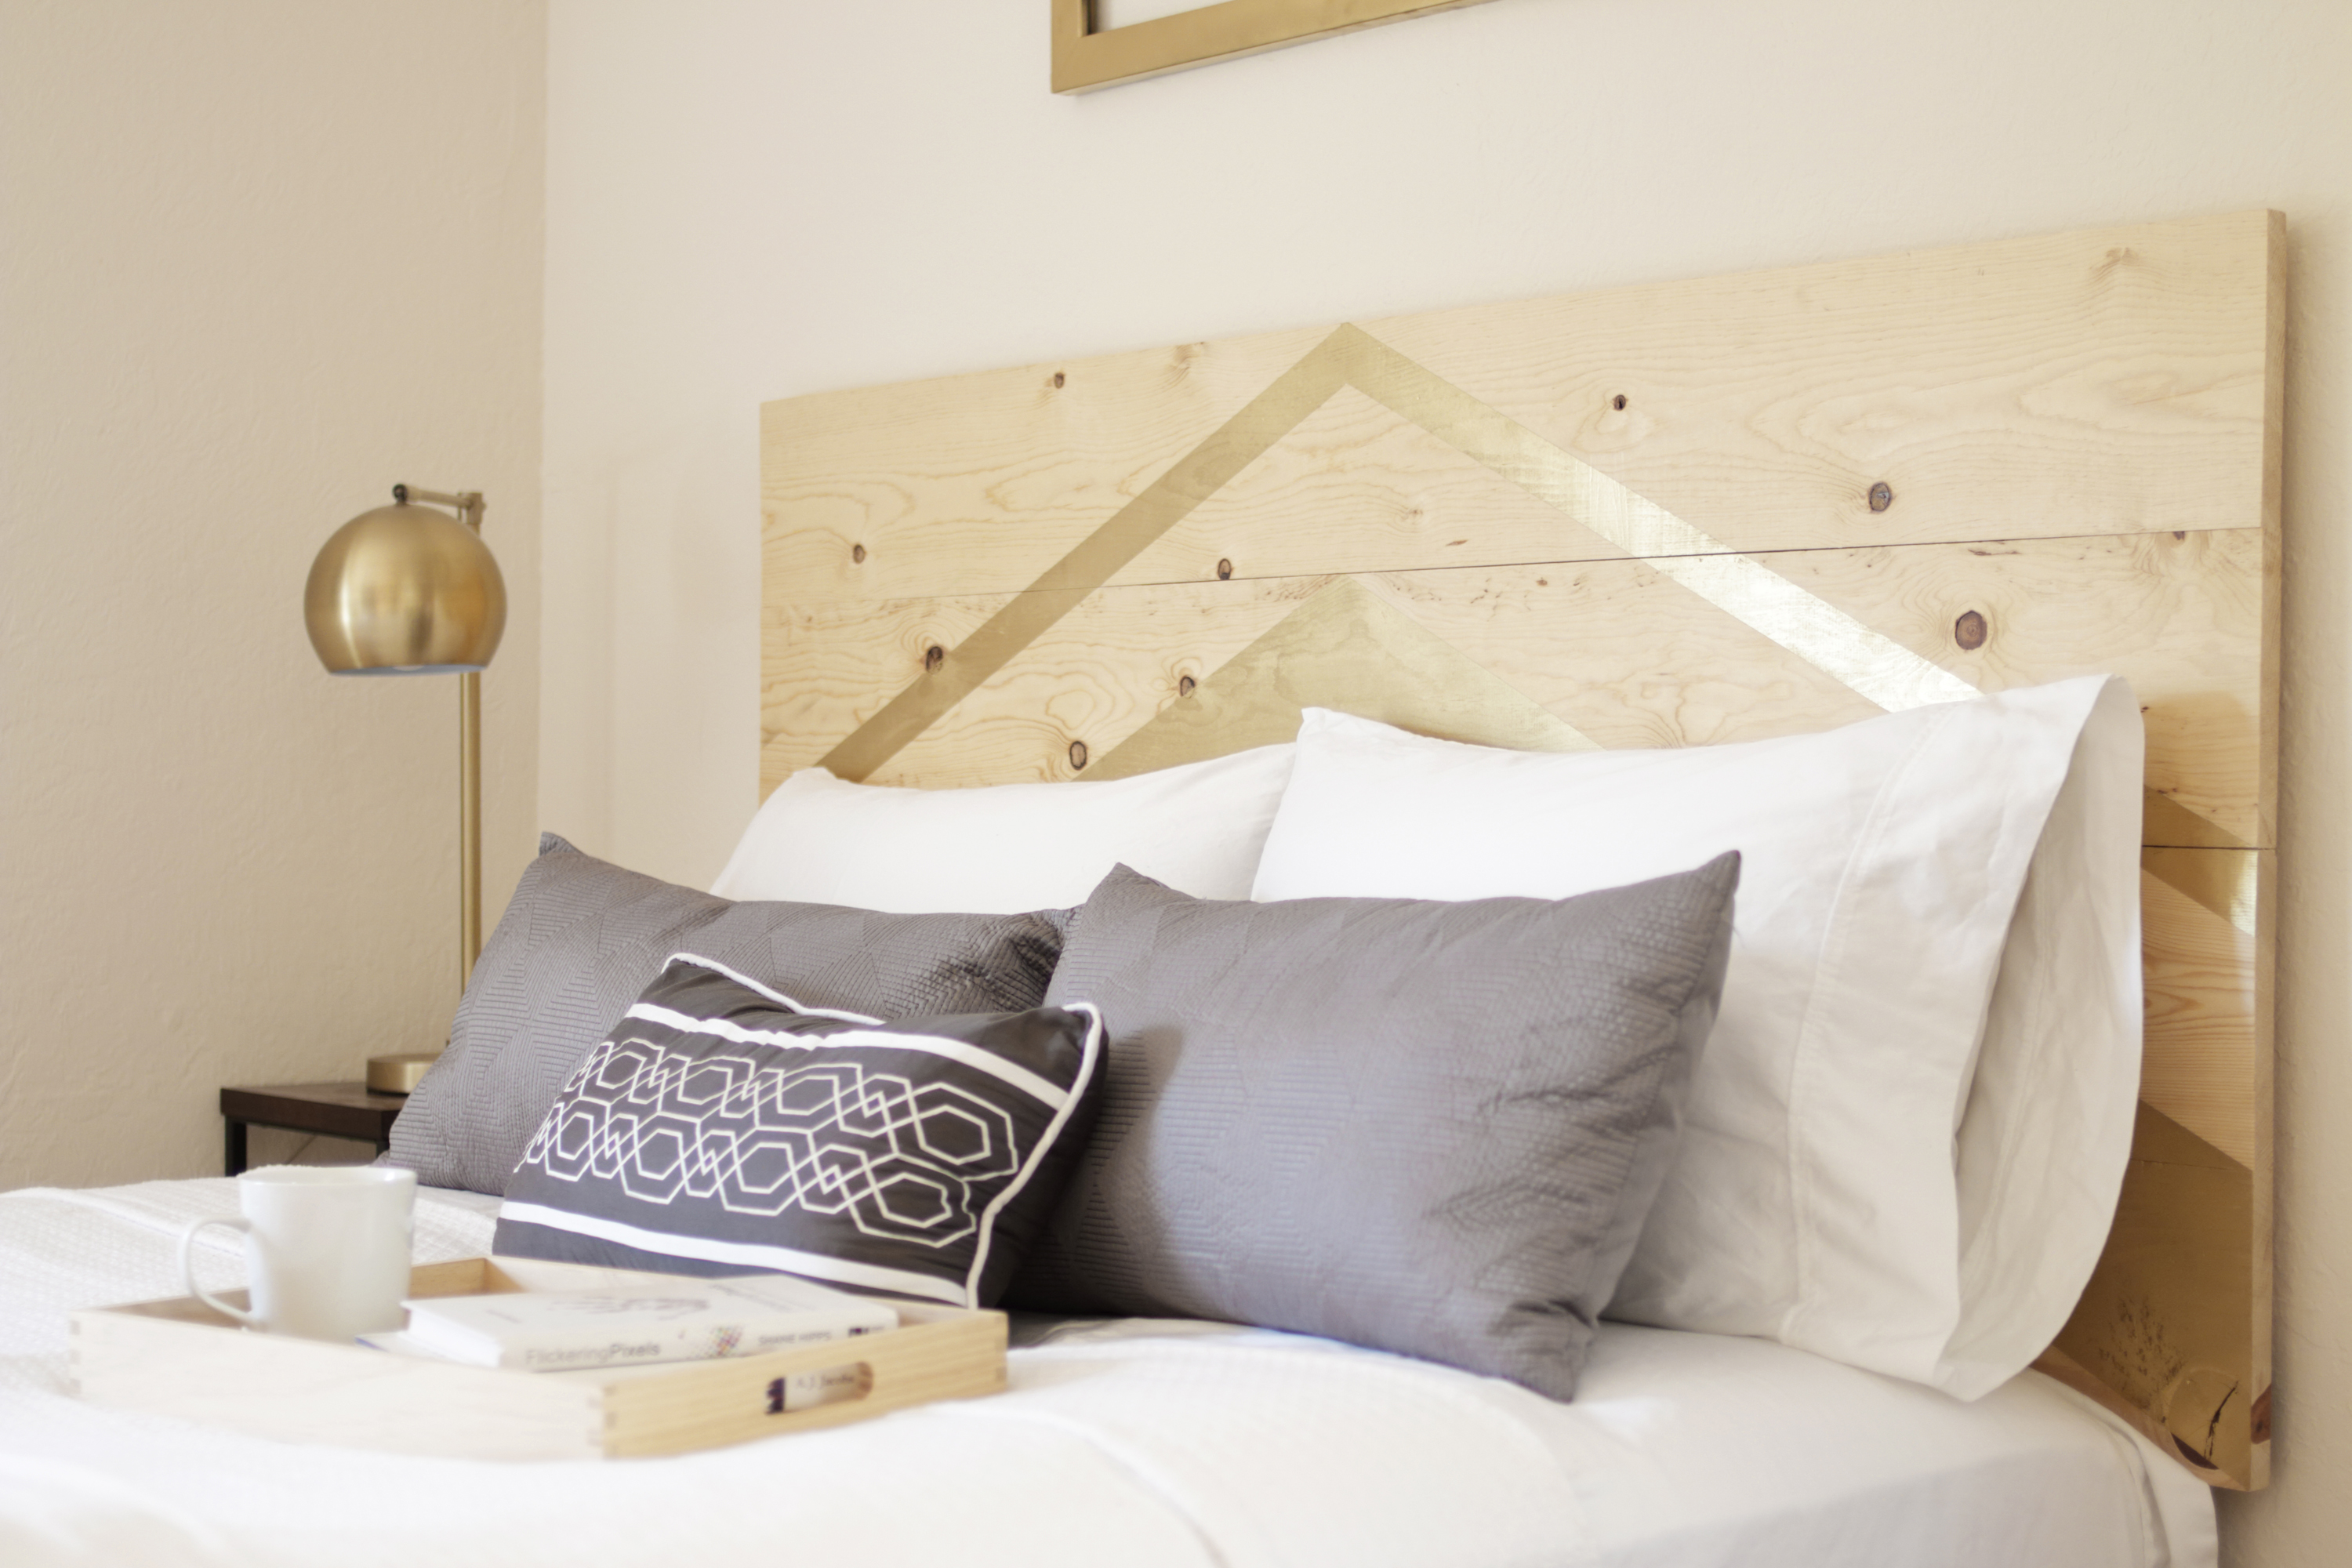
(Brass lamp from Target, Night stand from Ross)

Full disclosure: This post contains affiliate links which means I receive a small commission from any products you purchase as a result of clicking my links. However I will NEVER promote a product I haven’t personally used before or that I do not think is worth purchasing.