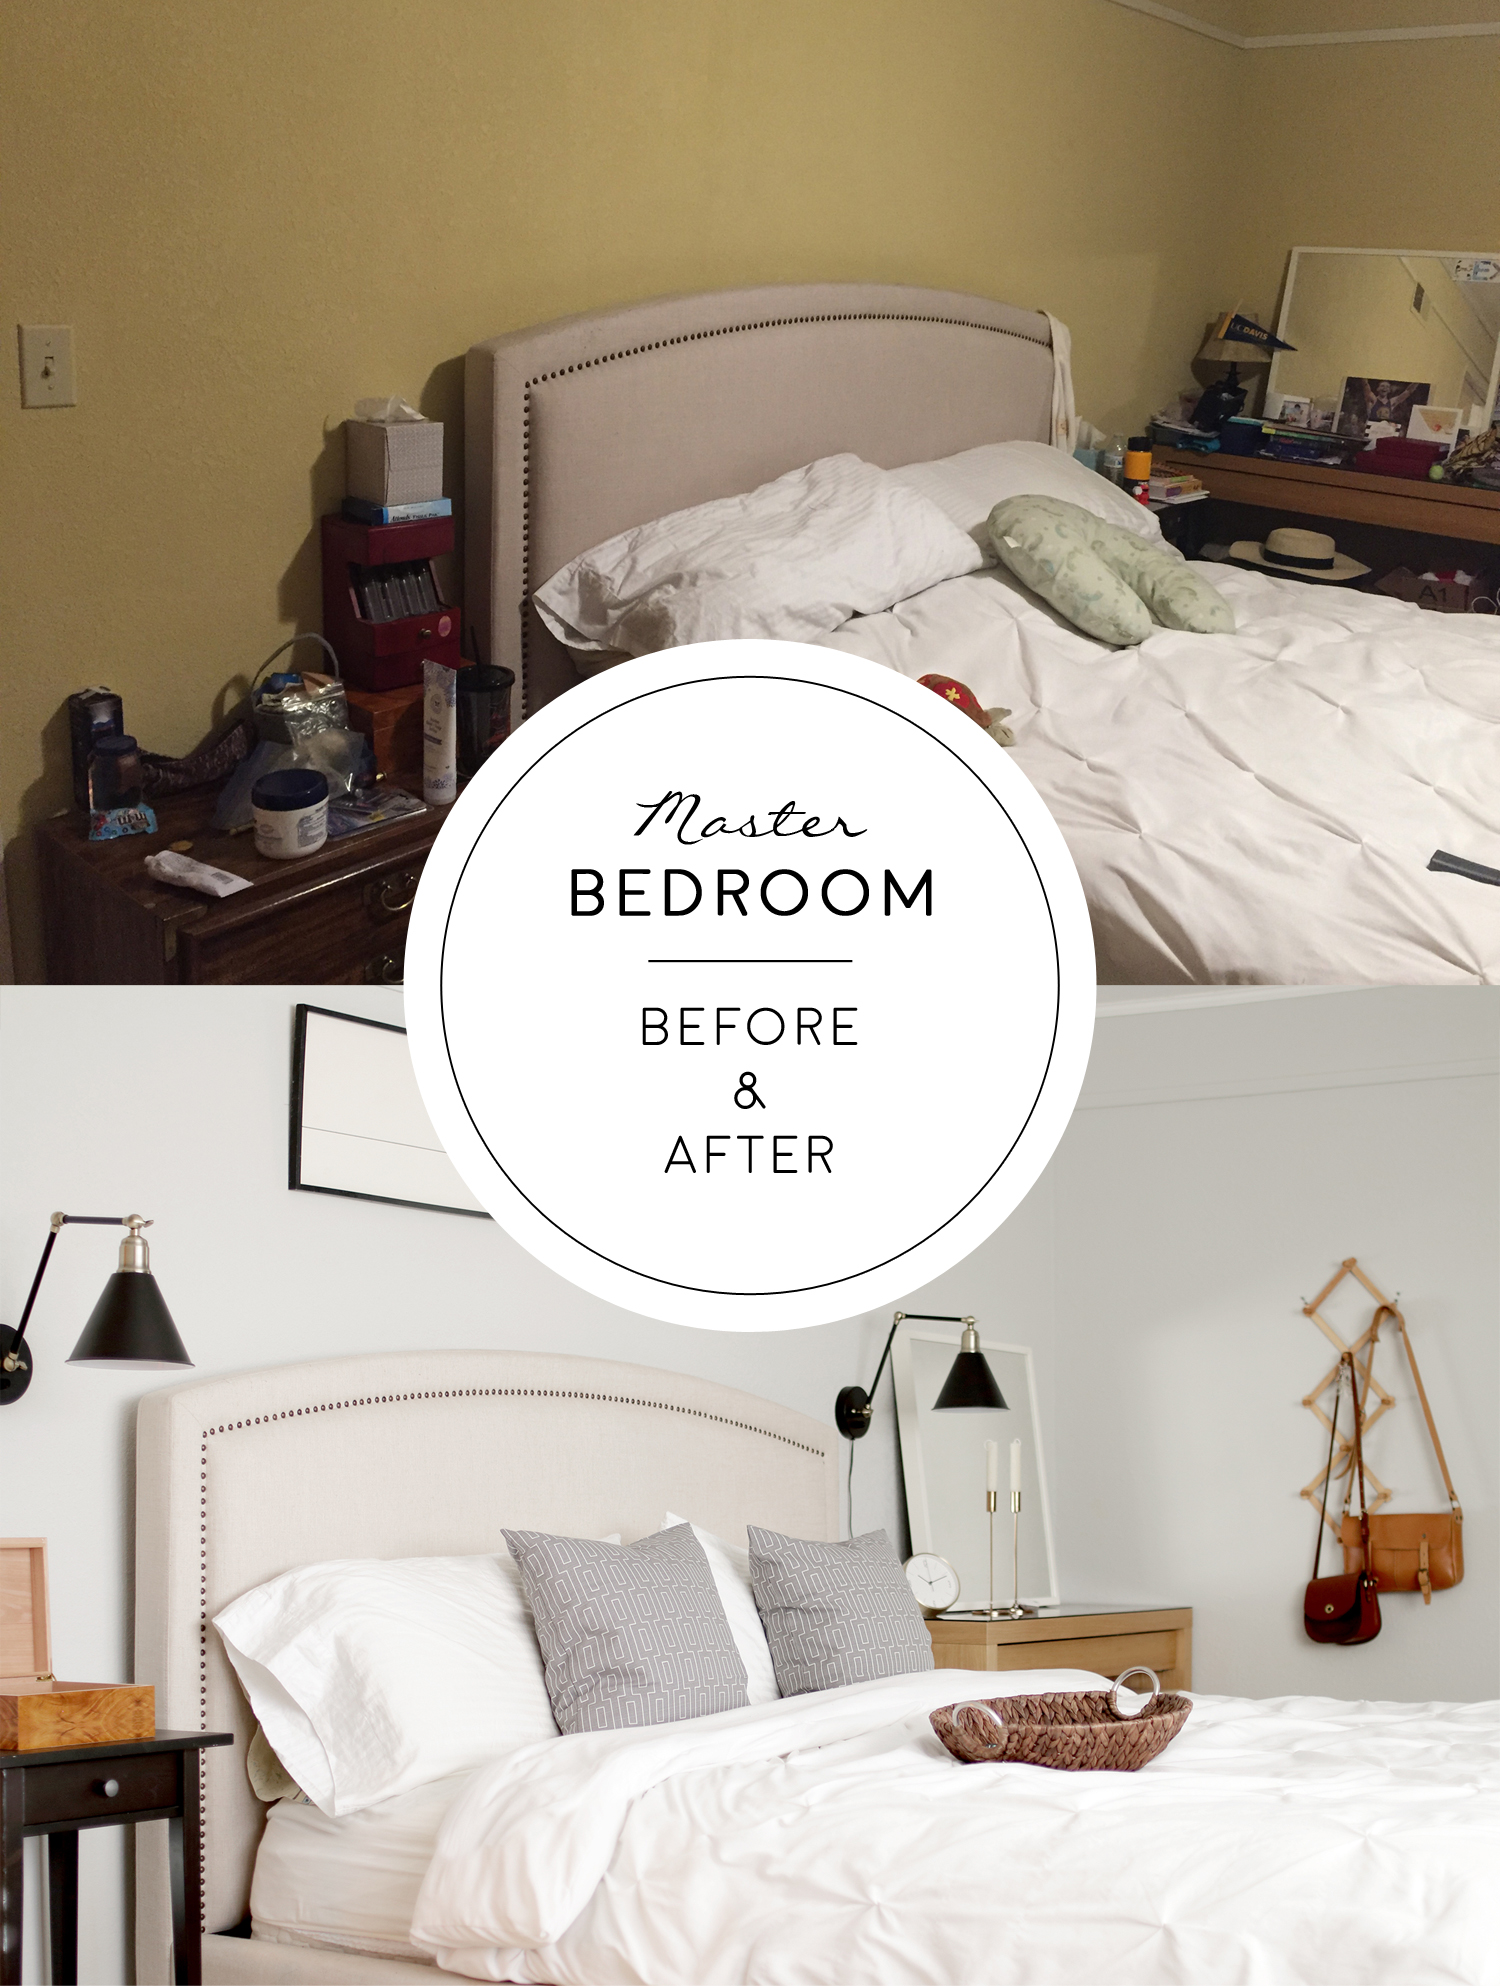
Before and After: $300 Master Bedroom Makeover
My friends, Russell and Melissa, purchased a home in San Ramon, California 2 years ago. San Ramon is located in the east bay and boasts highly rated schools and low crime rates – which inevitably comes with a huge price tag. It didn’t leave a lot of leftover cash for renovations or finishes.
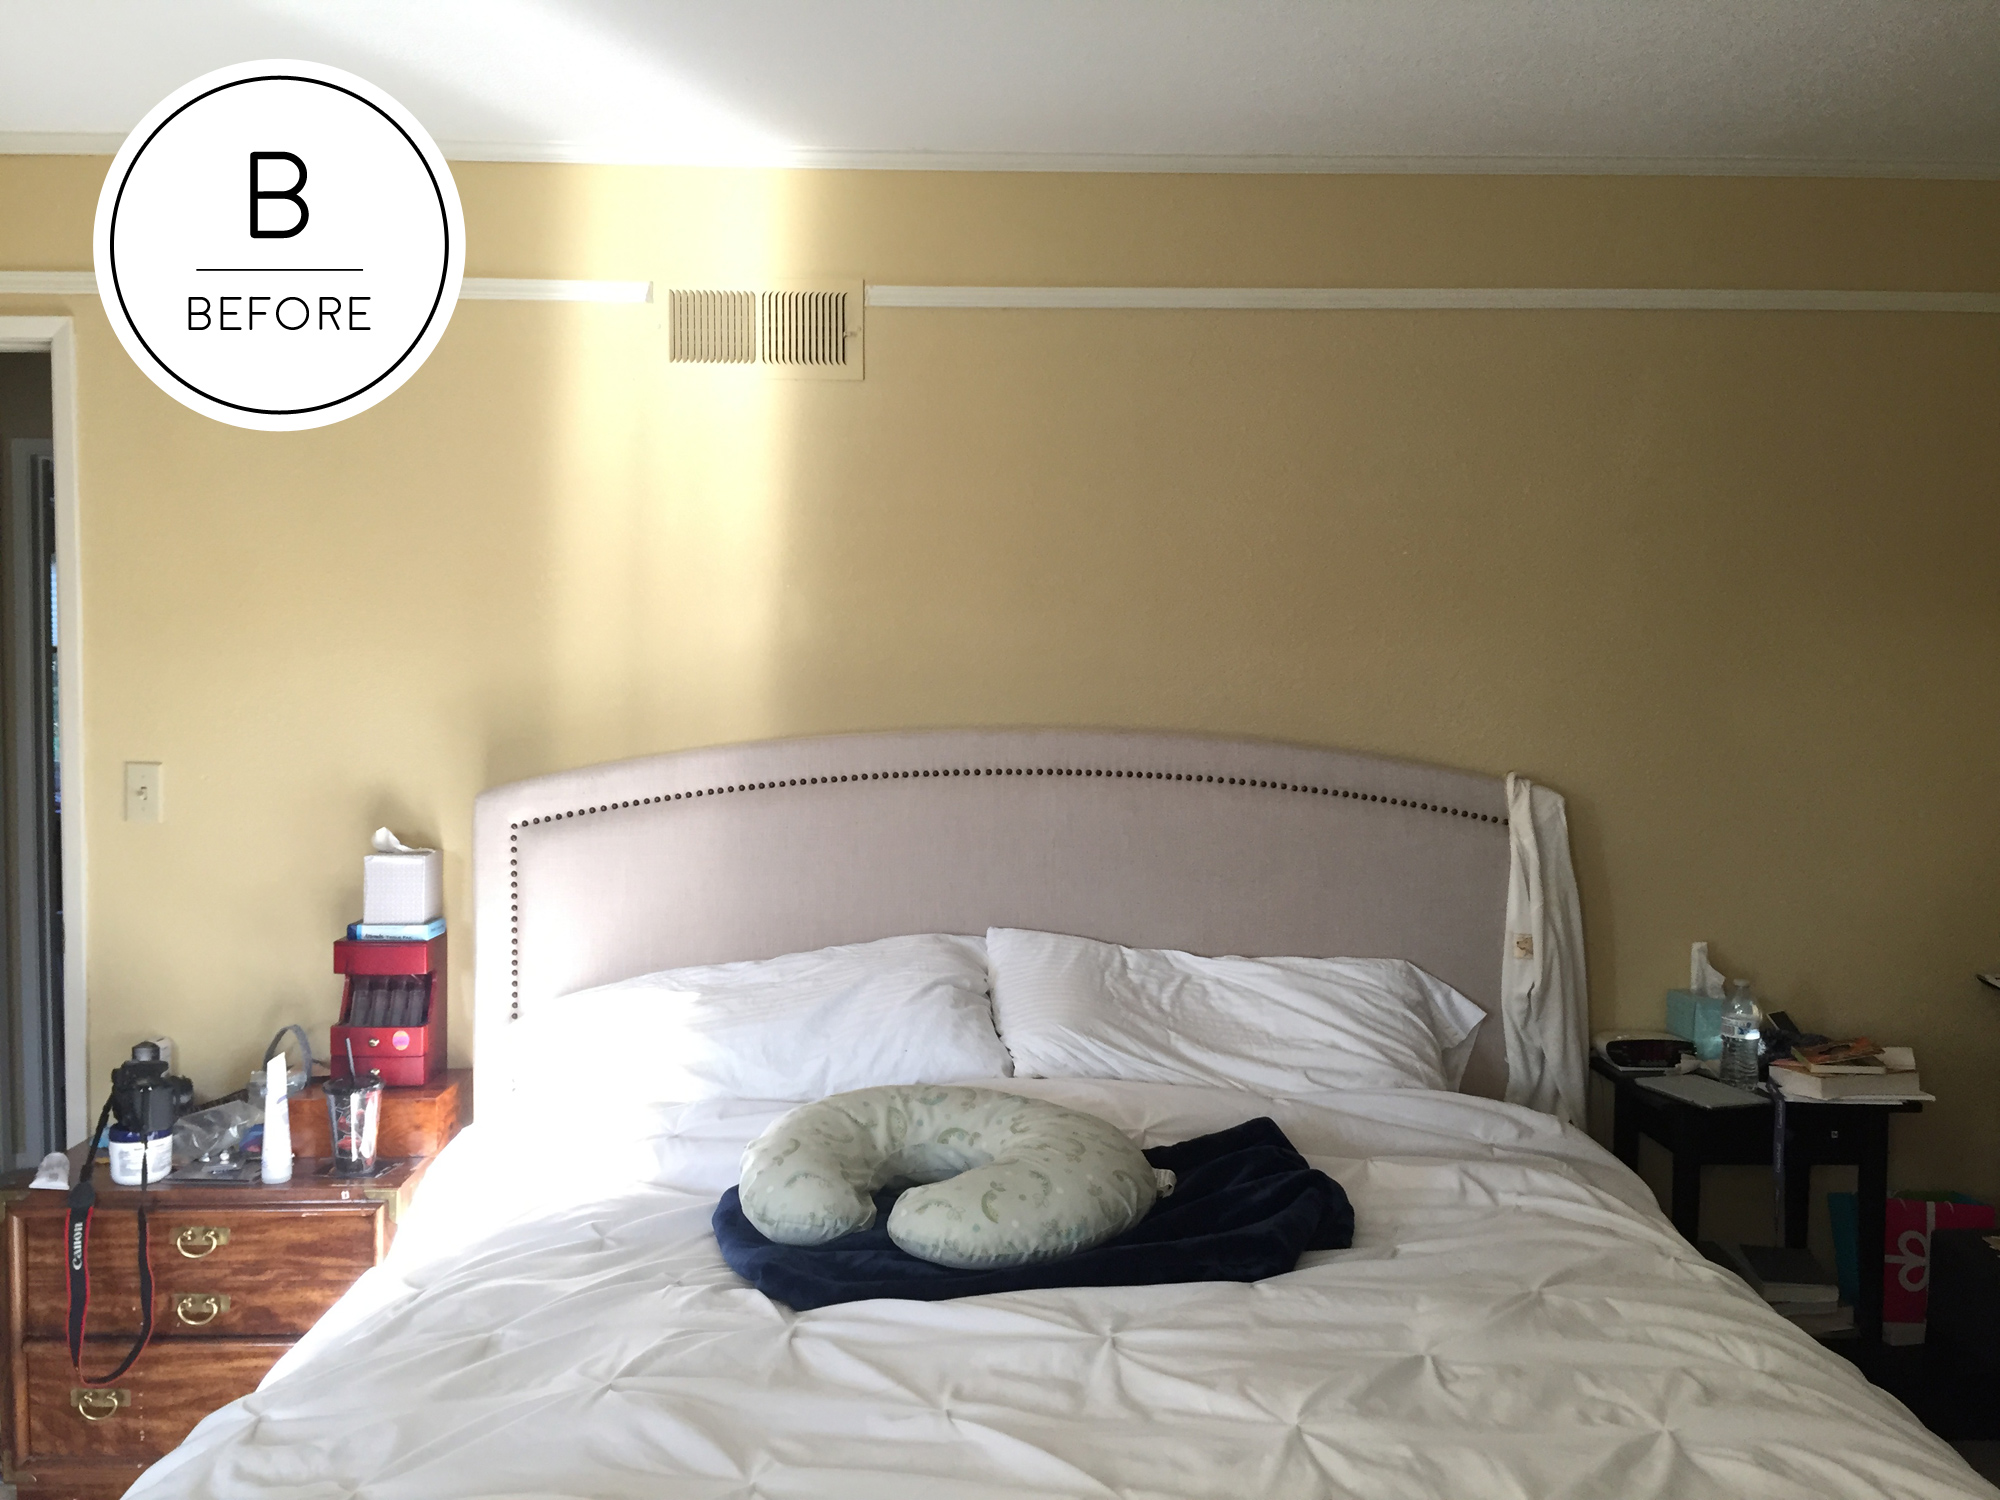
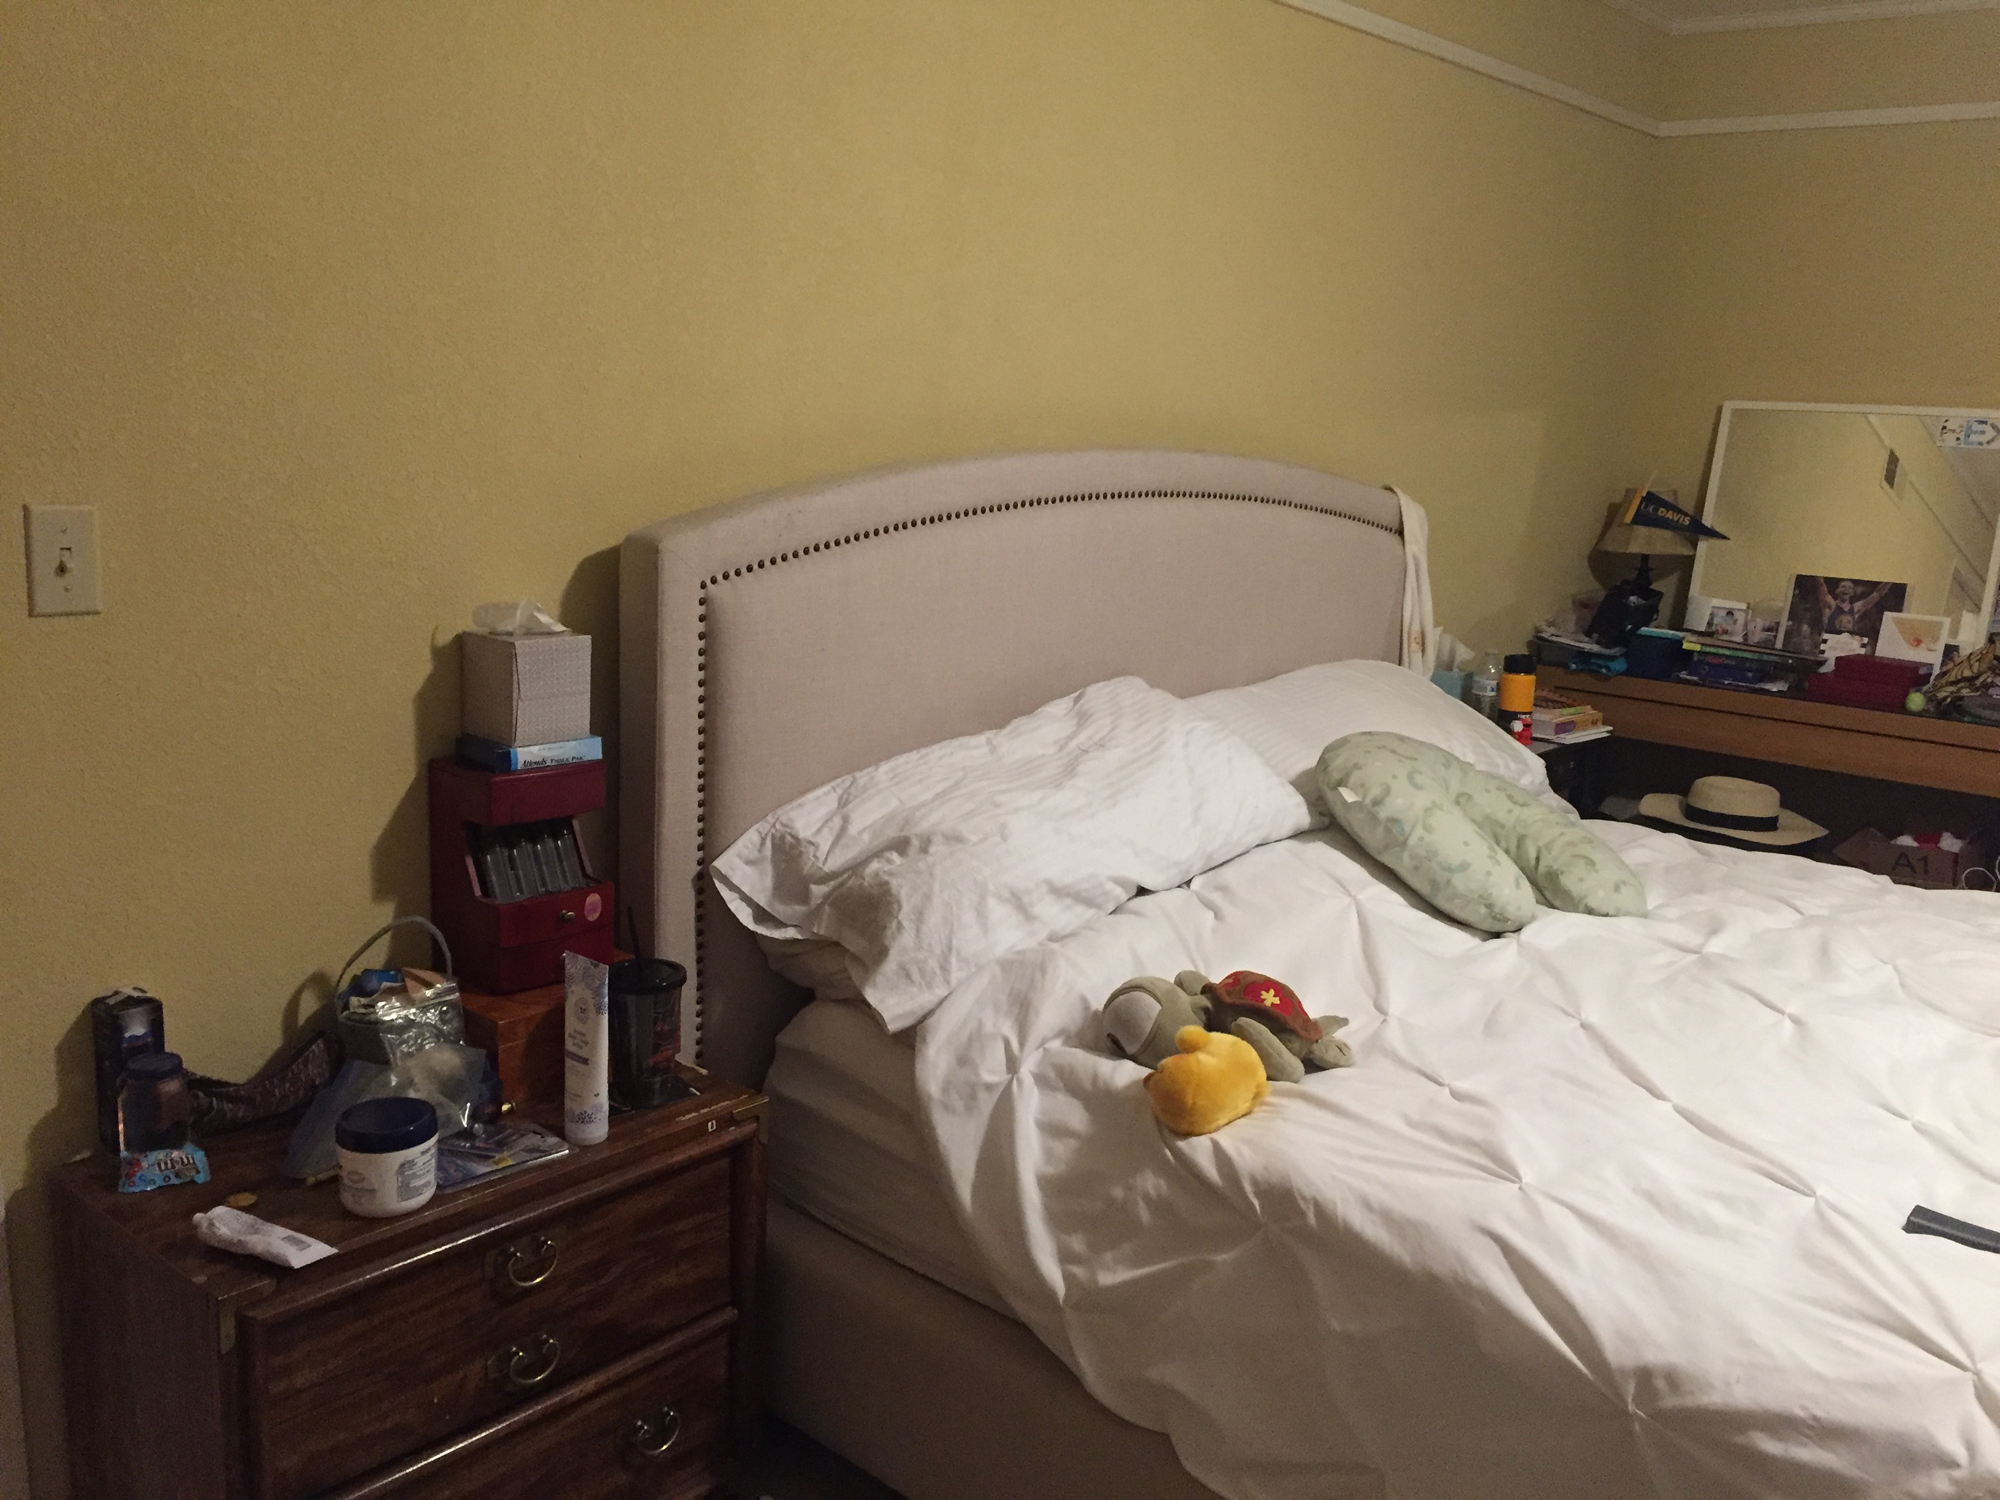
The 40 yr old home was previously owned by an elderly couple so the decor was outdated to say the least. Since I used to live with them and they are like a second family, I told them I would renovate a room for them without any charge as long as they covered the cost of materials. They gave me $300 to redo their master bedroom. $300!! This was a very very tight budget especially since I had ambitious plans for the space, but I was up for the challenge.
Identifying the problems
When I design a space, I generally try to see where the problem areas are and then I build off of it:
- Clutter – there was too much stuff in the room so we needed to find a way to store it or get rid of it
- Colors – the colors in the room were way too dark and muddy. It didn’t have that breezy and light California vibe.
- Mis-matched furniture – the furniture combinations were kind of eclectic which is not necessarily a bad thing, but we needed to arrange things differently so the furniture would feel less arbitrary.
- Horrible vent placement – This made me mad seeing a vent right above the bed. But you have to work with what you’ve got.
Design
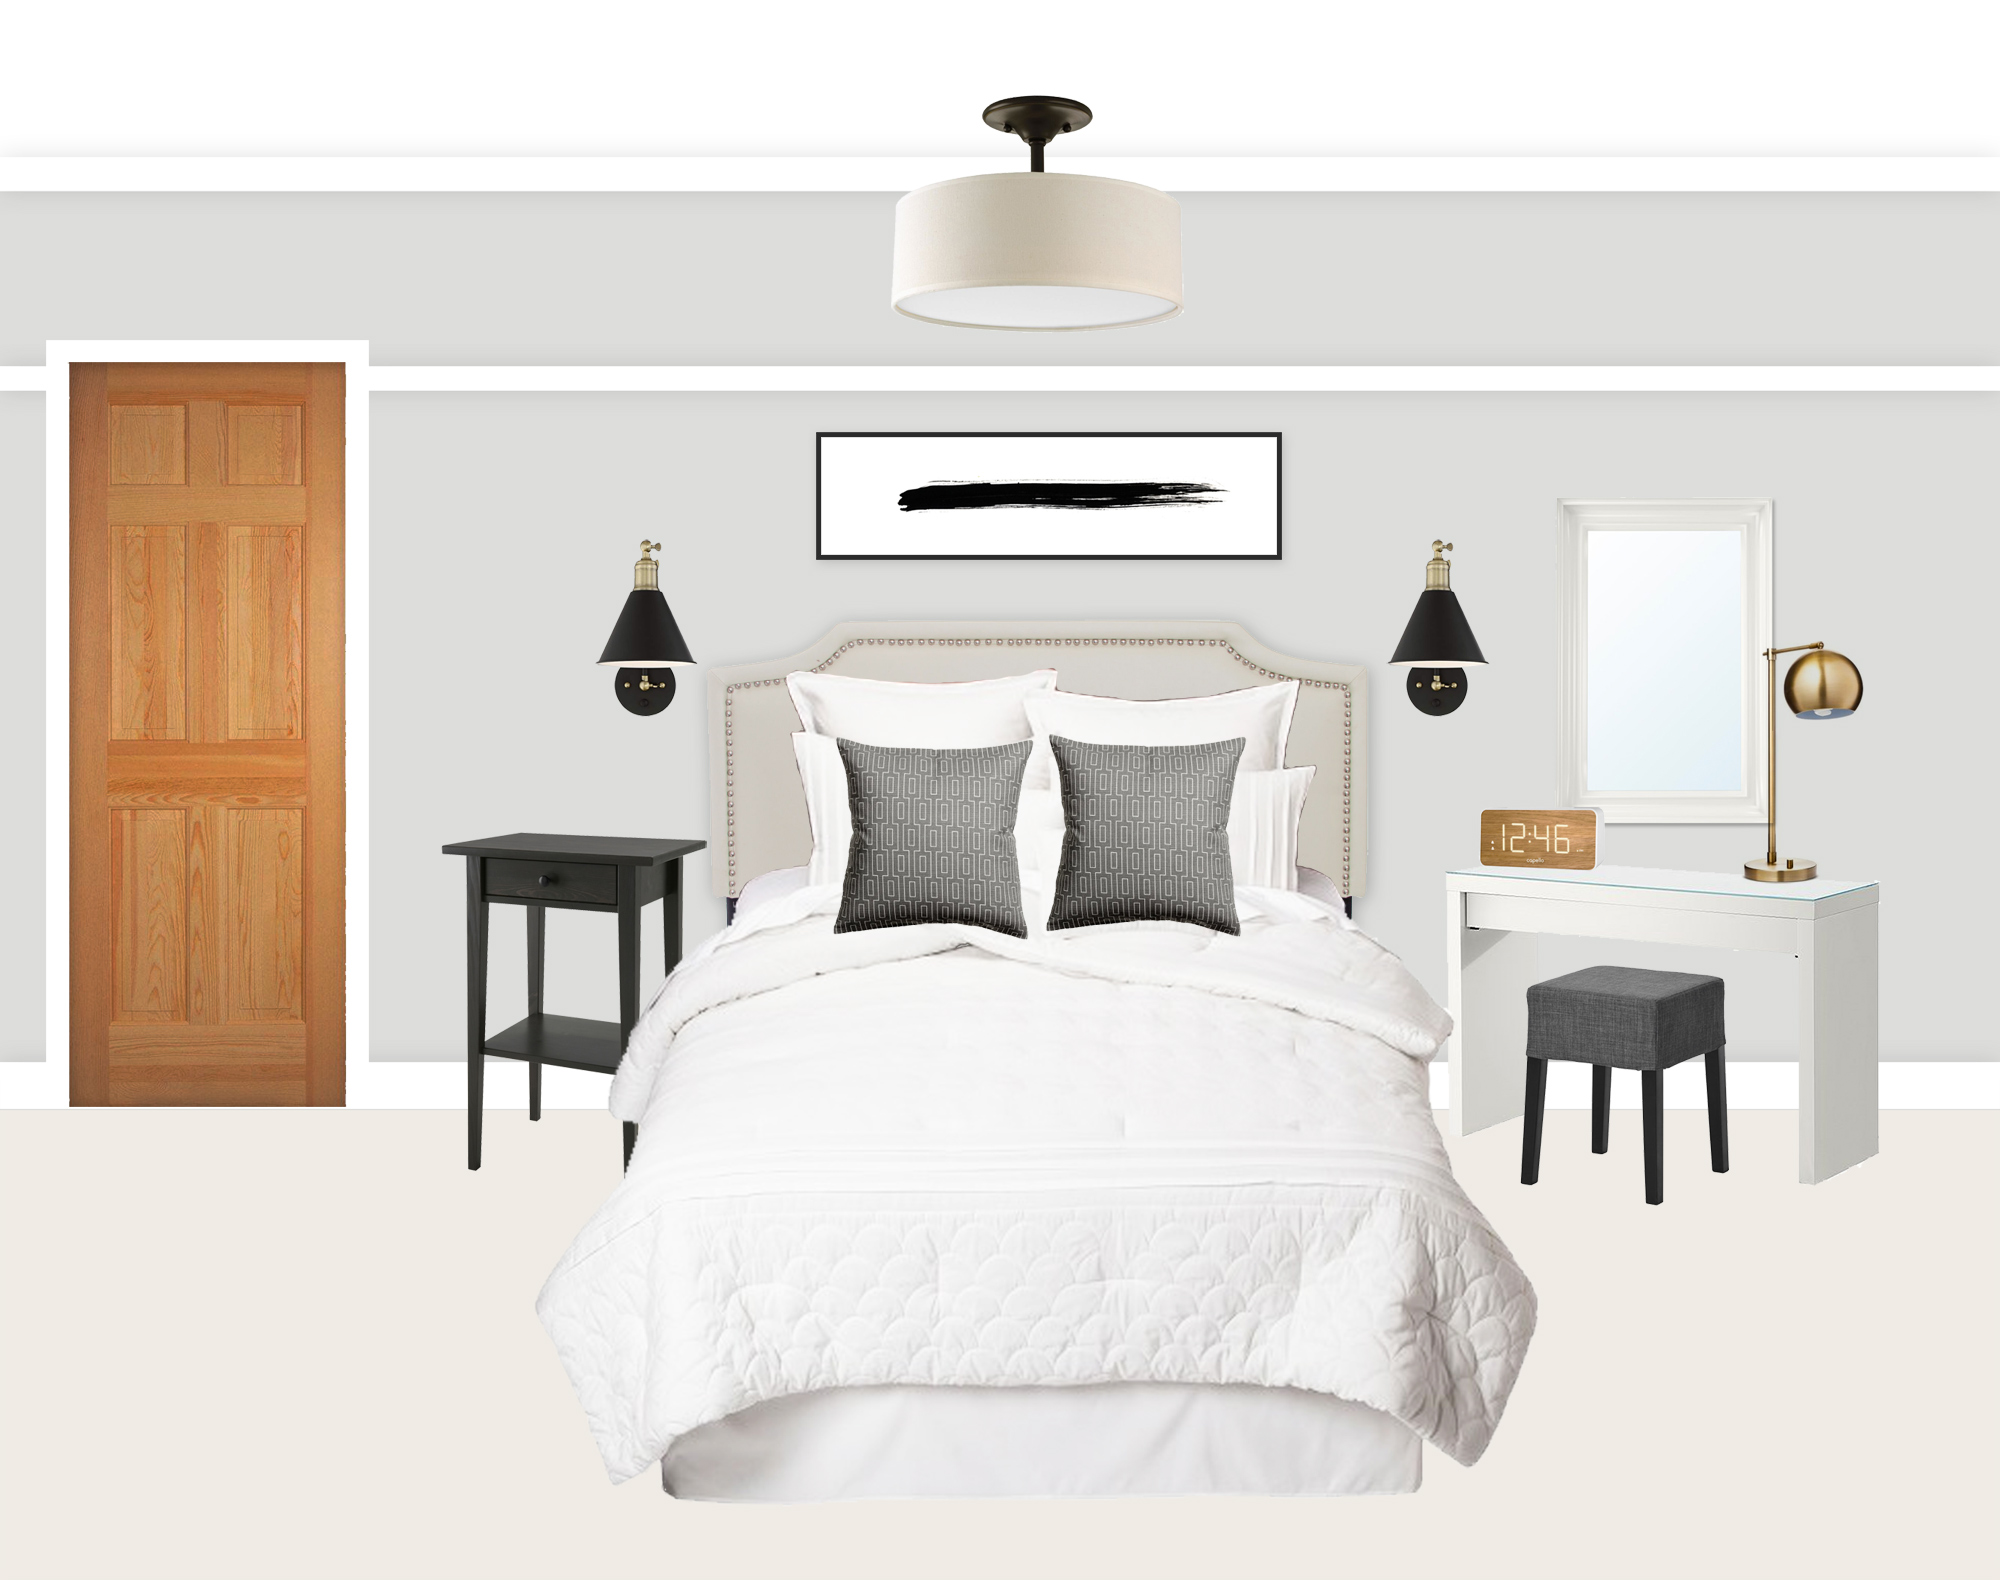
This was my original design board for the room. You can tell I used a lot of the existing furniture, but capitalized on color and lighting.
Paint
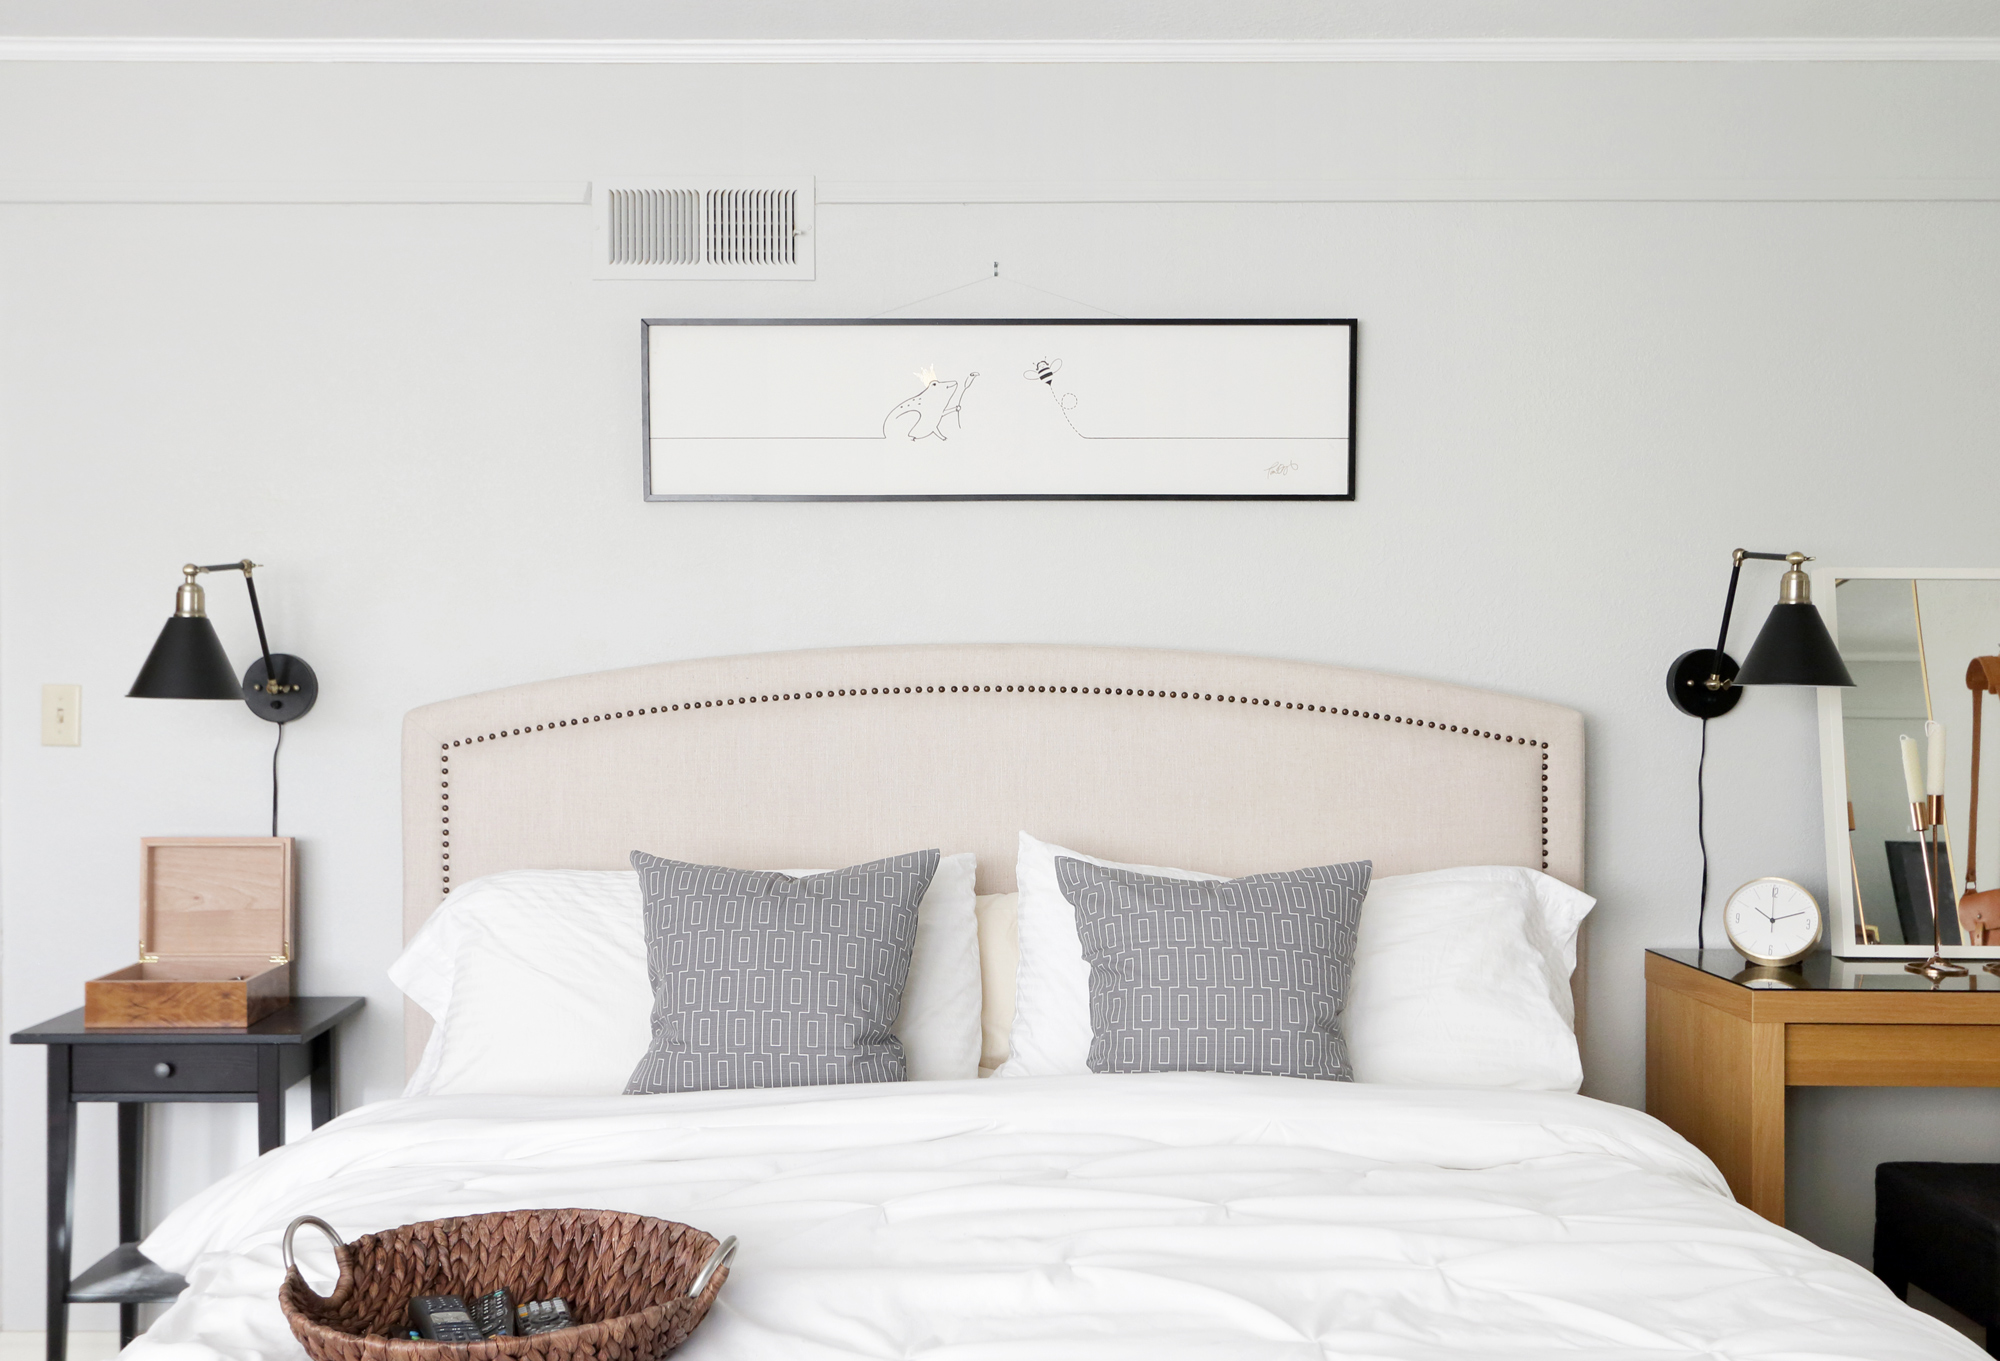
I knew I had to spend the cash where it mattered the most. The absolute first thing that needed to change was the wall color. It was a dark mustard yellow that made the room look like a furnace when the afternoon sun started shining in. I finally landed on Benjamin Moore’s Gray Owl.
After painting the walls, the original trim color stood out in an awful way. It was an antique white which made the gray look like a baby blue. It looked like a doll house. So I dug up some leftover Behr Polar Bear White from my kitchen renovation and painted the crown molding. I also ended up painting the middle trim the same as the walls because it randomly cut off at that annoying wall vent. The paint job made a MASSIVE difference in the room, and it only cost $45. When Melissa saw it, she felt like this was the color it was always meant to be.
De-clutter and Rearrange
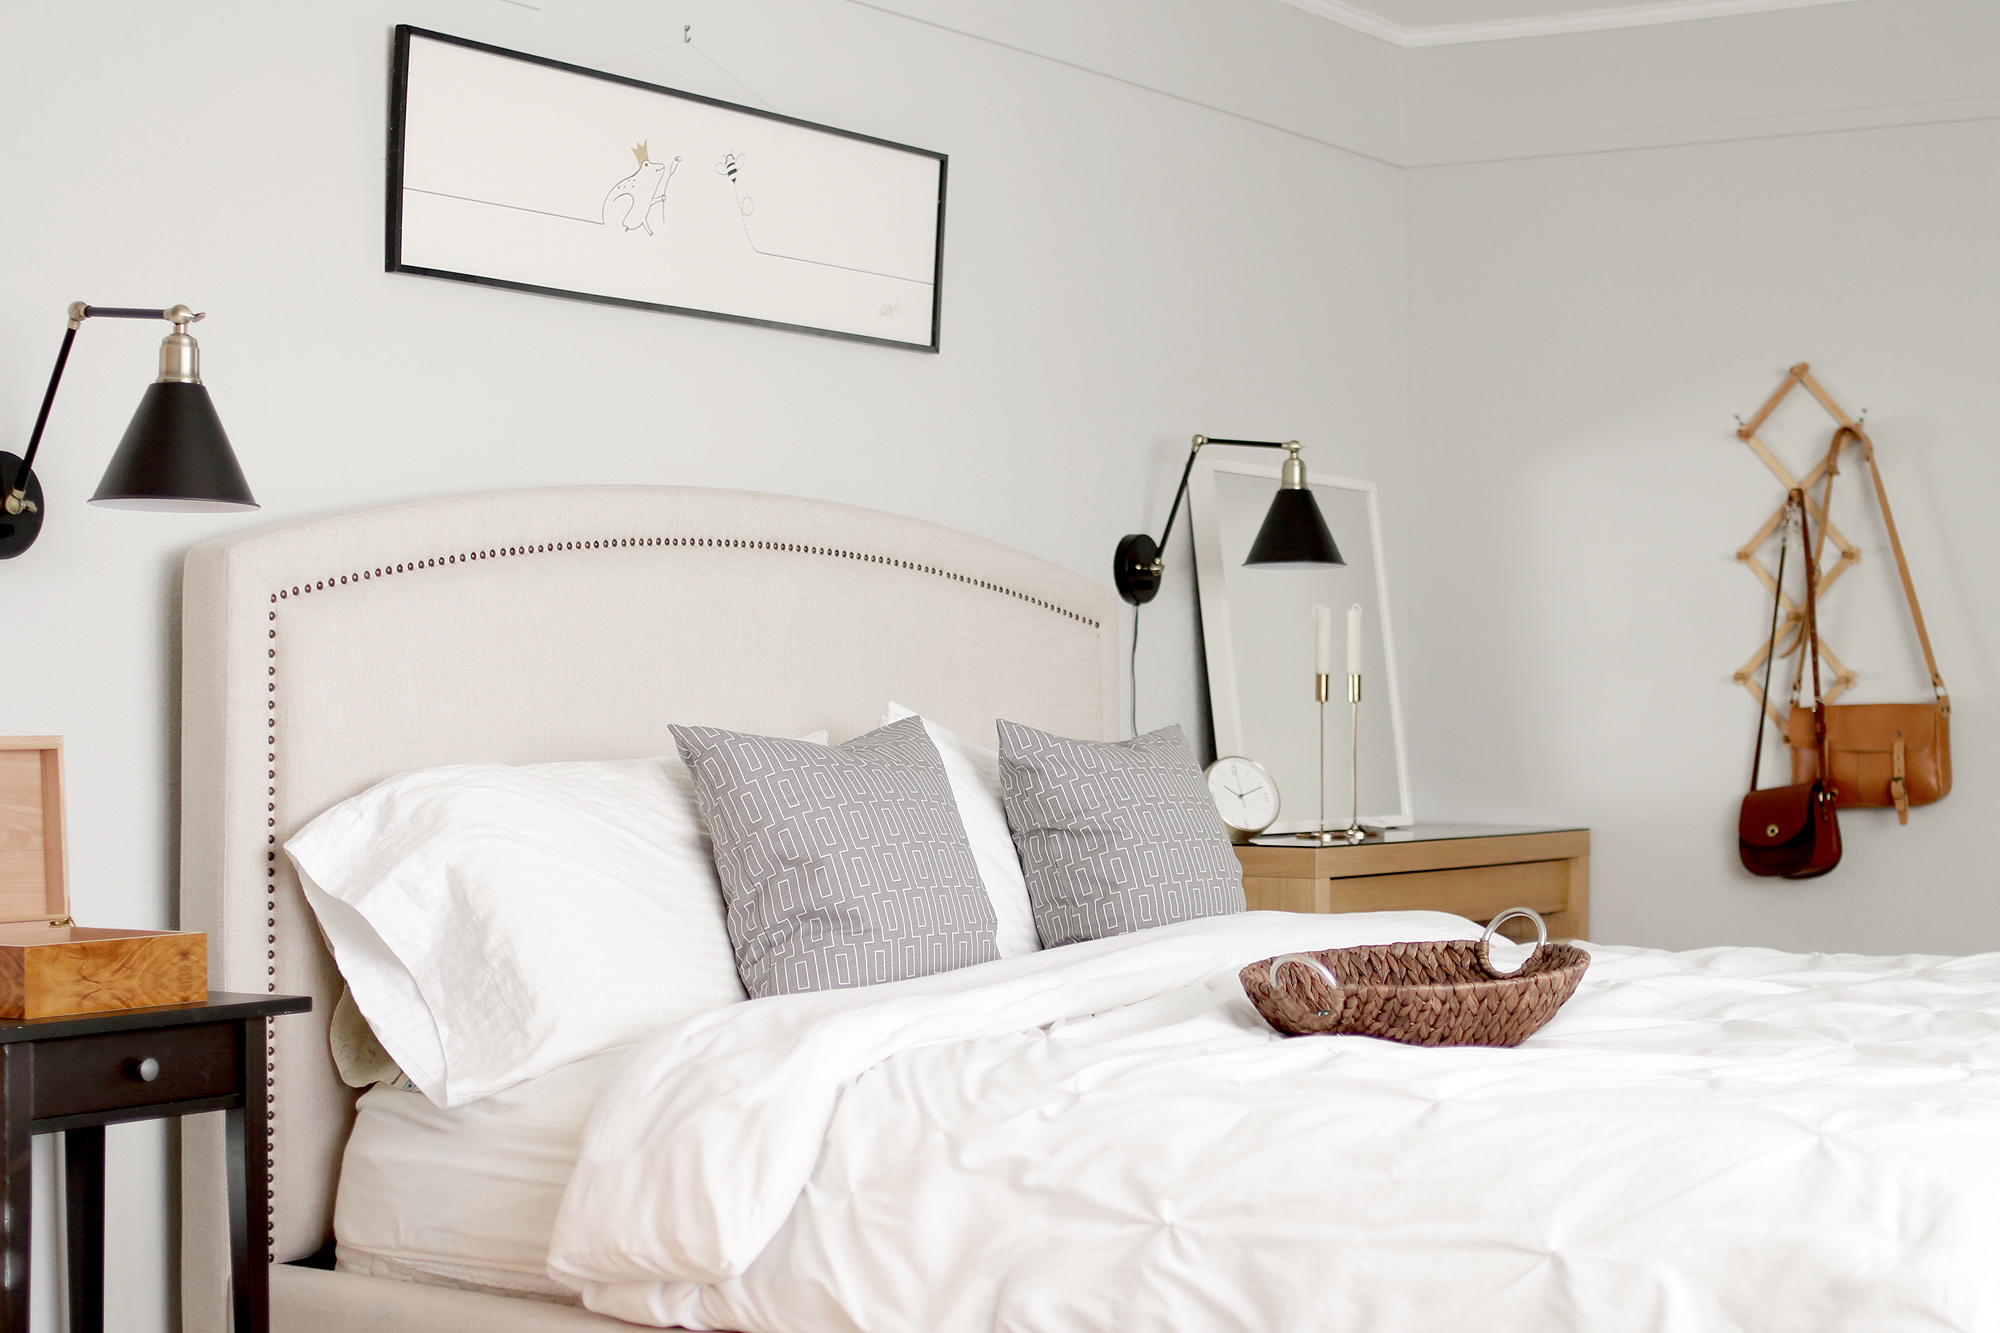
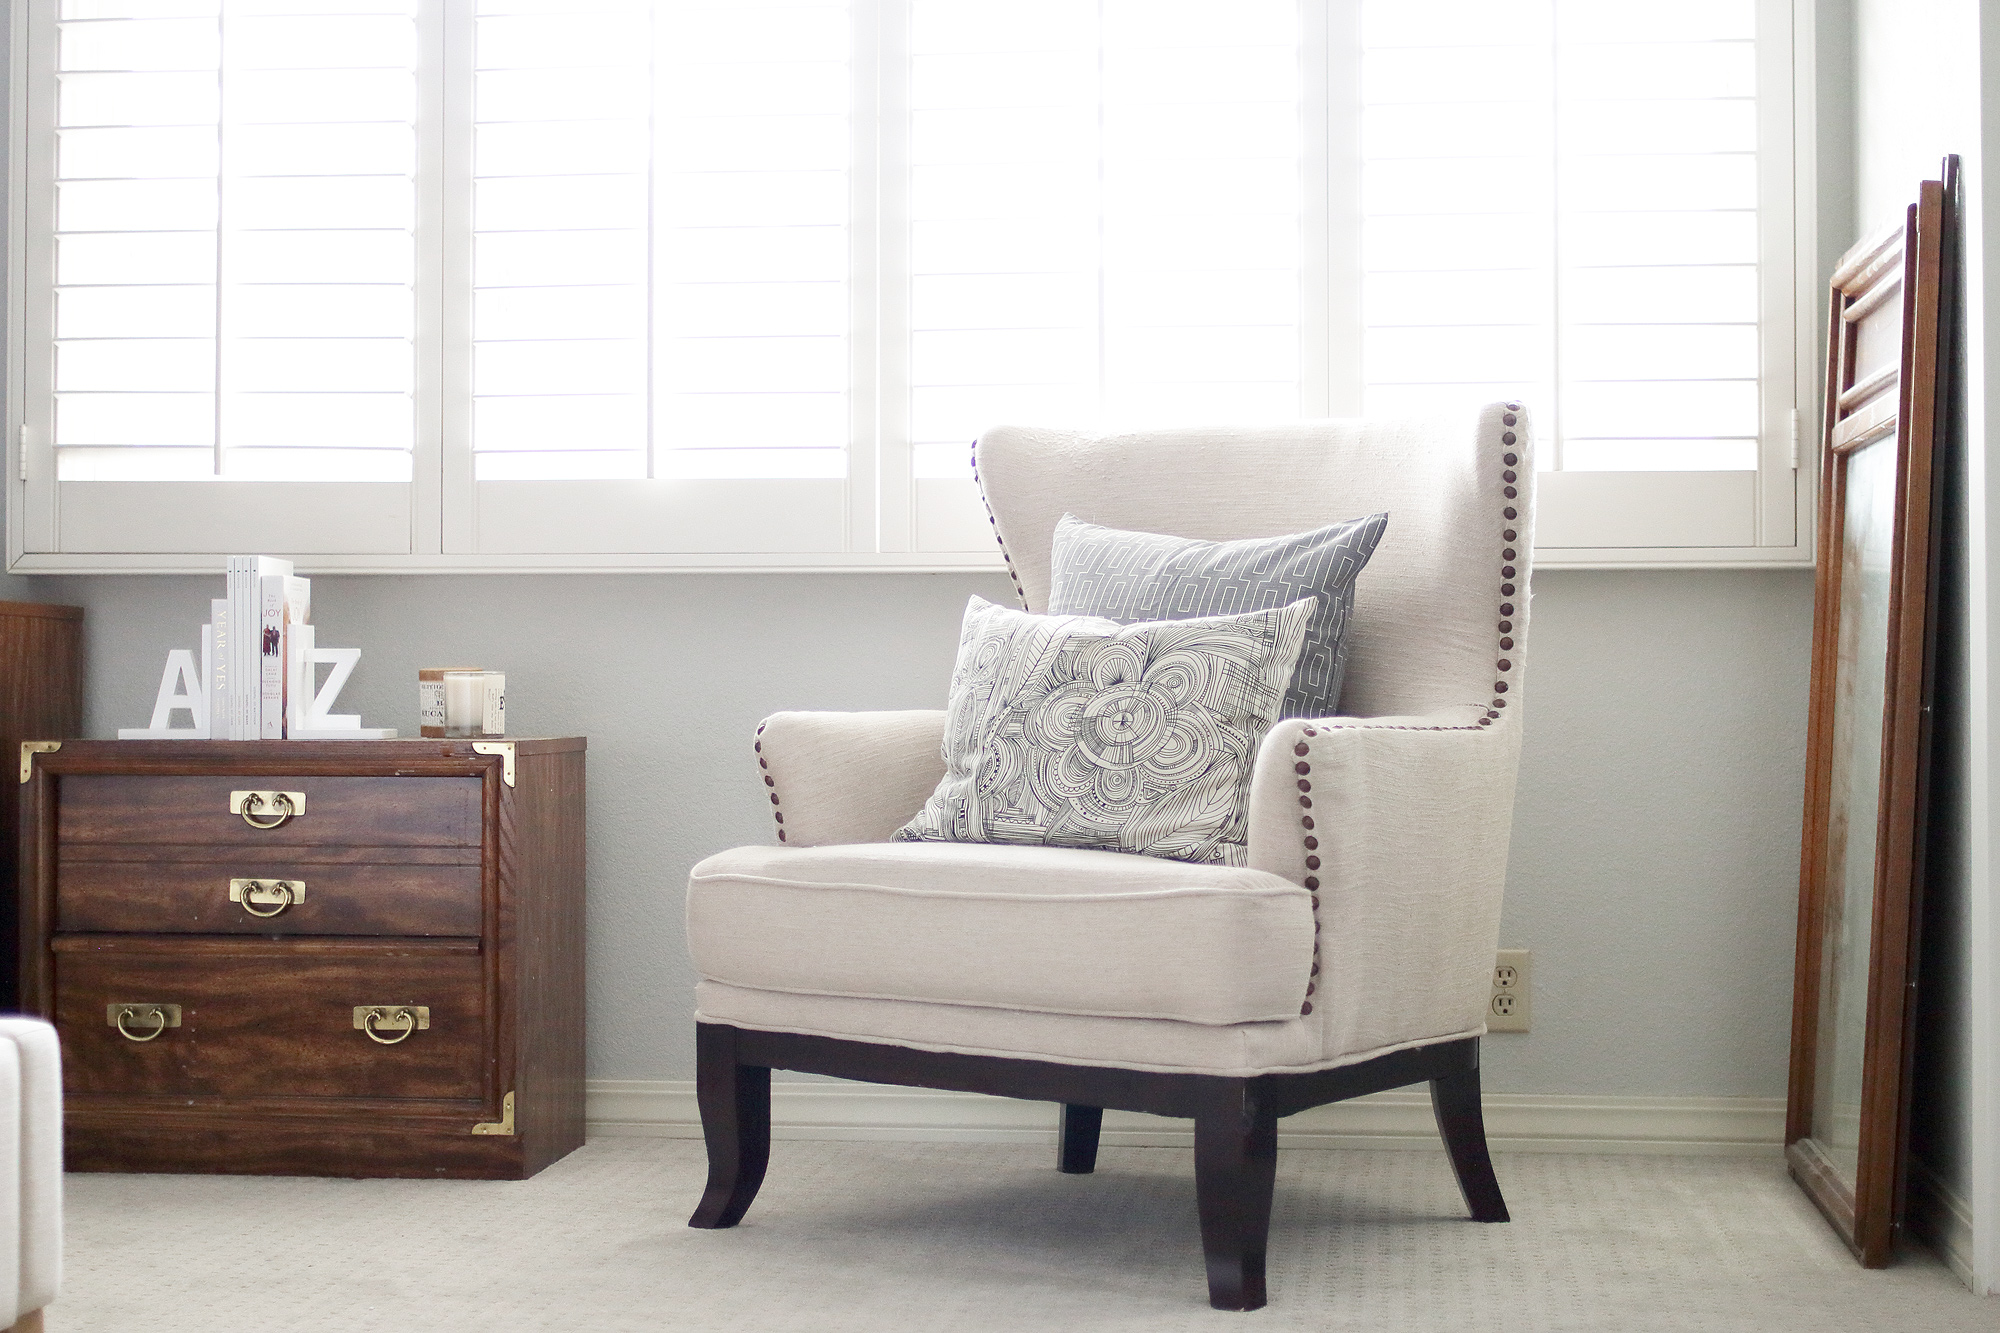
Don’t underestimate how effective some de-cluttering and furniture arrangement can be in a room. We simply moved Russell’s nightstand to the opposite wall, and moved Melissa’s nightstand over to his side. Then we turned Melissa’s vanity around so it now serves a dual function of vanity and nightstand. This gave her a lot more space in the corner to get ready in the morning. I also gave the couple their own homework assignment to get rid of things they didn’t need and having a place for everything they wanted to keep. Check out more organization tips here.
Using What You Have
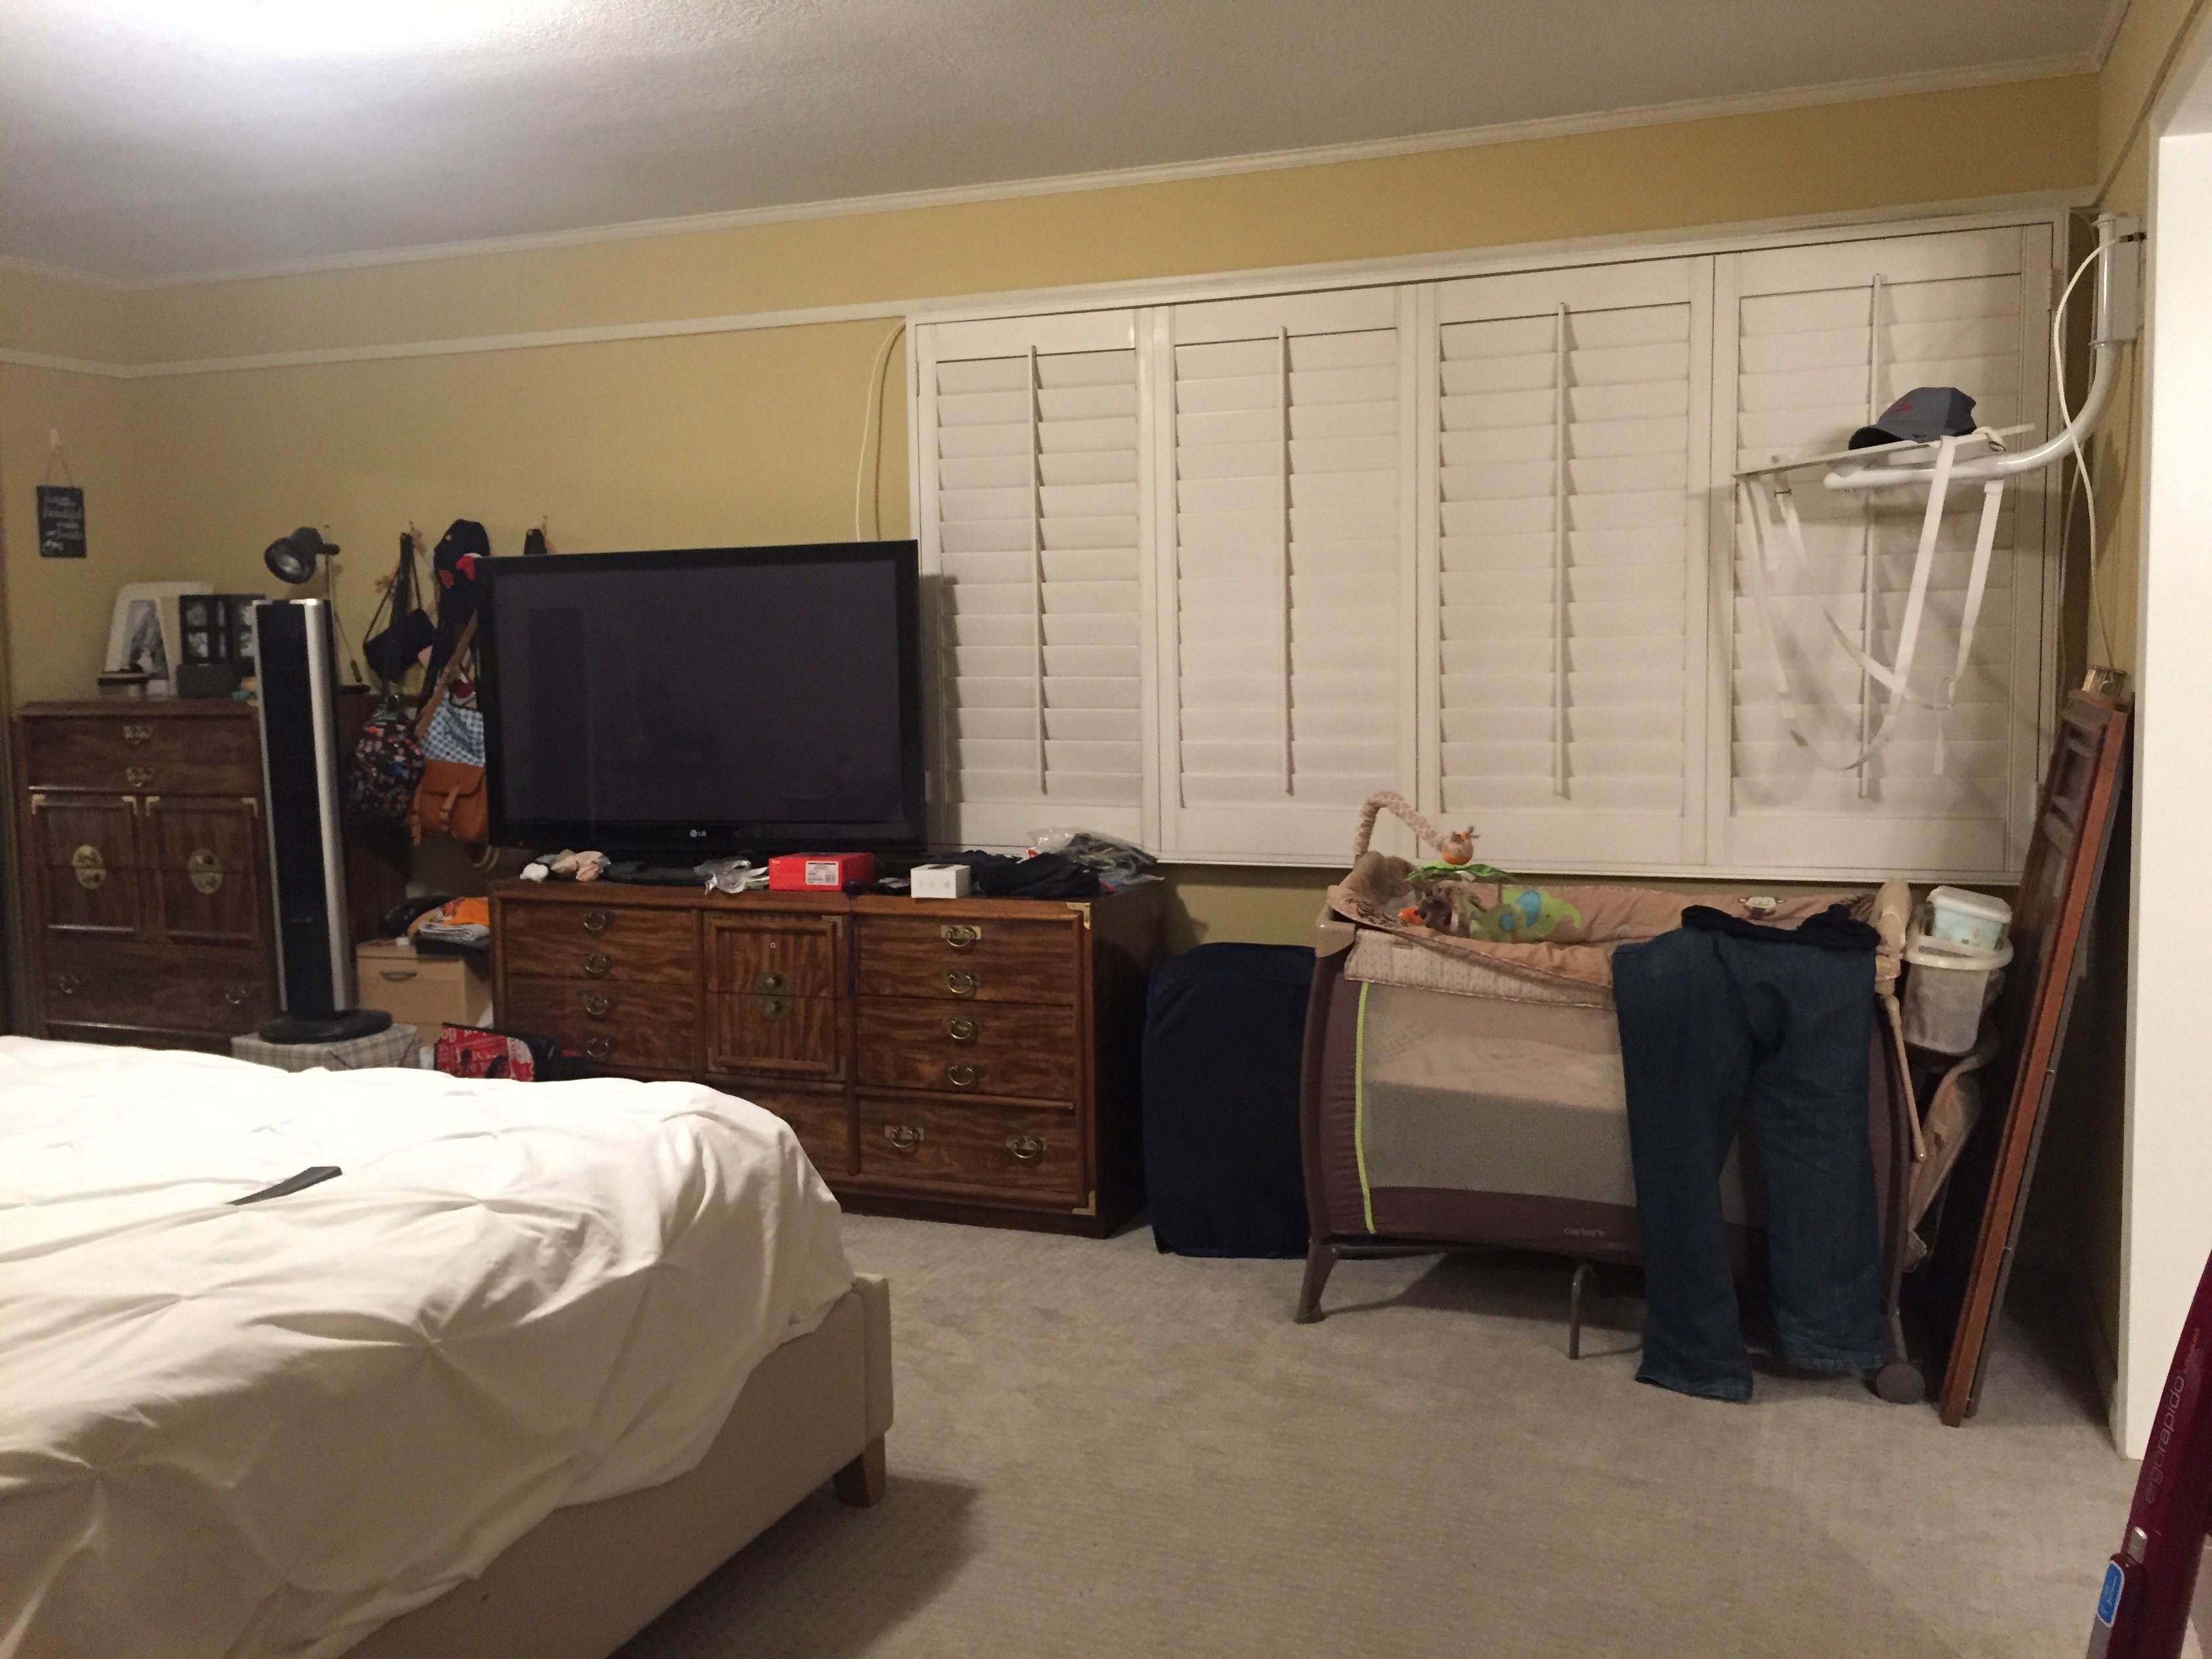
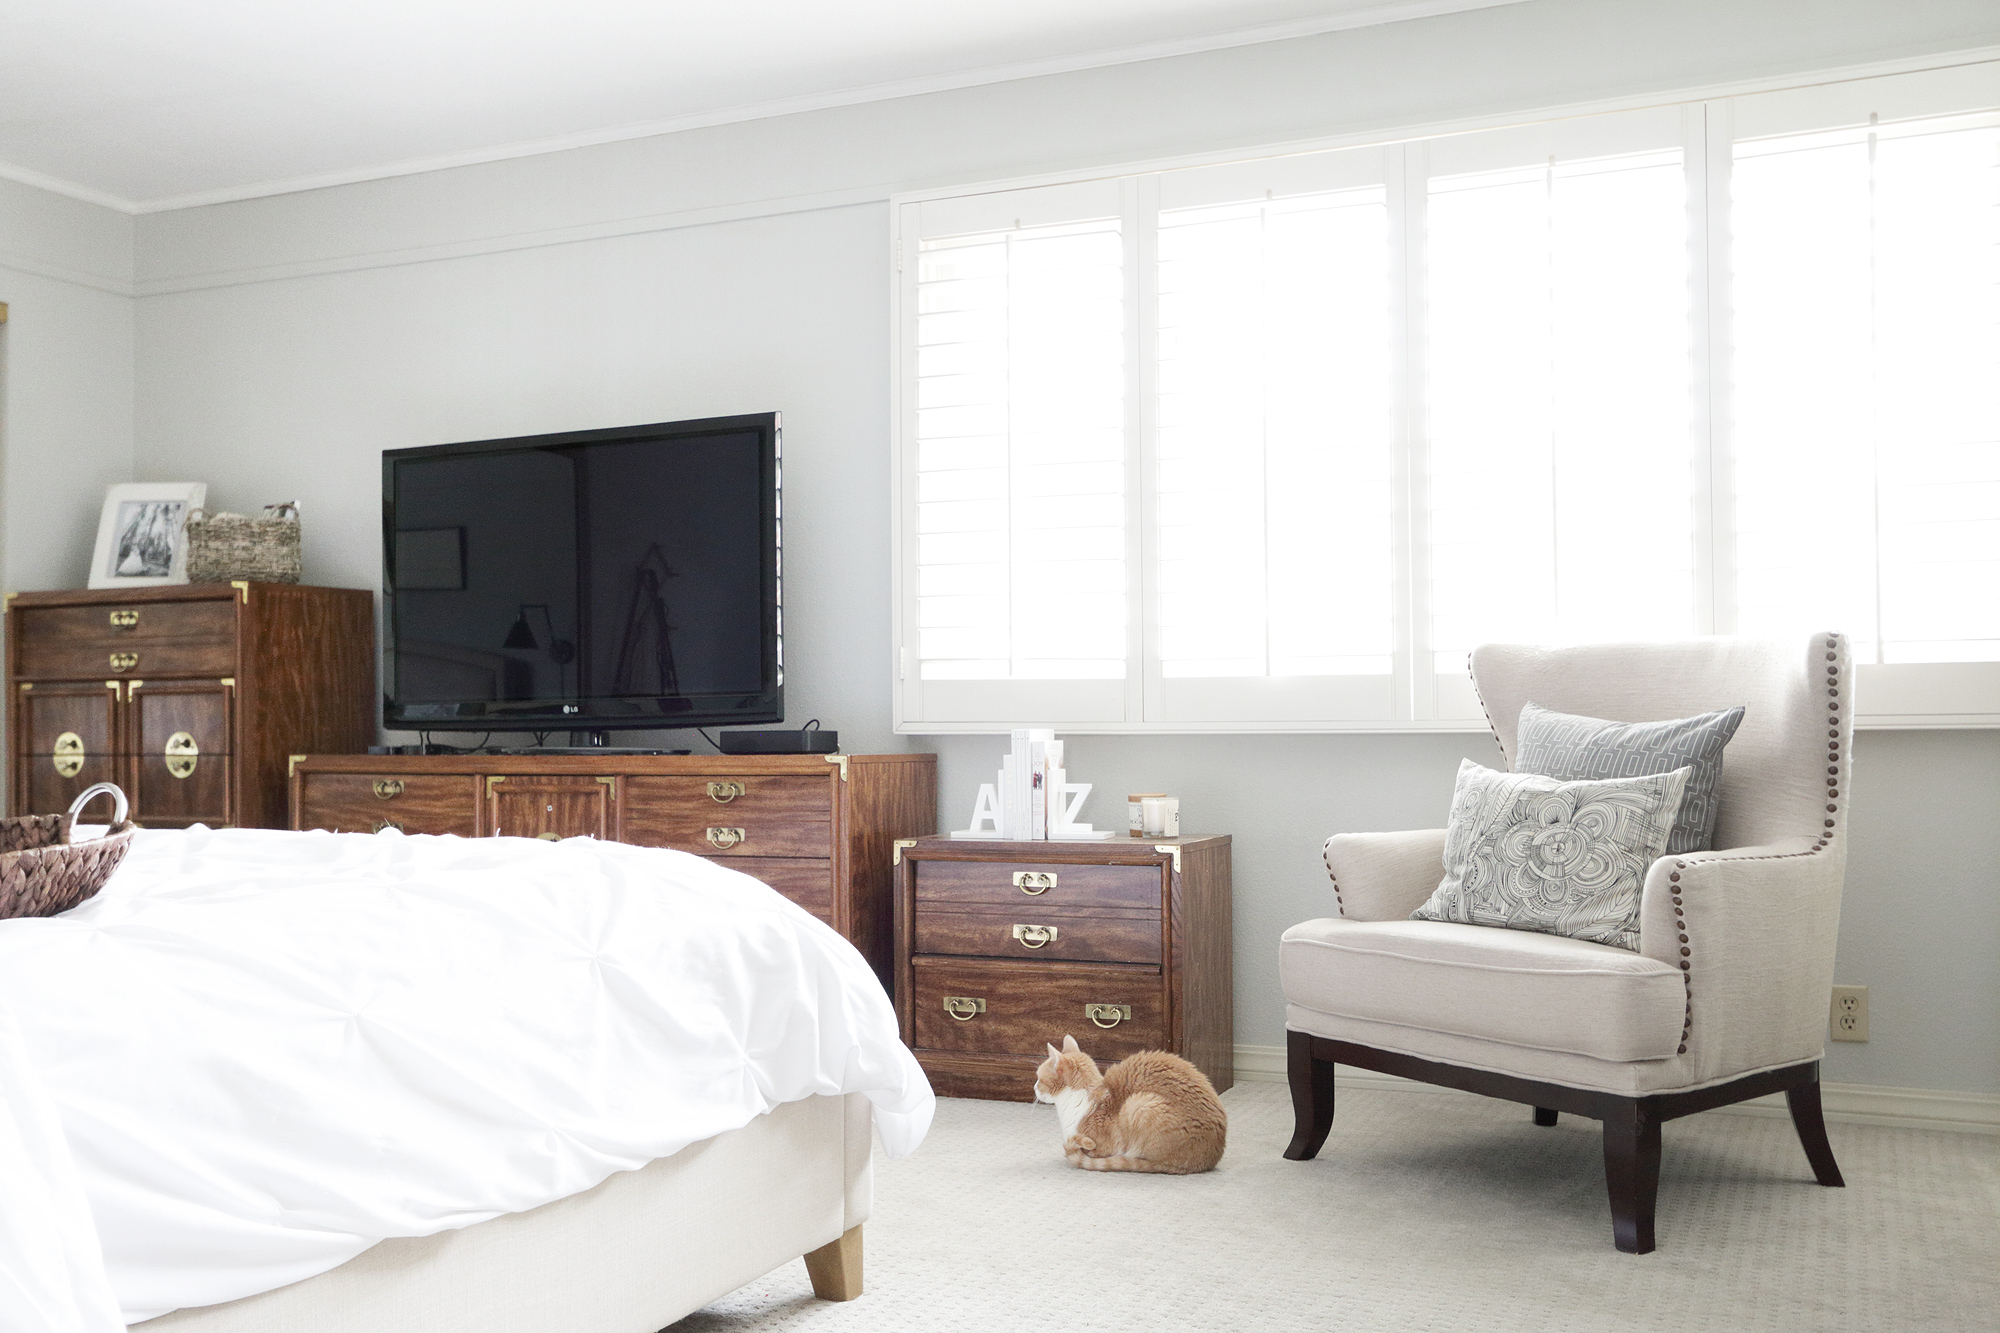
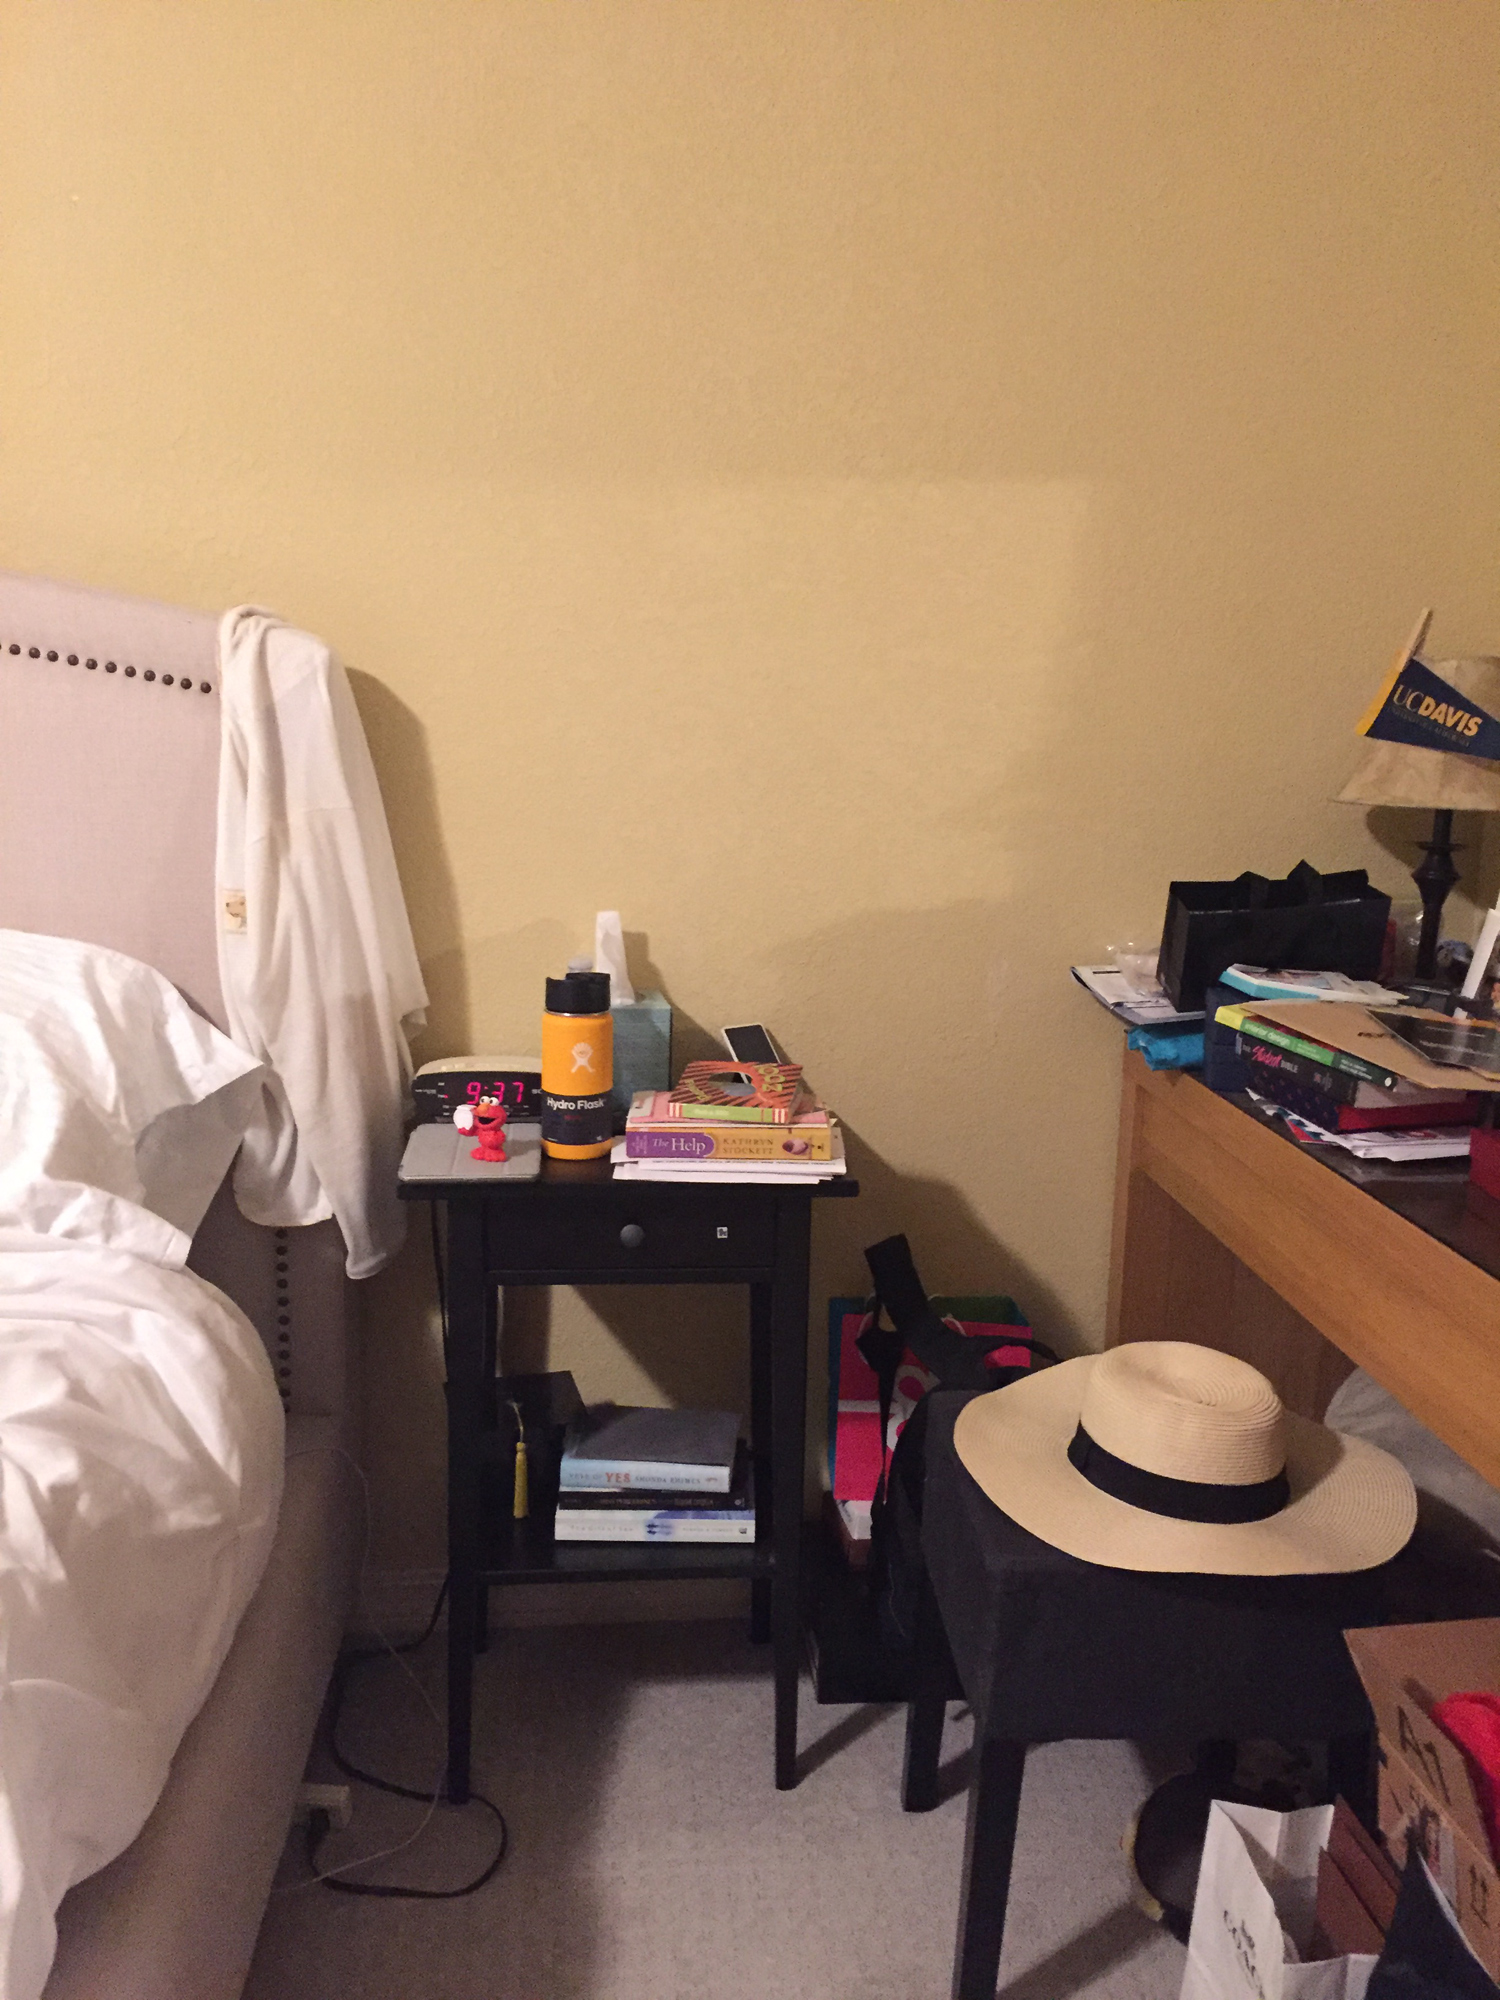
On a small budget, sometimes you have to work with what you already have. Russell had a particular sentimental attachment to the Japanese style dresser set because it belonged to his late grandmother. At first, I wasn’t sure what to do with it because the pieces were visually heavy and he didn’t want me to paint them, but after arranging them in a stepped formation along with the new wall color, the pieces grew on me. I stored the pack-n-play since both their kids were no longer babies and took down the white tv wall mount in the corner. I brought up a chair from the living room that was only serving as the kids’ stuffed animal display. It now creates a nice reading nook by the window.
Other things I was able to reuse or find around the house included:
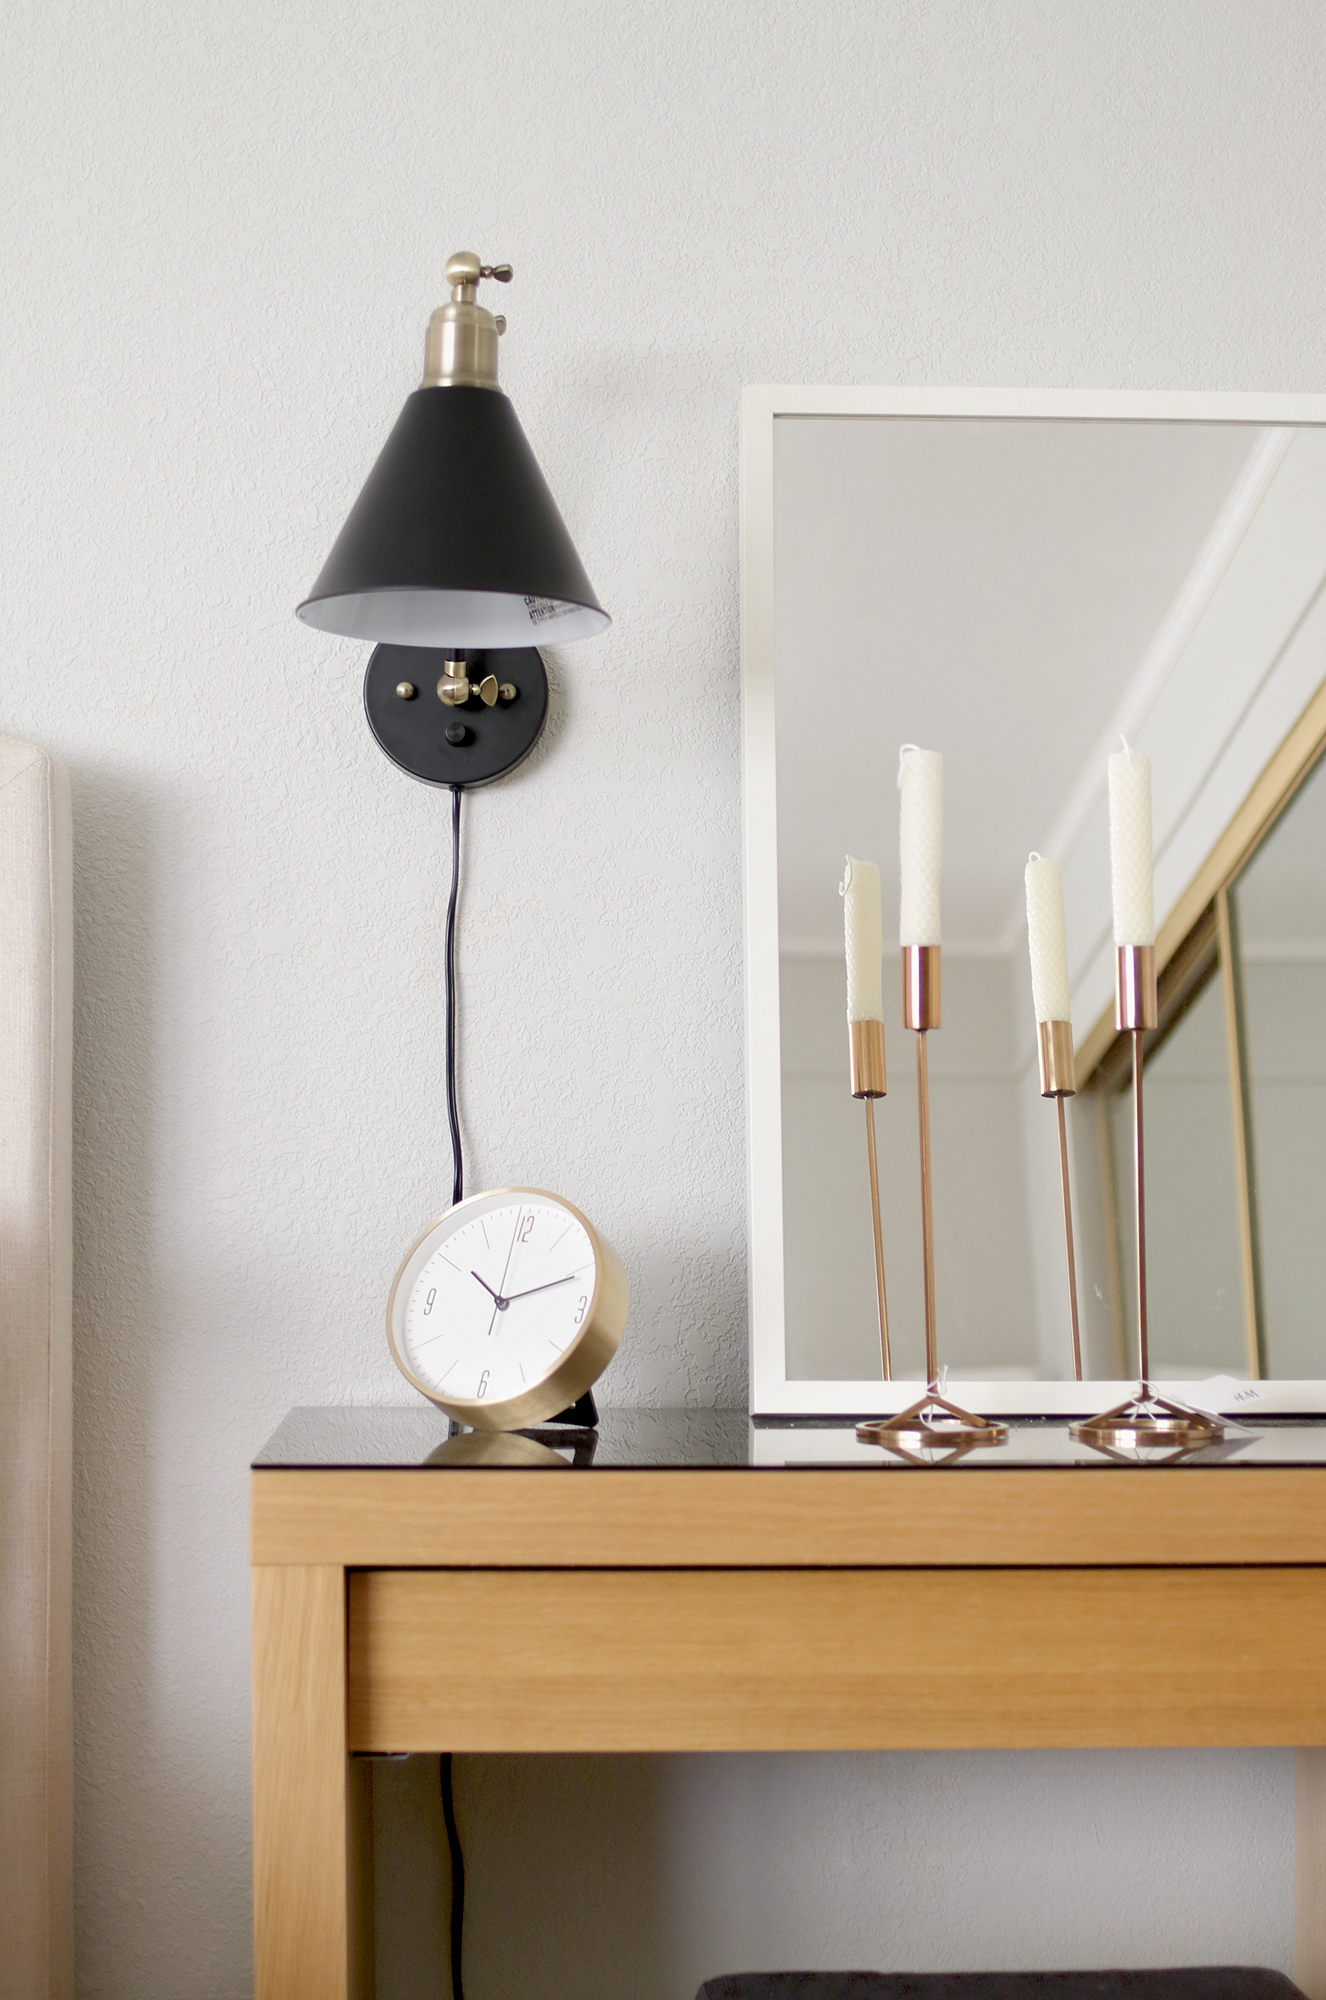
- 2 hand rolled candles that Melissa made, which I used on the copper candlesticks
- An unused cigar box which now serves as a catch-all on Russell’s nightstand
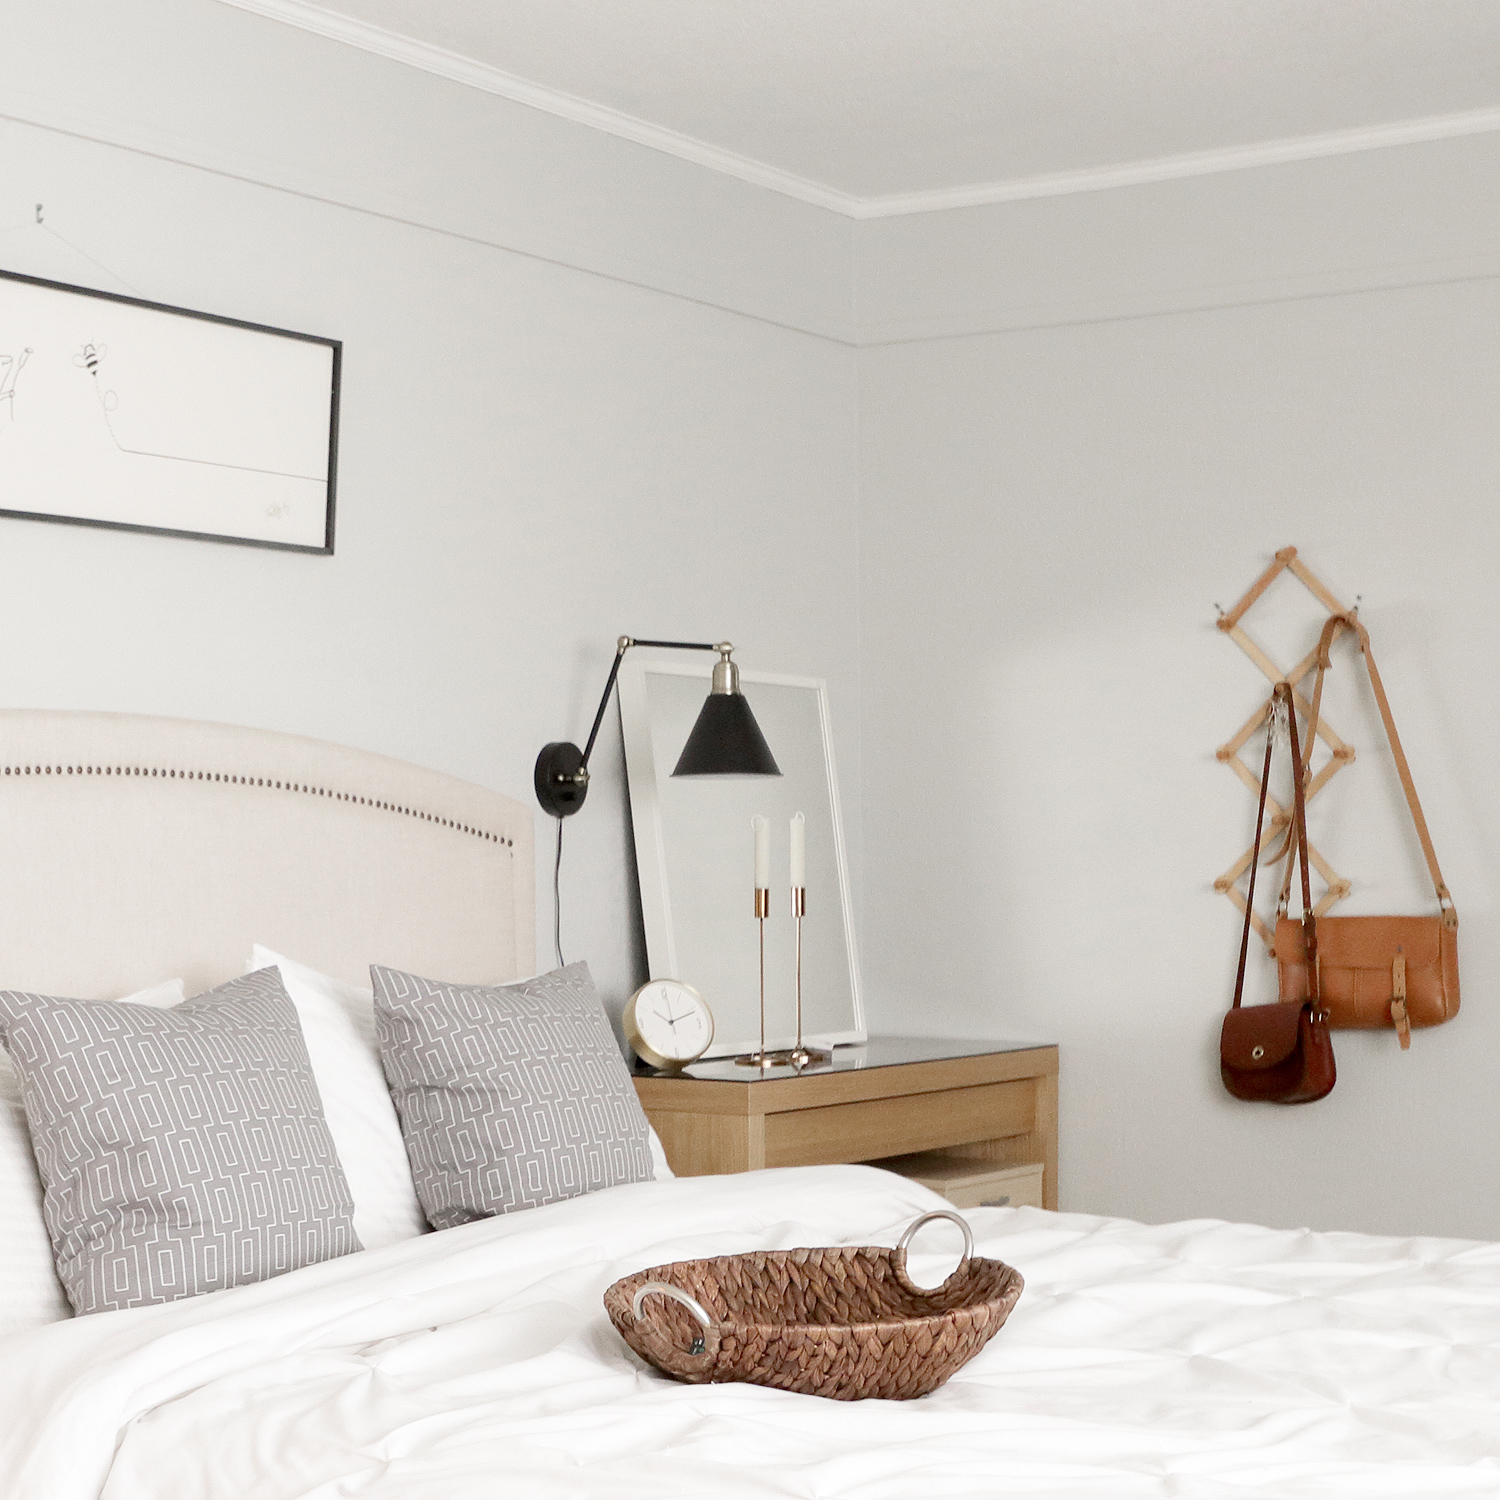
- Melissa’s wall mounted purse hanger which I moved next to her vanity and installed it vertically instead of horizontally
- A throw pillow for the chair
- Bed frame, bedding, vanity, nightstand
Lighting
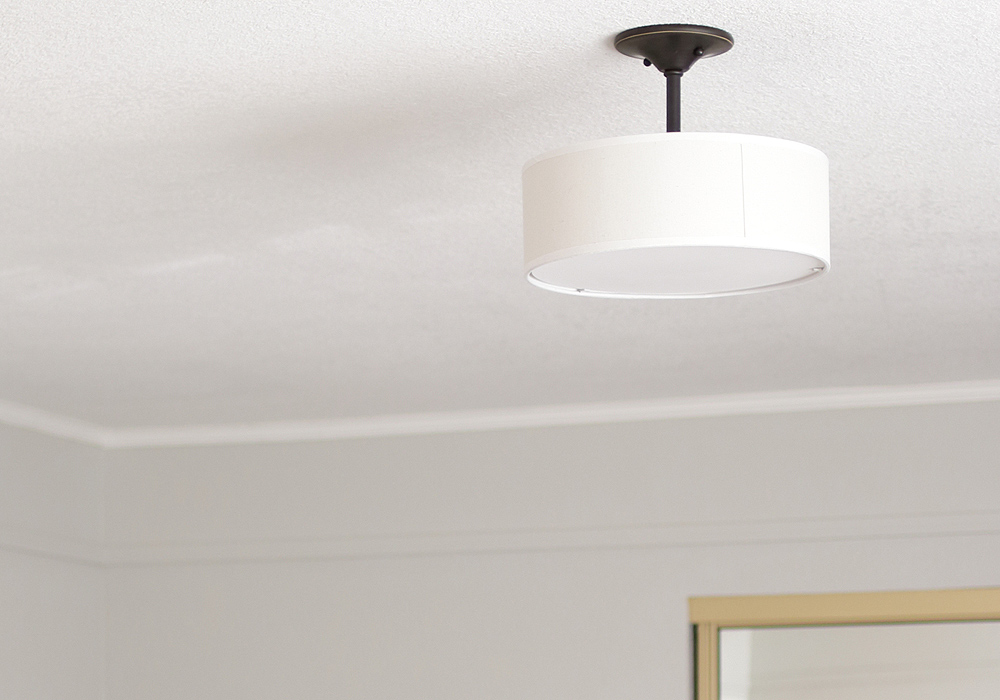
I tell people all the time that if you’re going to spend money on anything, put it towards lighting. Your choice in lighting can be the difference between a sophisticated space or a college dorm room. You don’t even have to spend that much. I purchased these adjustable sconces from Lamps Plus for $100. I also purchased a semi-flush mount for $68 from home depot to replace the dreadful boob light.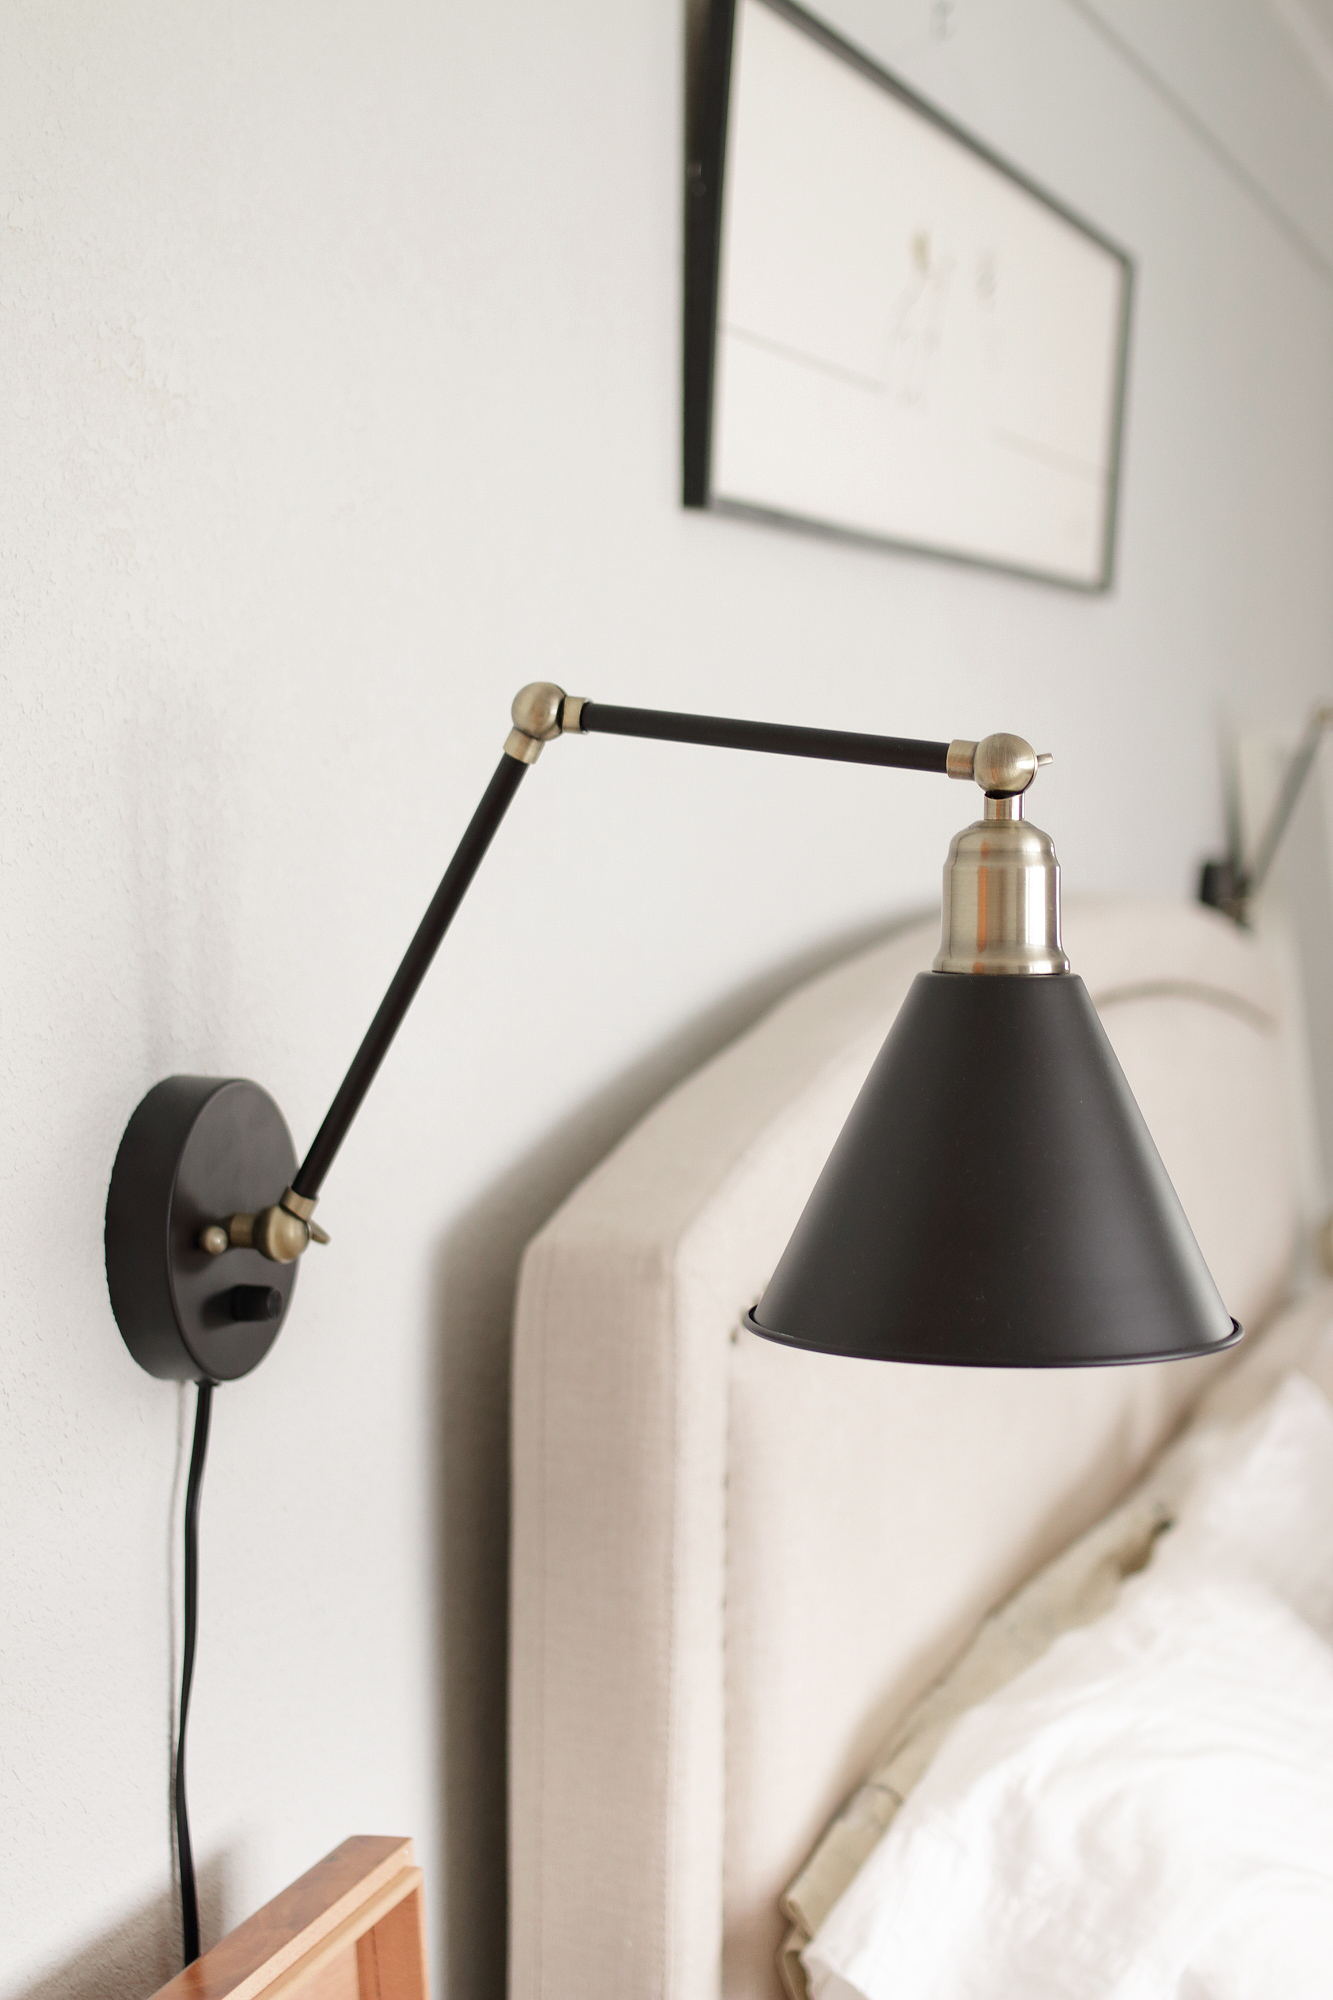
Accents
A couple’s bedroom can often be a challenge because you don’t want to over-masculinize or feminize a room. A few well placed accents can elevate a room’s style without making it seem pretentious or frilly. I went with 2 charcoal accent pillows from H&M which cost me only $8 and I purchased the feather inserts from IKEA which cost $12. 2 large feather accent pillows for $20? That’s pretty much robbery. While I was at it, I snagged 2 copper candlesticks on sale at H&M for $5 each. The couple was also storing their remotes in a cardboard box, so I picked up a basket from Ross for $6 to replace it.
The bookends were $17 from Target and the candle next to them was one that the couple already owned.
DIY Artwork
I have a love hate relationship with wall art. Great pieces are normally way too expensive for me to justify purchasing, while buying mass produced art to fill up space feels impersonal and vacuous. That’s why I’m a big advocate for DIY art or asking an artistically inclined friend to create a custom piece. Not only is this more affordable, you can customize the dimensions to fit the space according to your needs.
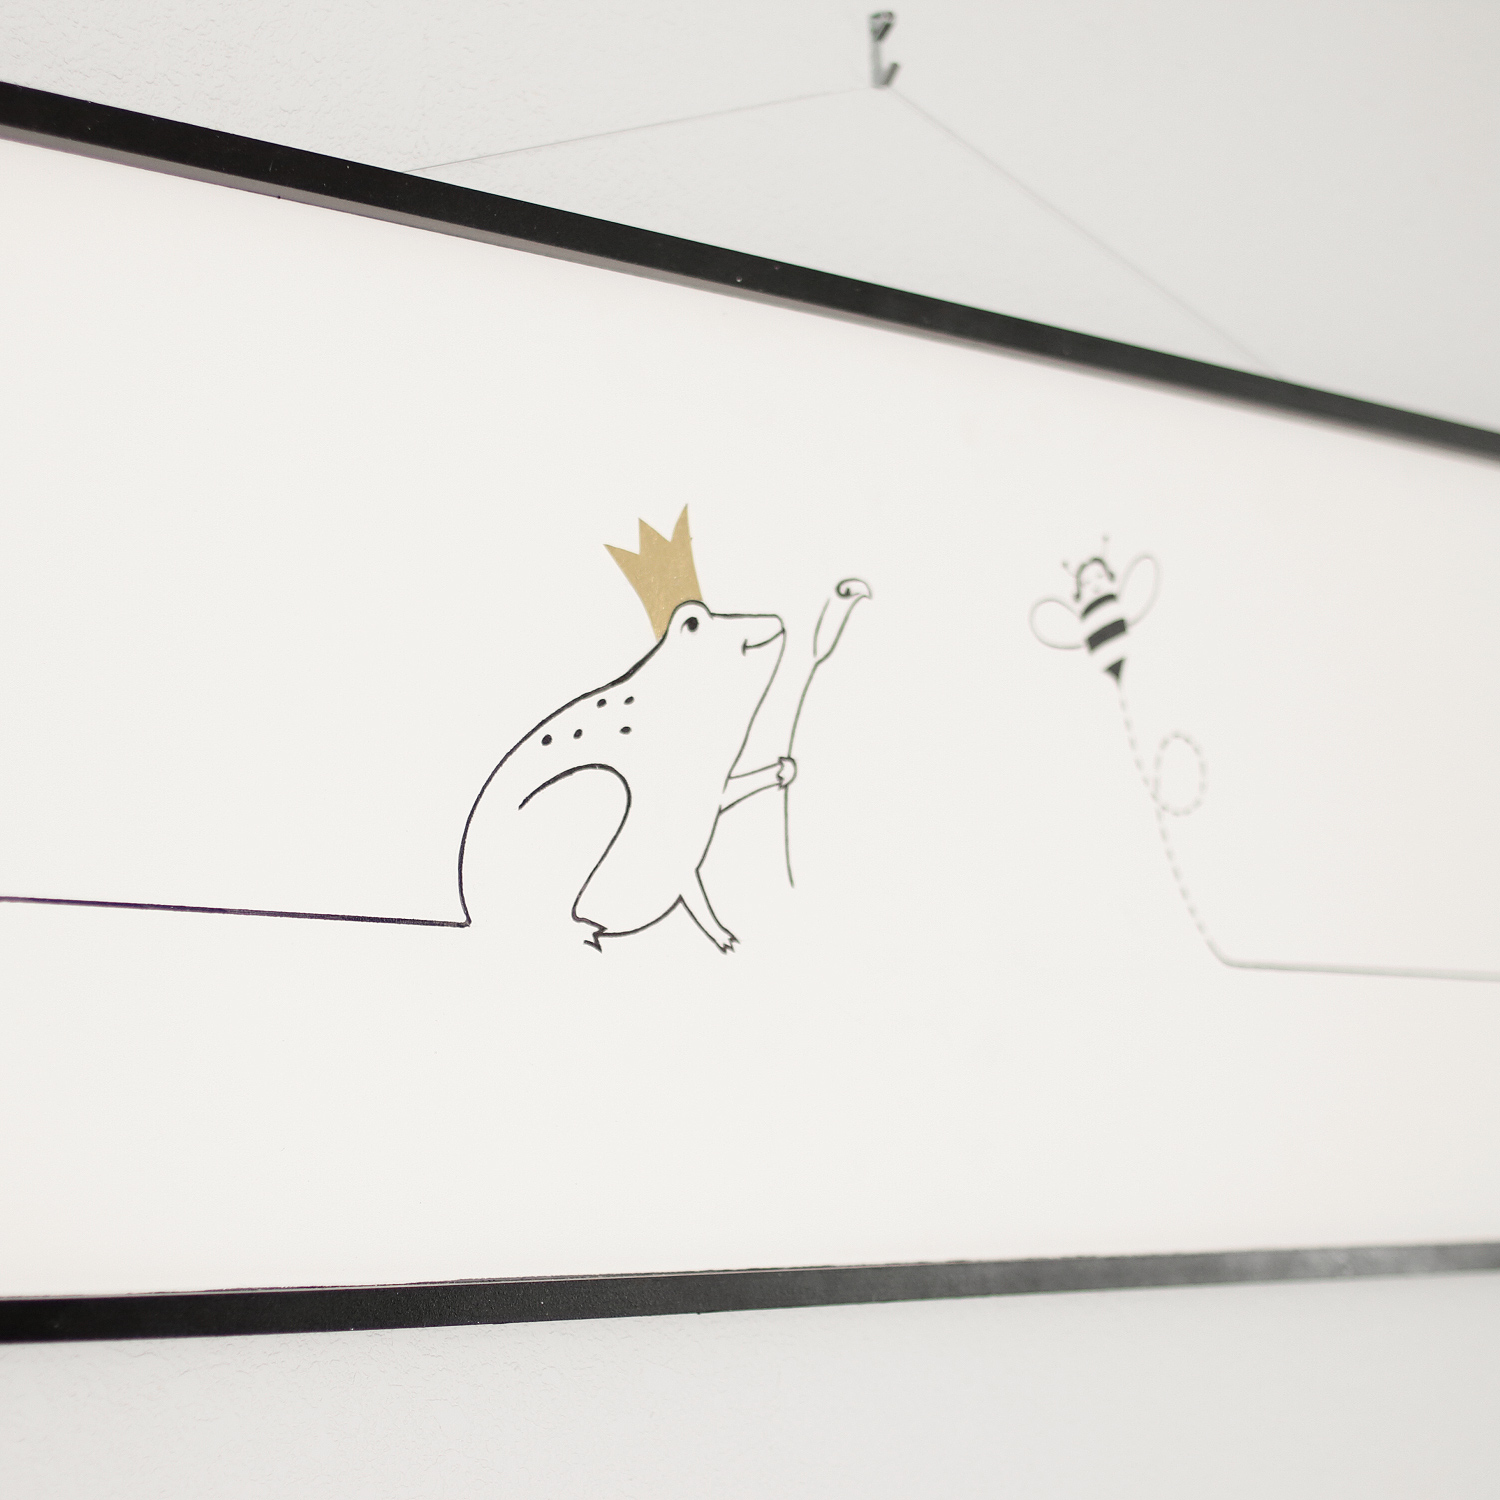
For this piece, I purchased $19 in materials and drew a custom illustration. Russell is a huge reptile aficionado (hence the frog prince) and Melissa loves honey bees because of her namesake. I painted it on a 1/4″ mdf and framed the piece using wall trim from home depot.
At the end we came in a little over budget at $311, which was still fantastic. Russell and Melissa ended up loving the new master bedroom so much, they took their Christmas photos in it. I’m really proud of what we were able to do in this space for such a small budget. Hope this inspires you to make big things happen even when you’re not flush with cash.
Full disclosure: This post contains affiliate links which means I receive a small commission from any products you purchase as a result of clicking my links. However I will NEVER promote a product I haven’t personally used before or that I do not think is worth purchasing.
5 Replies to “Before and After: $300 Master Bedroom Makeover”
This is so awesome! The power of paint and decluttering. What a good friend you are!
thanks Kim!
Love!!!!!! I’m going to fly you out to Colorado and let you work your magic here!
BRILLIANT as always. the wall art is easily $1000.
Such beautiful redesigning!! Thanks for sharing.